
Lotus Notes to Microsoft 365 Migration Guide
This guide explains how to configure a Lotus Notes Connector and migrate mailboxes from Lotus Notes/Domino to Microsoft 365 or Google Workspace.
Overview
This guide explains how to configure a Lotus Notes Connector to use the Cloudiway Platform Mail migration product and migrate to Google Workspace or Microsoft 365.
Looking for our Lotus Notes Migration Solution?
Discover all features, pricing, and use cases for Lotus Notes to Microsoft 365 migration.
View Solution PageHow It Works
The Lotus Notes migration requires a local agent installed on a dedicated workstation within your network. This workstation acts as the bridge between your Domino server and the Cloudiway cloud platform.
Pre-Migration Configuration
Before starting the migration, you must set up a migration workstation with the following configuration:
Install Lotus Notes Client
Install the Lotus Notes client (version 8.0 or later) on the migration workstation. This client will be used to access mailboxes on the Domino server.
Configure Administrator Notes.id
Configure the Notes client with an administrator Notes.id file that has access to all mailboxes on the Domino server. This is essential for the agent to read mailbox content.
Install Cloudiway Agent
Download and install the Cloudiway agent on the same workstation. The agent uses the Notes client to access mailboxes remotely.
Migration Architecture
The migration is performed entirely from the workstation:
Data Flow Process
The agent connects to the Notes mailbox databases and dumps them locally. Then, it zips and uploads the data to the Cloudiway server. All exchanges are performed over a secure channel (TLS 1.2). Once uploaded to the Cloudiway server, the data is pushed to the target (Microsoft 365, Google Workspace, or Exchange). At the end of the migration, the data uploaded to the Cloudiway server is removed.
Local Data Extraction
The agent connects to the Notes mailbox databases on the Domino server and dumps the data locally to the workstation.
Compression & Secure Upload
The extracted data is compressed (zipped) and uploaded to the Cloudiway server over a secure TLS 1.2 channel.
Push to Target
Once uploaded, Cloudiway pushes the data to the target platform (Microsoft 365, Google Workspace, or Exchange).
Data Cleanup
At the end of the migration, all data uploaded to the Cloudiway server is automatically removed.
Prerequisites
To perform the Lotus Notes to Microsoft 365 migration, you need the following:
Workstation with Lotus Notes Client
Lotus Notes client version 8.0 or higher must be installed
Notes.id with Full Access
A Notes.id file that has access to all mailboxes on the Domino server
Domino Server Access
Network access to your Domino server from the agent workstation
Microsoft 365 Target
Microsoft 365 tenant with mailboxes already provisioned
System Requirements
The migration agent workstation must meet the following minimum requirements:
| Component | Requirement |
|---|---|
| Lotus Notes Client | Version 8.0 or later |
| .NET Framework | Version 4.7.2 minimum |
| RAM | At least 4 GB |
| Hard Drive | At least 100 GB free space |
What is Migrated
When migrating from Lotus Notes, the following mail-related items can be migrated:
Step 1: Create Lotus Notes Connector
First, create a new Lotus Notes connector in the Cloudiway platform:
Create New Connector
Go to Connectors > New and select LotusNotes as the connector type.
Select Product
Set a connector name and select Mail as the product.
Enter Server Name
Enter your Domino server name in the Server Name field. The server name is case-insensitive.
Complete Setup
Click NEXT, review your settings, then click COMPLETE.

Step 2: Install Local Agent
After connector creation, click on the Lotus Notes connector to access the download page. You will see both the Agent download and the Configuration file:

Download Agent
Click DOWNLOAD AGENT to get the migration agent. Unzip the downloaded file on the migration workstation.
Download Configuration File
Click DOWNLOAD CONFIGURATION FILE to get the JSON configuration file. Place it in the same folder as the agent.
Install Agent
Install LotusNotesAgent.exe on a workstation where Lotus Notes client version 8.0 or higher is installed.
Configure Notes Identity
Open the Notes client and login with a Notes.id that has access to all mailboxes. Close the Notes client when done.
Configuration File Parameters
The configuration file contains the following important settings:
| Parameter | Description |
|---|---|
| AliasDns | Cloudiway API endpoint URL |
| Security.Name | API token name (configured in Step 3) |
| Security.Token | API token value (configured in Step 3) |
| ServerName | Your Domino server name |
| MigrateArchives | Set to true to migrate archive mailboxes |
| MigrateMailboxes | Set to true to migrate user mailboxes |
| TempDirectory | Local folder for temporary data storage during migration |
| Threads | Number of parallel migration threads (default: 8) |
| ExclusionFolders | Array of folder names to exclude from migration |
Step 3: Configure API Token
The agent needs an API token to authenticate with the Cloudiway platform. You must create a Personal Access Token and add it to the configuration file.
Access the APIs Page
Login to the Cloudiway portal and navigate to Account > Apis in the top-right menu:

Create a New Token
Click + NEW TOKEN
In the Personal Access Tokens section, click + NEW TOKEN to create a new API token.
Configure Token Settings
Enter the following information:
- Token Name: A descriptive name (e.g., "Test_Migration")
- Project: Select your migration project (e.g., "Mail Migration")
- Expiration Date: Set a future date for token validity
- Permissions: Enable Lotus Notes access
Save and Copy Token
Click Create. The token value will be displayed only once - copy it immediately!
Update Configuration File
Open the configuration file and update the Security section with your token:
"Security": {
    "Name": "Test_Migration",{'
'}    "Token": "your-token-value-here"{'
'}{'}'}Step 4: Create Target Connector
Create a target connector for your destination platform. You can migrate to Microsoft 365 or Google Workspace.
Option A: Microsoft 365 Target
Create New Connector
Go to Connectors > New, select Microsoft 365 as connector type.
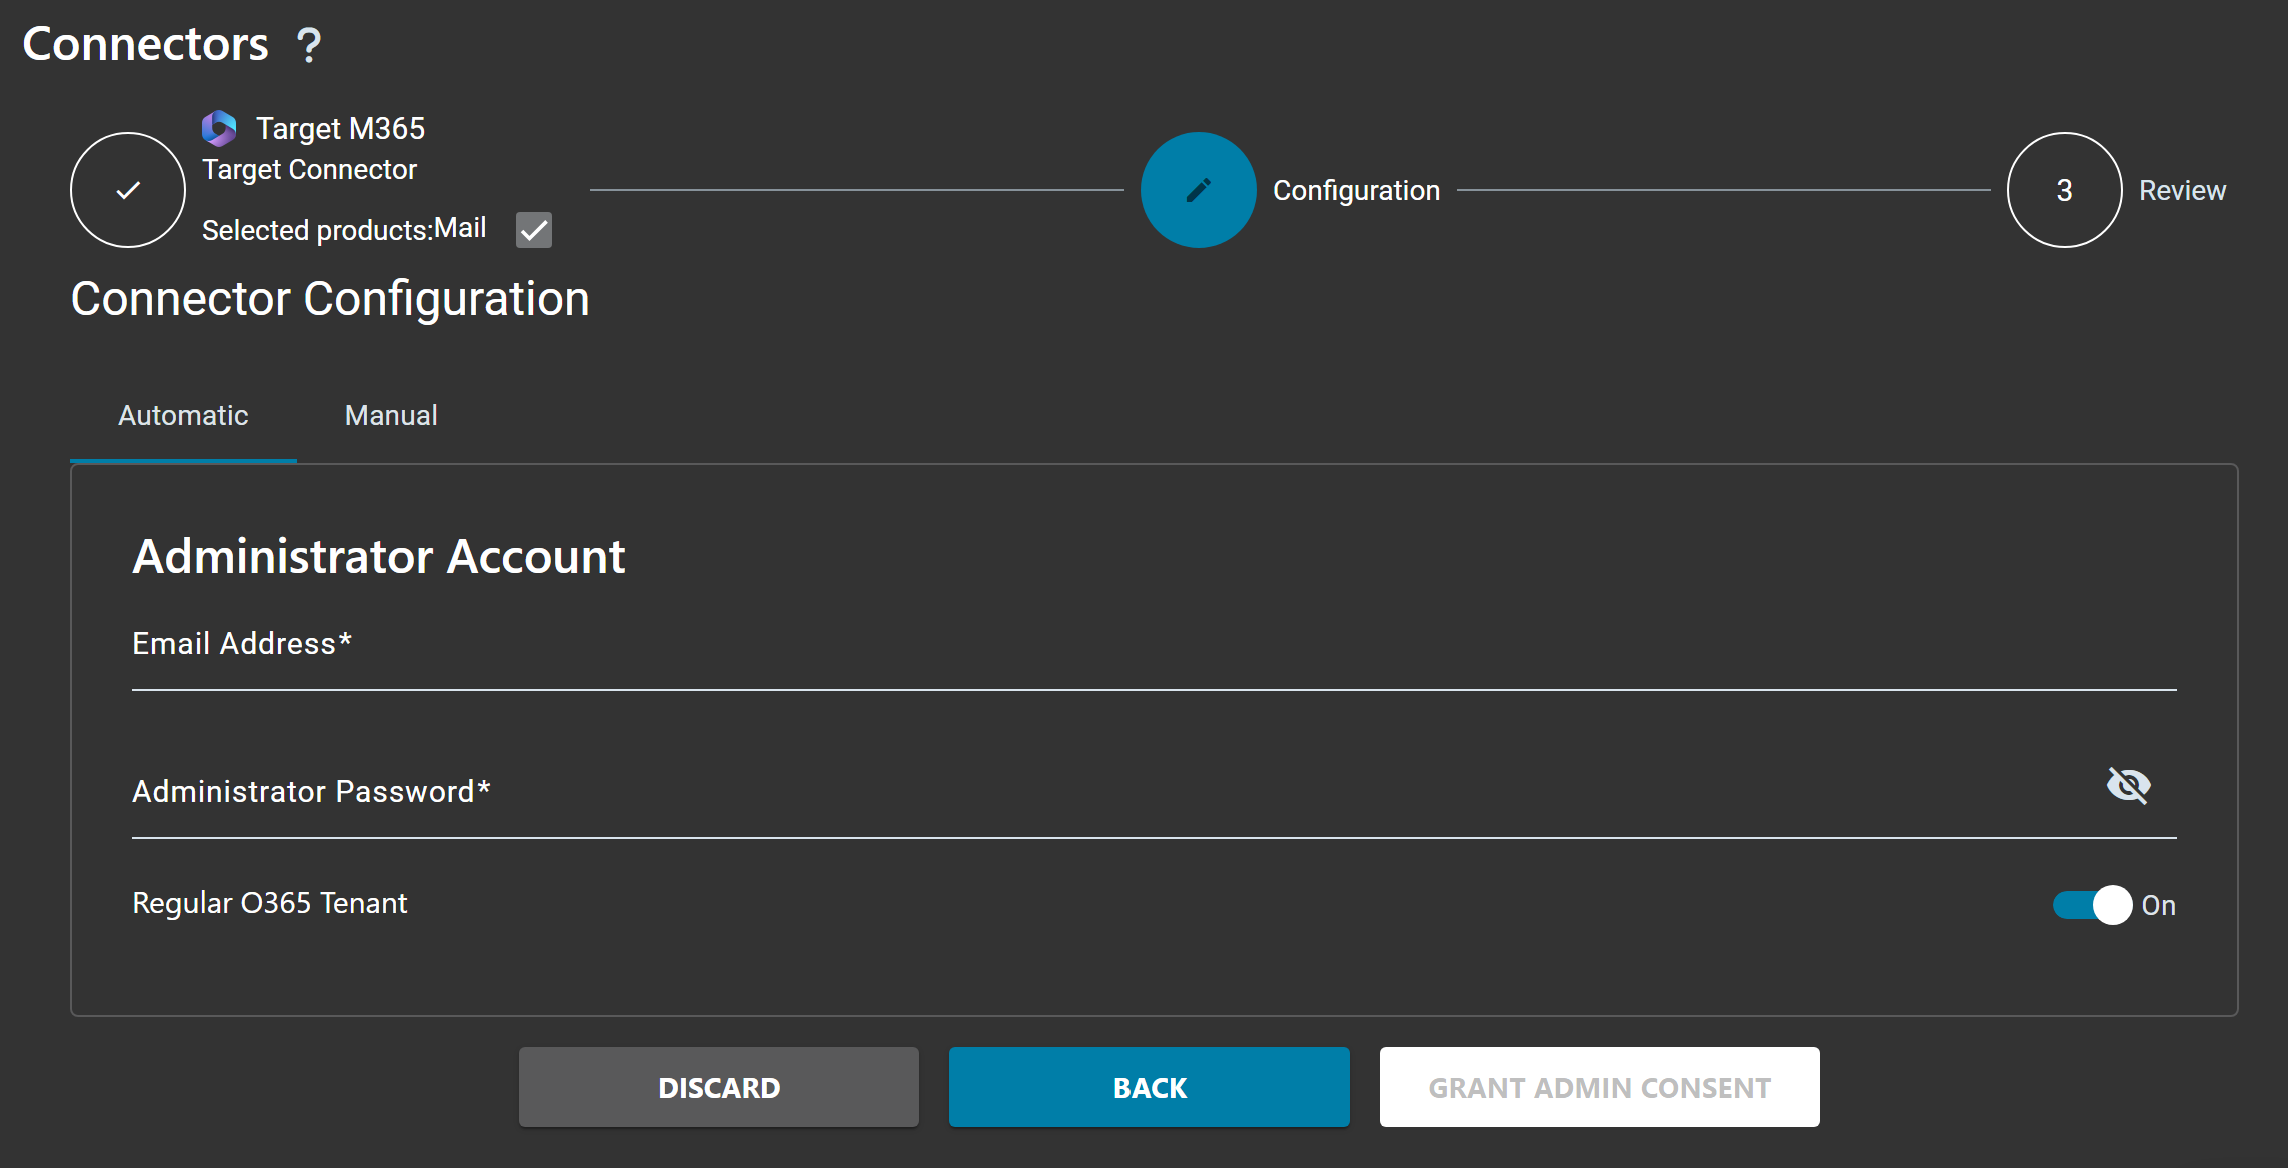
Configure Authentication
Choose Automatic mode and enter your Microsoft 365 Global Administrator credentials, then click GRANT ADMIN CONSENT.
Complete Setup
Review settings and complete the connector creation.
Option B: Google Workspace Target

Create New Connector
Go to Connectors > New, select Google Workspace as connector type.
Configure Service Account
Choose Automatic mode and sign in with your Google Workspace Super Admin account to authorize access.
Enable Domain-Wide Delegation
Follow the prompts to enable domain-wide delegation for the Cloudiway service account in your Google Admin Console.
Complete Setup
Review settings and complete the connector creation.
Option C: Exchange On-Premises Target
You can also migrate Lotus Notes to an on-premises Exchange server using EWS (Exchange Web Services).
Create New Connector
Go to Connectors > New, select Exchange On Premises as connector type.
Enter EWS URL
Enter your Exchange Web Services endpoint URL: https://your-exchange-server/EWS/Exchange.asmx
Select Authentication Mode
Choose your authentication method:
- Impersonation: Migration account impersonates each user (requires ApplicationImpersonation role)
- Delegation: Migration account has Full Access rights to each mailbox
- Self Service: Each user provides their own credentials
Complete Setup
Enter the migration account credentials and complete the connector creation.
Step 5: Run Migration
Now you can configure the migration settings, populate the user list, and run the migration.
Configure Global Settings
Navigate to Mails > Global Settings to configure your migration options:

Key settings to configure:
| Setting | Description |
|---|---|
| Source Connector | Select your Lotus Notes connector |
| Target Connector | Select your Microsoft 365 or Google Workspace connector |
| Migration Scope | Choose what to migrate: Emails, Contacts, Calendars, or all |
| Date Filter | Optionally filter items by date range |
Populate User List
Navigate to Mails > User List to add users for migration. There are three ways to populate the user list:
Option 1: Discovery (Get List)
Under MIGRATION, click on the Get List option:
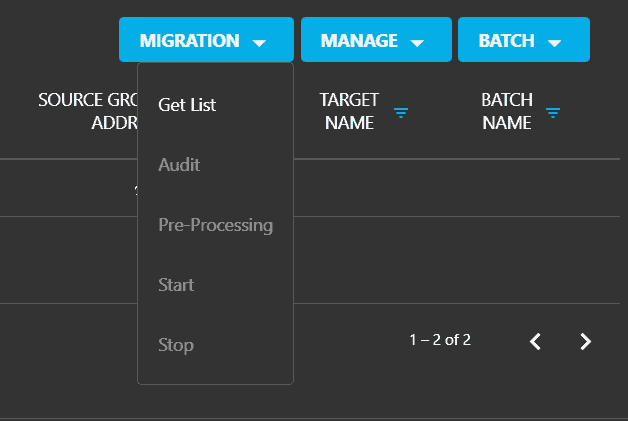
Specify the following parameters:
Source Pool
Select the Lotus Notes source connector you created earlier.
Target Pool
Select the Microsoft 365 or Google Workspace target connector.
Matching Rule
Choose how source emails should be mapped to target emails:
- Mail Exact Match: source email = target email
- Keep Email Prefix Same as Source: only the domain changes
- FirstName.LastName: (e.g., [email protected])
Target Domain
Specify the target domain for the migrated users.
Option 2: Import User List
Click on MANAGE > Import to upload a CSV file containing the users to migrate.
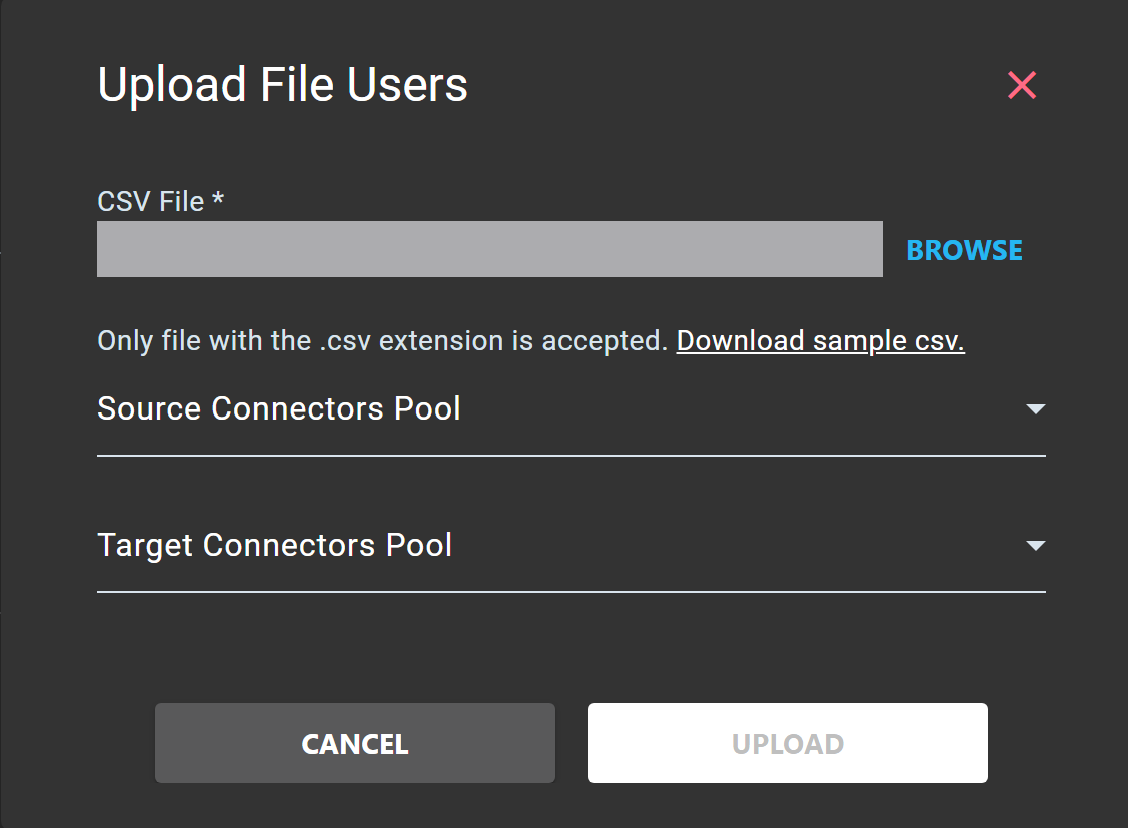
CSV File
Click on BROWSE to select your CSV file. You can click Download sample csv to get a template file.
Source Connectors Pool
Select the Lotus Notes source connector.
Target Connectors Pool
Select the target connector (Microsoft 365 or Google Workspace).
Option 3: Create Manual Entry
Click on MANAGE > Create to manually add individual users. Enter the source Lotus Notes email address and the target email address for each user.
Run Audit (Recommended)
Before migrating, run an Audit task to assess mailbox sizes and identify potential issues:
Select Users
Select the users you want to audit using the checkboxes.
Start Audit
Click MIGRATION > Audit to start the audit process.
Review Results
Check the audit results to see mailbox sizes, item counts, and any errors.
Execute Migration
Once you have reviewed the audit results, you can start the migration:
Select Users or Batches
Select the users you want to migrate. You can migrate all users at once or create batches for phased migration.
Start Migration
Click MIGRATION > Start to begin the migration process.
Monitor Progress
Monitor the migration progress in the dashboard. You can see the status of each user and any errors that occur.
Delta Migration (Optional)
Run a delta migration to sync any new items that were created after the initial migration.
Other Migration Options
Shared Mailbox Migration
Shared mailboxes can also be migrated in a similar way.
For this, create a file named LotusSharedMailboxes.csv in the same directory than the agent.
Here is the format (header row):
email;servername;sharedmailbox pathExample: [email protected];domino01;mail\sharedmailbox1.nsf
email is the email address of the shared mailbox.
servername is the Domino server name where the shared mailbox is stored.
path is the folder location on the shared mailbox on the Domino server.
Archive Migration
Cloudiway solution allows to migrate Lotus Archives.
First, you need to enable this setting in the configuration.json where you must set MigrateArchives = true.
Lotus Notes archive migration is managed directly from the Notes agent, not from the Cloudiway platform. The Archive view under mail migration is not used by Lotus Notes migration.
Instead, you must create a file named LotusArchives.csv in the same directory than the agent. This is where you will define the location of the archives.
Archives can be stored in a Domino server or in a network path.
Format of LotusArchives.csv
The CSV file must contain a header row with the following data:
email;NetworkFile;servername;archive pathemail is the user email address associated with the archive;
NetworkFile is a boolean (true | false) that specifies if the archive is hosted on a network share (true) or on a Domino server (false);
Servername is the Domino server name where the archive is stored.
path is the folder location on the archive.
On a Domino server, it would be the relative path of the nsf archive file, for instance, archive\archivefile.nsf
On a network drive, it would be the path of the archive. For example, if the file is stored in \\NasServer\Archives, you can first map it to a drive (net use h: \\NasServer\Archives)
the path of the archive in the CSV file would then be h:\archivefile.nsf
Example of csv file:
email;NetworkFile;servername;archive path
[email protected];true;;h:\bobarchive.nsf
[email protected];false;domino01;archive\johnarchive.nsf
If a user has multiple archives, you must reference all the archives in the csv file, for instance:
email;NetworkFile;servername;archive path
[email protected];true;;h:\bobarchive1.nsf
[email protected];true;;h:\bobarchive2.nsf
[email protected];true;;h:\bobarchive3.nsfRunning Multiple Agents
If you want to run more migrations in parallel, you need to setup several workstations.
Let's say that you want to run 4 agents simultaneously:
Install 4 Workstations and configure 4 Notes clients.
Create 4 Notes Connector.
On each workstation, download the agent of 1 connector and its associated configuration.json.
Warning Do not use the same configuration.json on multiple agents/computers.
It would have unpredictable results such as automatically stopping migrations running on other agents.
In the cloudiway User List, dispatch your users among the different connectors.
Now, when you will schedule the migration of 1 user, it will start on the associated agent.
Frequently Asked Questions
Does Cloudiway connect directly to my Lotus Notes server?
No. Cloudiway uses an on-premises agent that you install on a workstation with Lotus Notes client. The agent communicates outbound to the Cloudiway platform - the platform never connects to your environment.
What Lotus Notes version is required?
You need Lotus Notes client version 8.0 or higher installed on the workstation where the Cloudiway agent runs.
How do I migrate personal contacts from Lotus Notes?
To migrate personal contacts, each user must first replicate their personal contacts into their mailbox (NSF database) stored on the Domino server by starting the Lotus Notes Client and logging in.
What if I get "Database names.nsf not found" error?
This error typically means the server name configured in your source connector is incorrect. Check the name and correct it if wrong, or verify server accessibility from the agent workstation.
What if I get "user mailFile Not found" error?
This error occurs when the platform cannot find the NSF file of a migrating user. Make sure the user exists in your source domain and is spelled correctly in the platform, then restart the migration.
Get a free migration quote in minutes — entirely self-service.