
Google Drive to OneDrive Migration Guide
This guide is aimed at experienced system administrators who are capable of connecting to remote systems and using a variety of administration tools.
Overview
This Google Drive to OneDrive Migration User Guide shows you how to migrate your Google Drive content to OneDrive for Business.
Cloudiway uses Google Drive API and Microsoft Graph API to migrate Google Drive content including files, folders, permissions, and metadata. Google native documents are automatically converted to Microsoft Office format. All network operations are performed over TLS 1.2.
Looking for our Google Drive Migration Solution?
Discover all features, pricing, and use cases for Google Drive to OneDrive migration.
View Solution PagePrerequisites
To perform the Google Drive to OneDrive Migration, you need to configure your Google Workspace and Microsoft 365 environments with the appropriate permissions.
Google Workspace Requirements
Cloudiway uses a Google Service Account with domain-wide delegation to access Google Drive. You have two options:
If you prefer to create the Service Account manually, you will need:
Google Cloud Project
Create a project in Google Cloud Console
Service Account
Create a Service Account with domain-wide delegation
Drive API Scopes
Enable Drive API with full access to user drives
JSON Key File
Download the JSON key file for authentication
Microsoft 365 Requirements (Target)
Cloudiway uses an Entra ID Application with Application Permissions to access Microsoft 365:
App Registration
Create an application in Microsoft Entra ID
API Permissions
SharePoint ? Sites.FullControl.All and Microsoft Graph ? Files.ReadWrite.All
Admin Consent
Granted by a Global Administrator
Certificate Authentication
OAuth 2.0 client credentials flow with certificate
What is Migrated
The following items are migrated during a Google Drive to OneDrive migration:
Automatic Link Rewriting in Documents
Cloudiway now automatically rewrites internal links within your documents during migration. When migrating from Google Drive to OneDrive, links pointing to other Google Drive files are automatically updated to point to their new OneDrive locations.
- Links to Google Drive files are converted to OneDrive links
- Internal document references are preserved and updated
- Links are updated based on your migration mapping table
Limitations
The following items are NOT migrated:
- External sharing links (anonymous links)
- Deleted files (Google Drive trash content)
- Google Forms (not supported)
- Google Sites (use Sites migration tool)
- Comments and suggestions in documents
- Google Drive shortcuts are not supported
Migration Process
The Google Drive to OneDrive migration is a five-step process:
Step 1: Create Connectors
For Cloudiway to migrate your Google Drive content, it needs to be able to communicate with both your source Google Workspace and target Microsoft 365 tenants. To do this, Cloudiway uses connectors.
You will need to set up a connector for each source tenant and each target tenant.
Google Source Connector
Create a Google connector to connect to your Google Workspace environment. Select Google as connector type, set a connector name and select File as product.
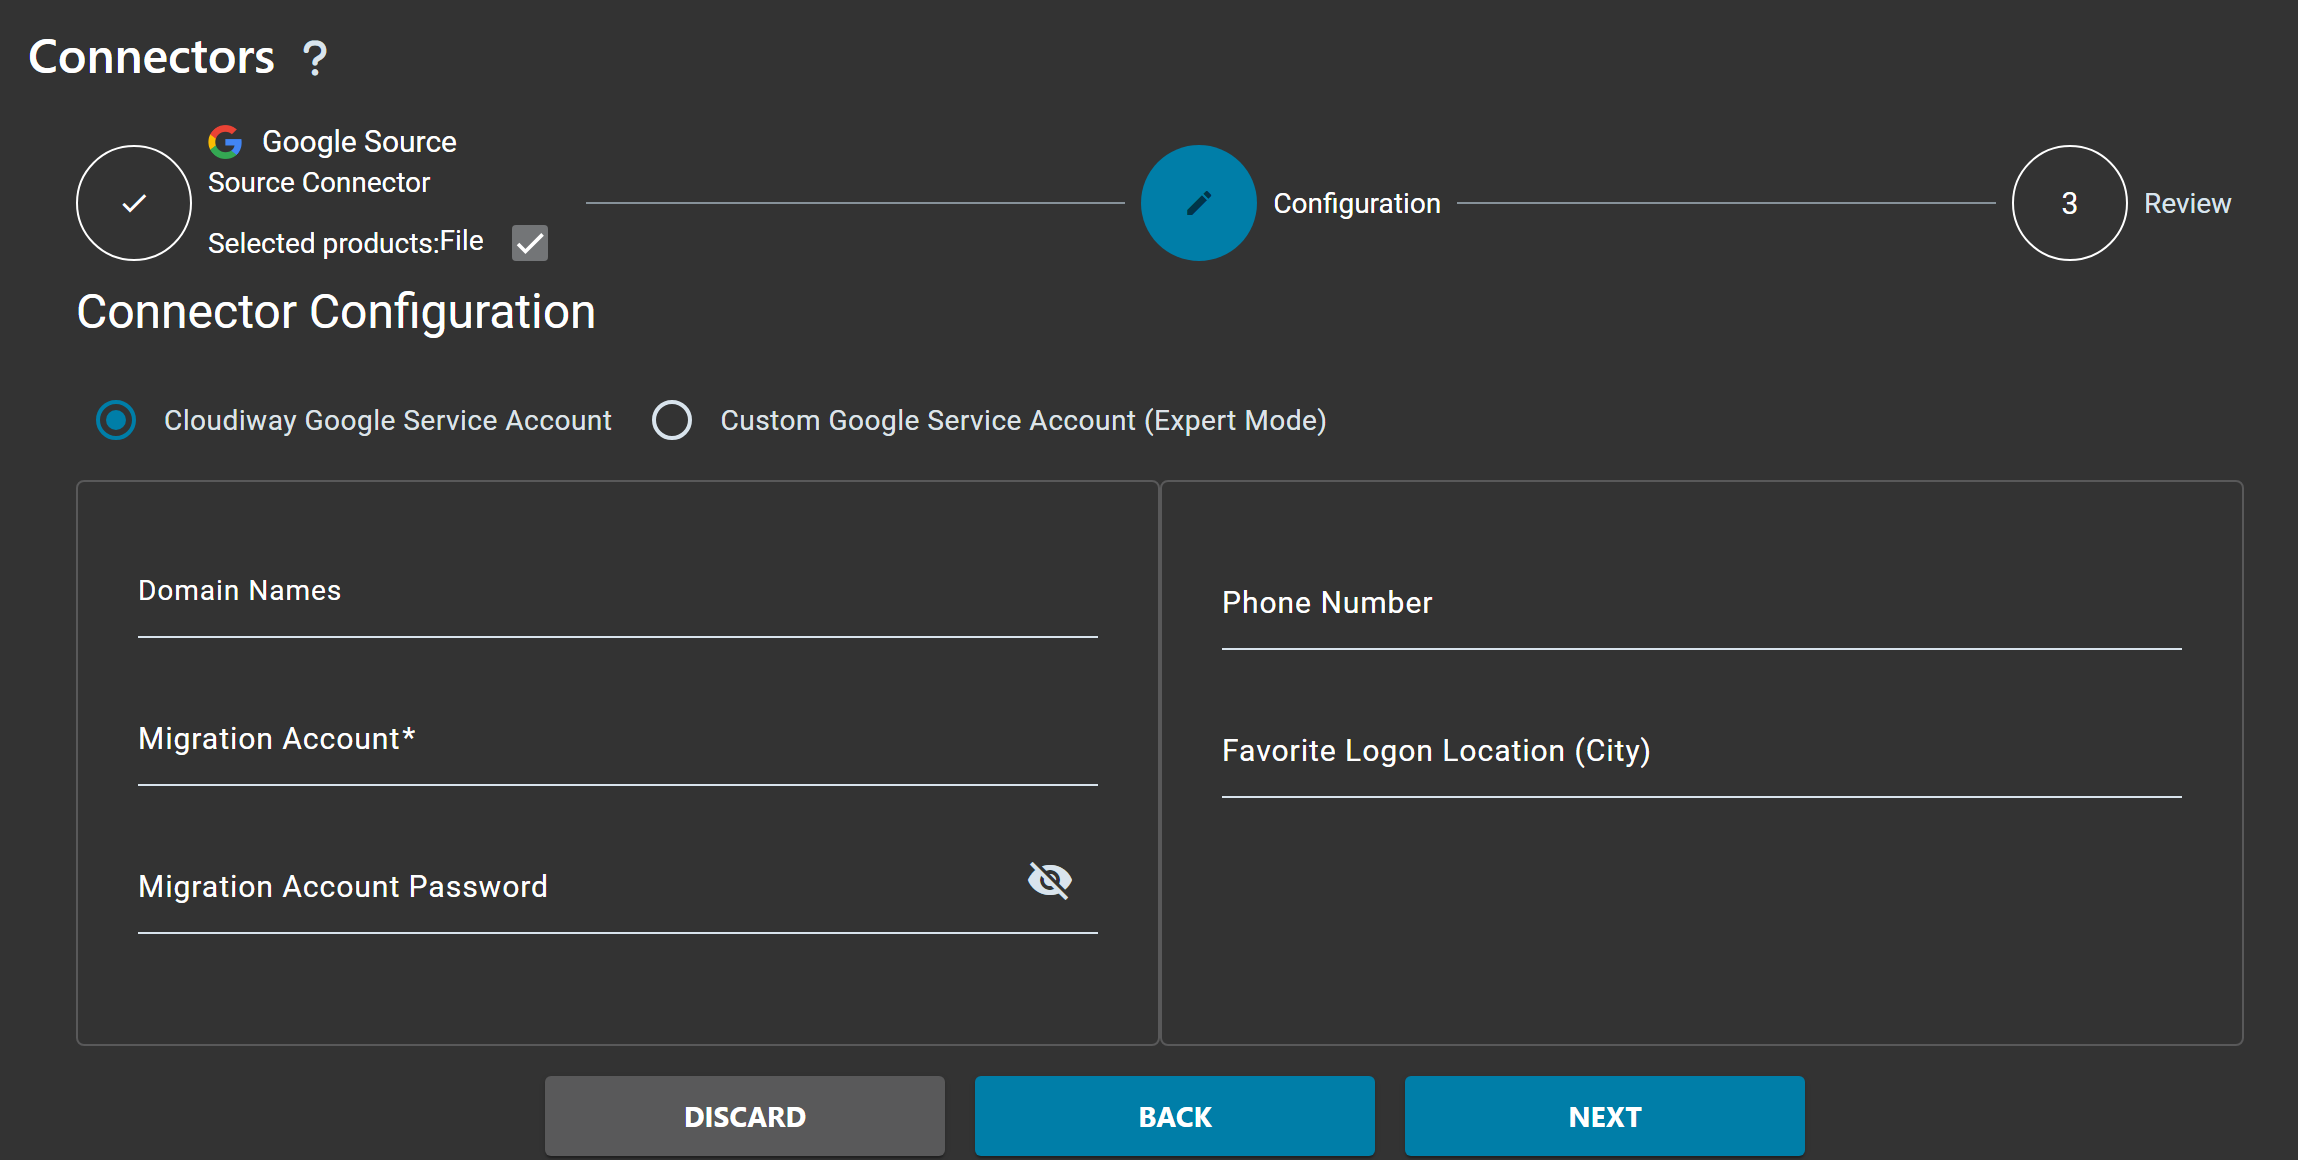
You have two authentication options:
- Cloudiway Google Service Account (Recommended): Cloudiway automatically creates and manages the Google Service Account for you. Simply provide your Migration Account (Google Workspace Super Admin email) and authorize Cloudiway.
- Custom Google Service Account (Expert Mode): Use your own Service Account with domain-wide delegation. You will need to provide the JSON key file.
| Field | Description |
|---|---|
| Domain Names | Your Google Workspace domain(s) |
| Migration Account | Google Workspace Super Admin email address |
| Migration Account Password | Password for the Super Admin account (only for Google Sites migration) |
| Phone Number | Phone number for 2FA verification (only for Google Sites migration) |
| Favorite Logon Location | City for location verification (only for Google Sites migration) |
Microsoft 365 Target Connector
Create a Microsoft 365 connector to connect to your target tenant. Select Microsoft 365 as connector type, set a connector name and select File as product.
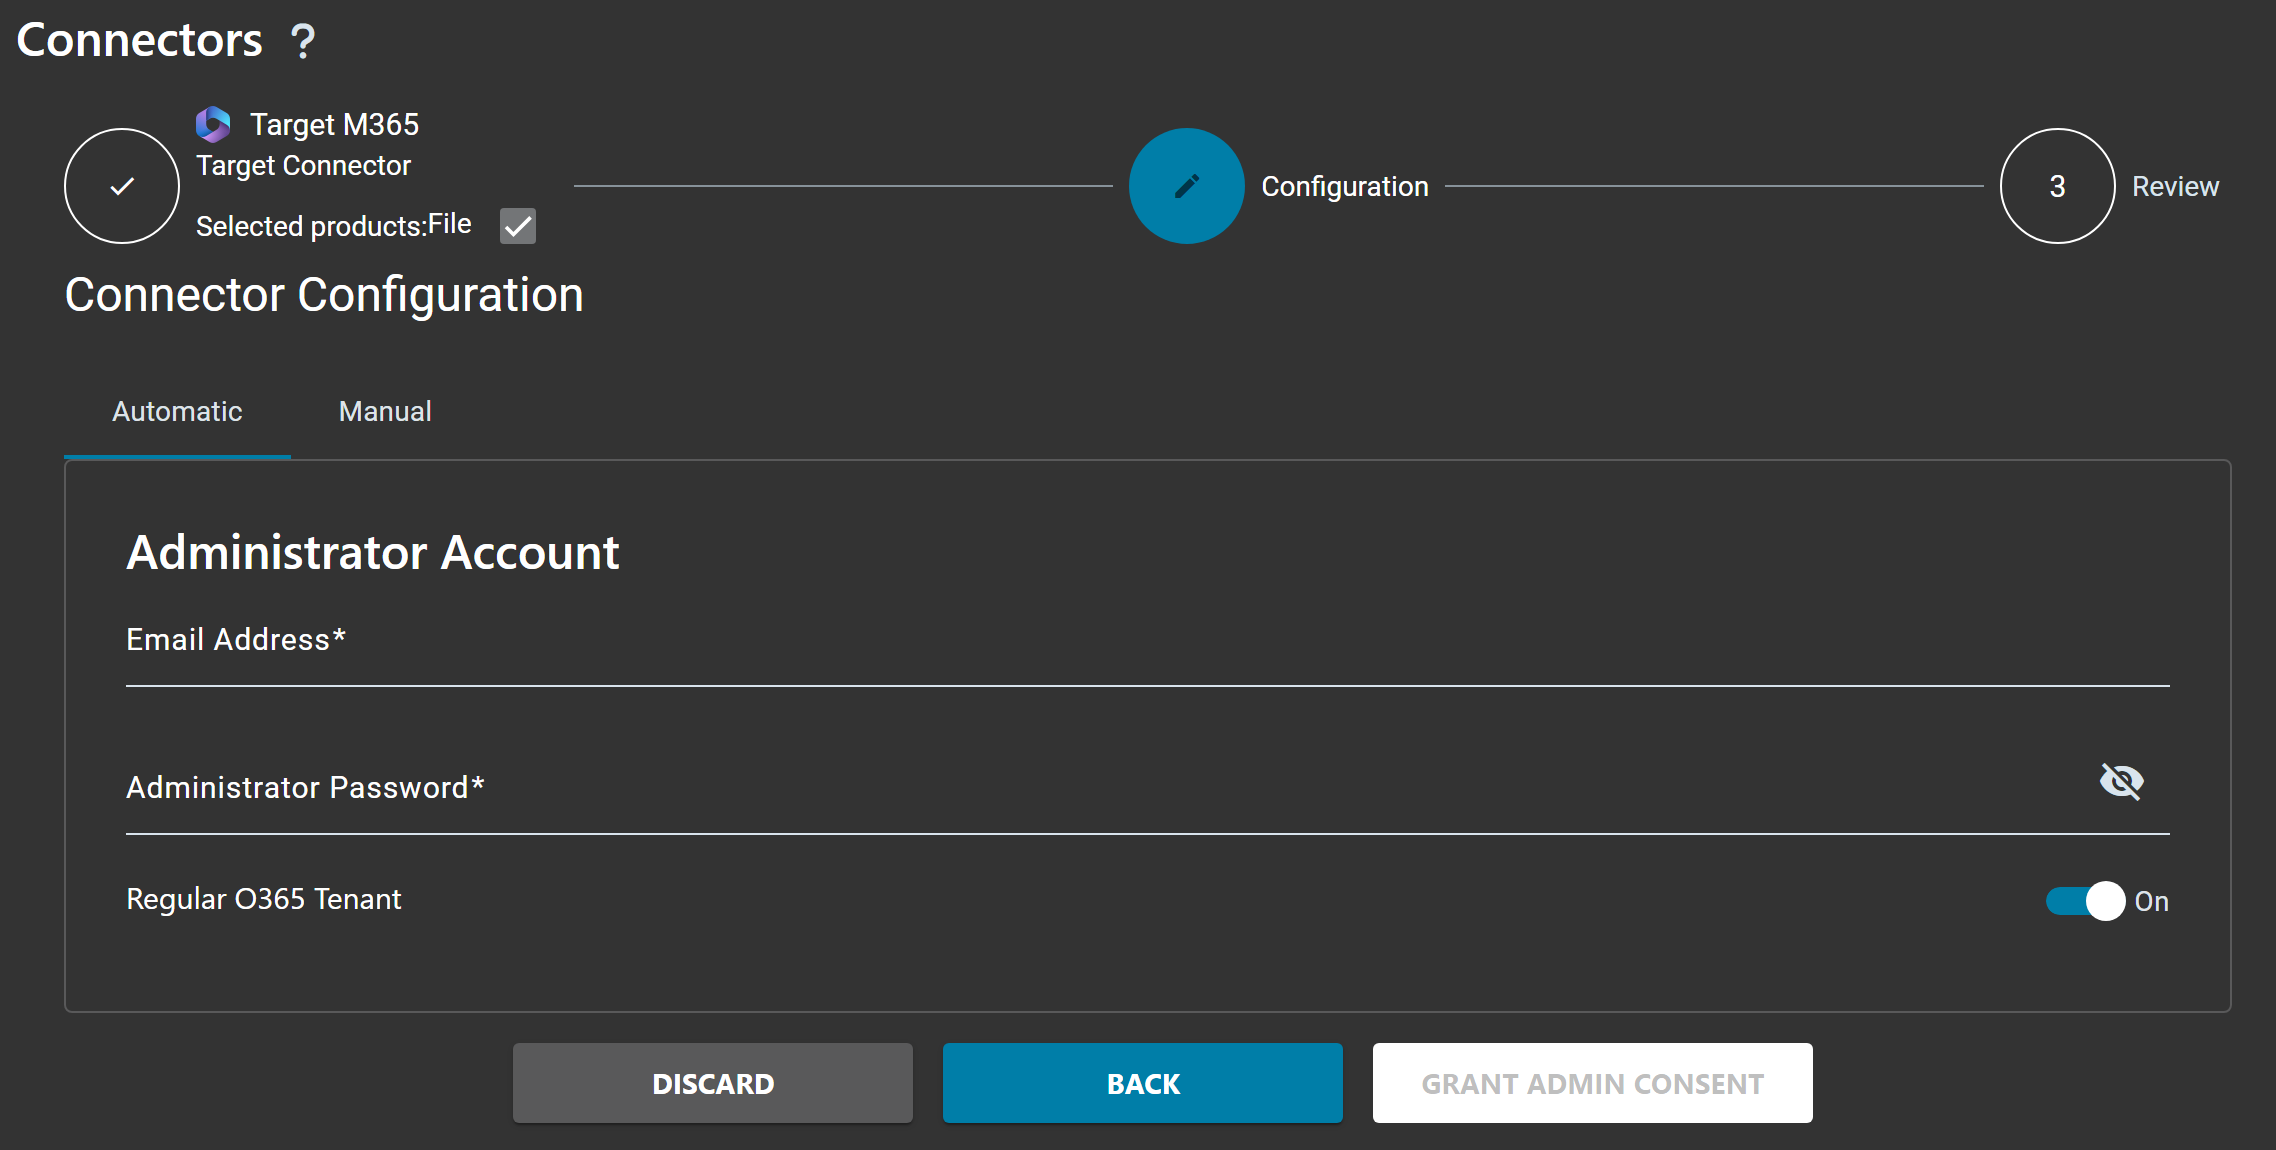
You have two configuration modes:
- Automatic (Recommended): Cloudiway automatically creates and configures the Entra ID Application. Enter your Administrator credentials and click Grant Admin Consent to authorize Cloudiway.
- Manual: Use your own Entra ID Application with pre-configured API permissions. You will need to provide the Application ID, Tenant ID, and certificate.
| Field | Description |
|---|---|
| Email Address | Global Administrator or SharePoint Administrator email address |
| Administrator Password | Password for the Administrator account |
| Regular O365 Tenant | Enable for standard Microsoft 365 tenants. Disable for GCC High or other specialized tenants. |
Step 2: Configure Global Settings
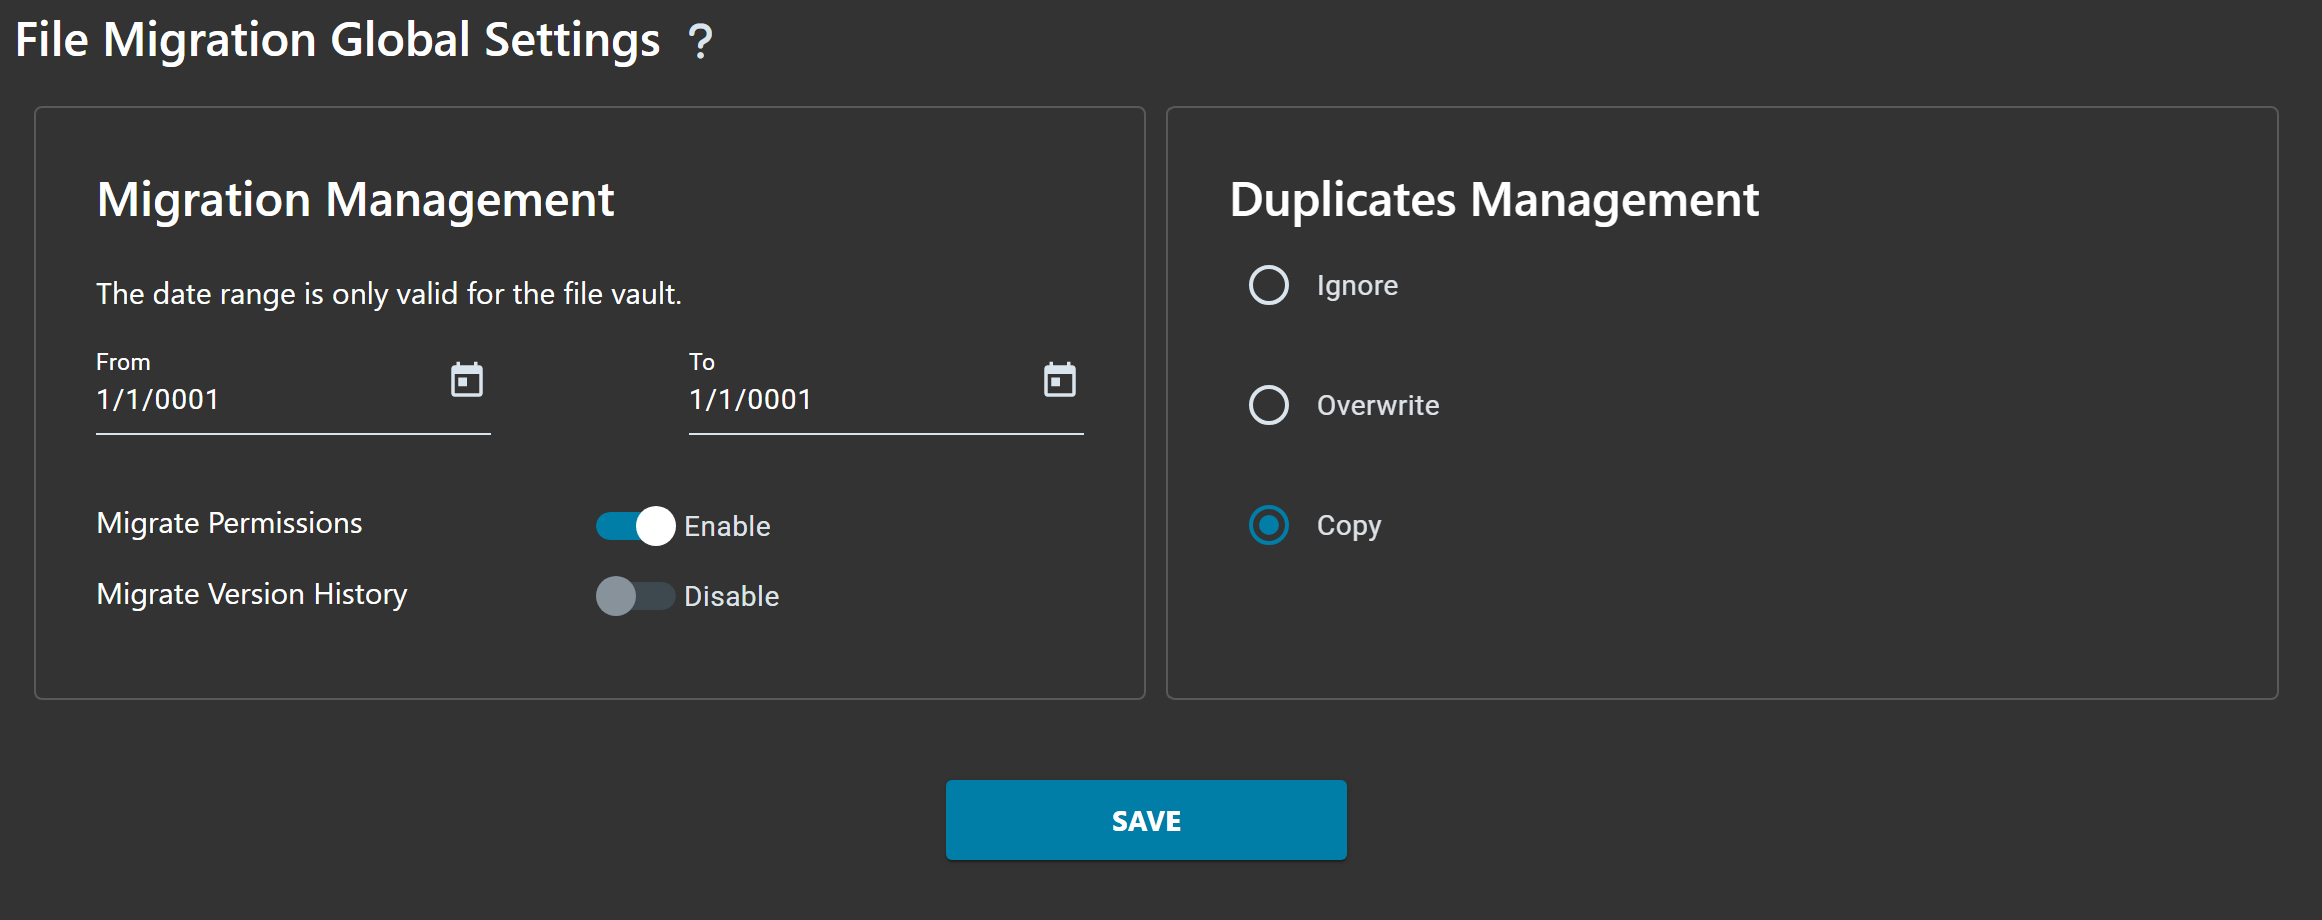
After setting up source and target connectors, navigate to Files > Global Settings to configure your migration settings.
Migration Management
| Setting | Description |
|---|---|
| Date Range (From/To) | Filter files by date range. Only valid for file vault migrations. Leave default values to migrate all files. |
| Migrate Permissions | Enable to preserve sharing permissions during migration. Permissions will be mapped according to the mapping table. |
| Migrate Version History | Enable to migrate previous versions of files. Disable to only migrate the current version. |
Duplicates Management
Define how duplicate files should be handled when a file with the same name already exists at the target:
- Ignore: Skip files that already exist at the target location
- Overwrite: Replace existing files with source files
- Copy: Create a copy of the file with a different name, keeping both versions
Click Save to apply your global settings.
Step 3: Fill User List
The User List contains all Google Drive accounts to be migrated. There are three ways to populate it:
Option 1: Discovery (Get List)
Click on User List > Get List to automatically discover all Google Drive accounts from the source Google Workspace tenant.
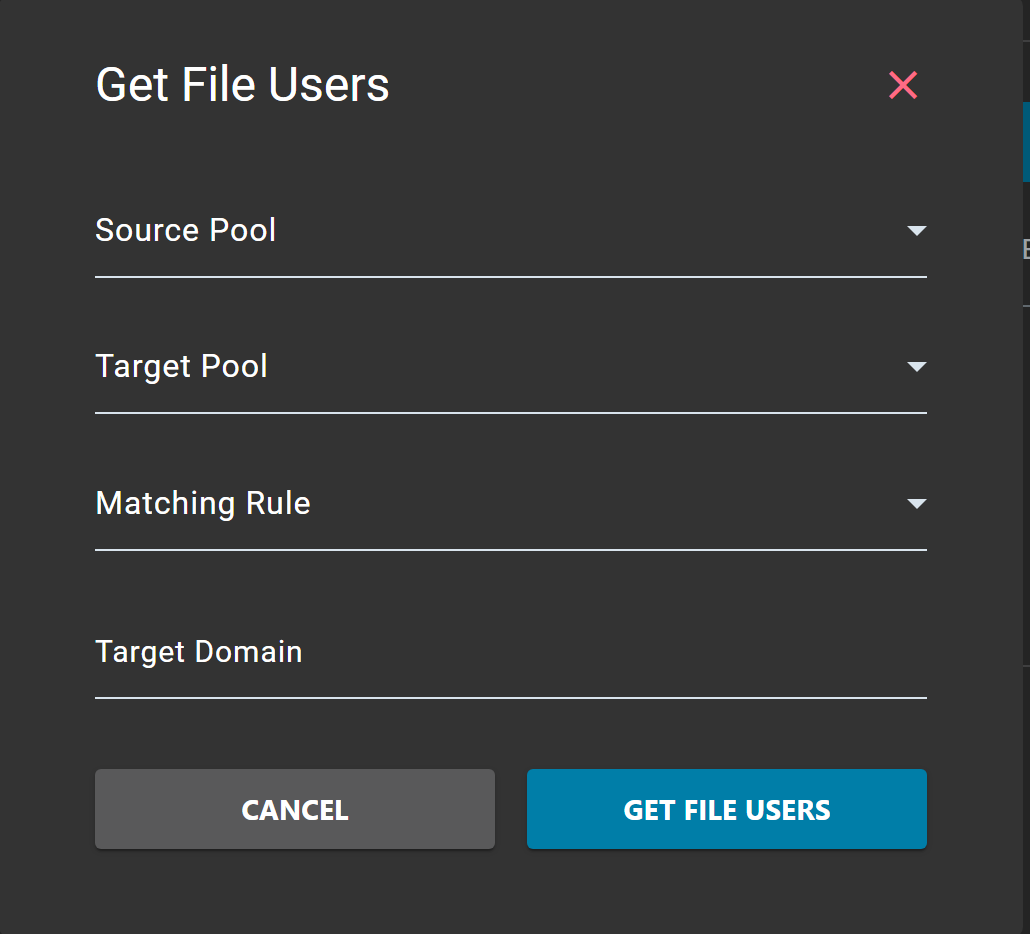
Specify the following parameters:
Source Pool
Select the Google Workspace source connector you created earlier.
Target Pool
Select the Microsoft 365 target connector you created earlier.
Matching Rule
Choose how source emails should be mapped to target emails:
- Mail Exact Match: source email = target email ([email protected] ? [email protected])
- Keep Email Prefix Same as Source: only the domain changes ([email protected] ? [email protected])
- FirstName.LastName: (e.g., [email protected])
- F.LastName: (e.g., [email protected])
- FLastName: (e.g., [email protected])
- LastNameF: (e.g., [email protected])
Target Domain
Specify the target Microsoft 365 domain for the migrated users.
Click Get File Users to start the discovery process.
Option 2: Import User List
Click on User List > Import to upload a CSV file containing the users to migrate.
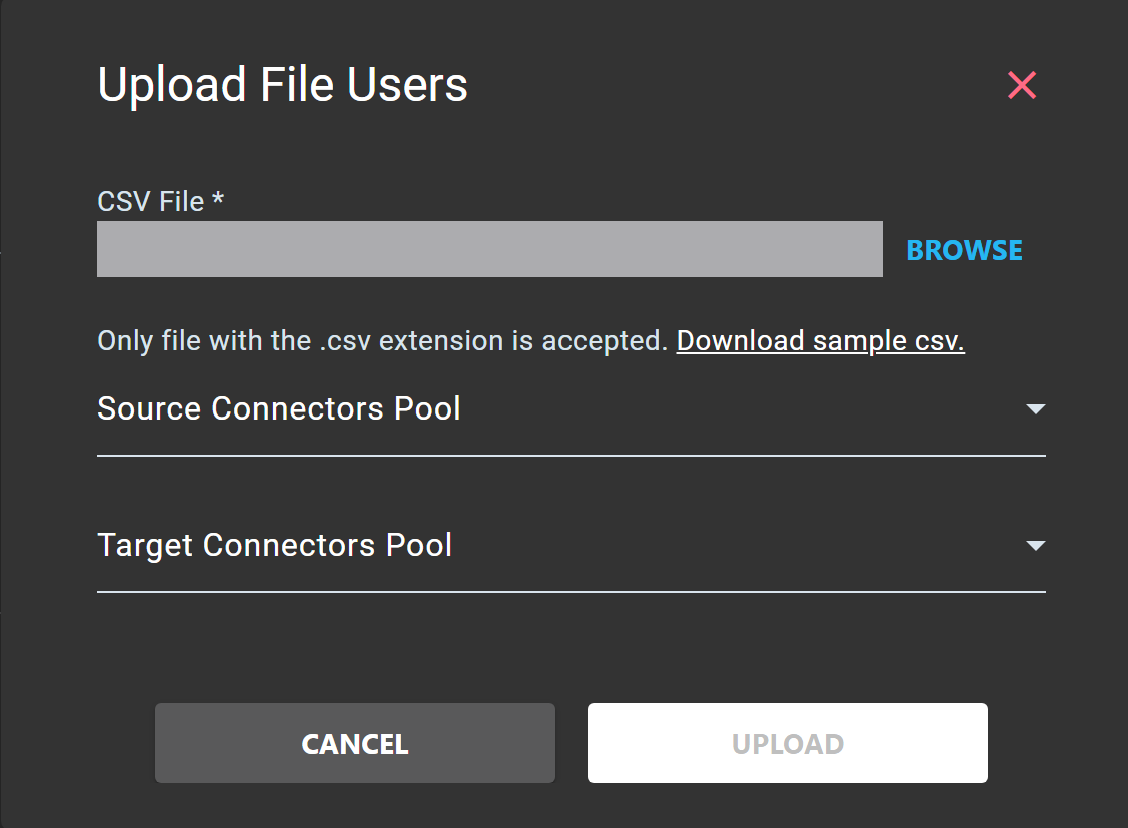
CSV File
Click on BROWSE to select your CSV file. Only files with the .csv extension are accepted. You can click Download sample csv to get a template file.
Source Connectors Pool
Select the Google Workspace source connector you created earlier.
Target Connectors Pool
Select the Microsoft 365 target connector you created earlier.
Click Upload to import the user list.
Step 4: Verify Mapping Table
The mapping table is crucial for proper migration of permissions and metadata. It maps source Google user email addresses to target Microsoft 365 user email addresses.
Review Auto-Generated Mapping
Cloudiway automatically creates mappings when you run discovery.
Add Missing Mappings
Ensure all users who have shared files are included in the mapping table.
Verify Accuracy
Double-check that source Google and target Microsoft 365 email addresses are correctly matched.
Step 5: Run Migration
Once your users are imported and mapping is verified, you can start the migration process.
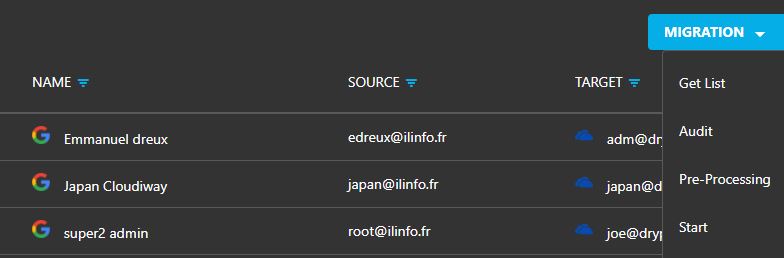
Preprocessing
Before running the actual migration, you must run the Preprocessing task. This essential step prepares the target environment for migration.
- Provisions the target OneDrive for each user (creates the OneDrive site if it doesn't exist)
- Validates connectivity to both source Google Drive and target OneDrive
- Verifies that the target user account exists and has a OneDrive license
- Prepares the migration environment for optimal performance
Run Audit (Optional)
Run an audit to verify connectivity and gather storage statistics before migration.
Select Users
Select the users you want to process from the User List.
Run Preprocessing
Click Actions > Preprocessing to provision OneDrive and validate the target environment. Wait for preprocessing to complete before starting migration.
Start Migration
Once preprocessing is complete, click Actions > Start Migration to begin the data transfer.
Monitor Progress
Track migration progress with real-time statistics and logs.
Delta Pass
Delta migration is a Cloudiway functionality that allows you to migrate incrementally. After the initial migration, you can run additional passes to catch any changes.
Frequently Asked Questions
Why are some files not migrating?
Check the exclusion list settings and verify that the file types are not excluded. Also ensure the source files are not locked or in use, and that you have proper permissions in Google Drive.
Why are permissions not preserved?
Ensure all users with permissions are included in the mapping table. Any missing email addresses will not have their permissions converted.
Are Google Docs converted properly?
Yes, Google native documents are automatically converted to Microsoft Office format. Google Docs become Word files, Sheets become Excel, and Slides become PowerPoint. Most formatting is preserved.
How do I handle large migrations?
Use batch processing and delta migration. Run initial migration during off-peak hours, then use delta passes to catch changes.
What happens if migration fails?
Check the migration logs for error details. Common issues include connectivity problems, permission errors, or file size limits. You can retry failed items after resolving the issue.
Get a free migration quote in minutes — entirely self-service.