GOOGLE SITES TO SHAREPOINT MIGRATION GUIDE
1. Google Sites to SharePoint Migration Overview
Google Sites to SharePoint migration projects are complex, customized projects. They cannot be performed on-demand in the self-service portal. These projects require Cloudiway product licenses combined with Consulting Services. The minimum timeline to start a Google Sites migration project is two weeks. Please contact your Sales Manager for more details.
Google Sites can be migrated as part of your entire migration plan or as an independent project, depending on your business needs.
Google Sites are migrated to SharePoint Modern Sites or to Microsoft Teams.
1.1. What is migrated
You will find the list of what can be migrated on the product page: Google Sites and SharePoint migration.
Regarding the limitations, you’ll find further information here, please don’t hesitate to contact us if you have any concerns.
1.2. Performance & Security
For more information about security, please refer to this article.
1.3. License Management
Cloudiway platform automatically assigns the licenses, for more details regarding the license management, check out this page.
1.4. Delta Passes
Delta migration is a Cloudiway functionality that allows you to migrate incrementally. Changes are migrated during delta passes. Deletions are not propagated.
1.5. Support
Although we provide support for our own products, we do not provide support for third-party products such as PowerShell nor SharePoint administration.
If you are concerned you might have any difficulty completing these steps, please consider a solution with our consulting team, contact us. This will ensure a fast, cost-effective, and stress-free implementation.
2. Google Sites to SharePoint Migration Prerequisites
2.1. How it works
The product uses the Google Drive APIs and native https calls to read the source and a mix of Graph APIs and CSOM calls to push the data to the target.
Migration from Google Workspace requires to set up OAuth authentications with appropriate permissions.
Please note: For both source and target, two-step authentication is not supported and will have to be bypassed before migration can start
- Instructions to turn off 2-step authentication in Google Workspace here.
- Deactivate MFA On Your Office 365 Migration Account here.
2.2. Mapping Table
In Microsoft SharePoint, there are permissions and metadata (createdby, modifiedby, etc.) that contain email addresses. During the migration, these addresses must be converted into target accounts.
To achieve this, Cloudiway uses a mapping table to perform the conversion.
Important: the mapping table must be exhaustive, any missing email address will not be converted, and would end up with loss of file permissions and metadata. Cloudiway automatically populates this mapping table when source users are discovered by Get List functionality from Mail or File sections. However, make sure if the mapping table was populated automatically that you are not missing any email address.
2.3. Source Prerequisites
2.3.2. Google Workspace migration account
To perform the migration, you will need to create a Google Workspace migration account, and give it access to your Google Sites. If the migration account is tenant admin, by default, it will already have access to permissions.
2.3.2. Google Feeds
Also, native Google Drive documents are accessed using Google Drive APIs. Therefore, you need to give permissions (Google feeds) to use these APIs for the source tenant.
This article explains how to add the Google feeds:
Cloudiway must whitelist your environment, it consists of manually login in a navigator from Cloudiway environment in order to authorize our IP addresses to access your Google Sites. You must contact Cloudiway at the beginning of your project to proceed to the whitelisting and, and may be necessary to perform it again during your project.
2.4. Target Prerequisites
2.4.1 Create a target Office 365 service account
We recommend creating an Office 365 account dedicated to the migration, that can be deleted once the migration is completed.
- It must be SharePoint administrator.
- It must be configured with multi-factored authentication (MFA) and SSO (ADFS) turned off.
Cloudiway automatically creates the Sharepoint site, therefore they don’t have to exist prior to the migration. If they already exist, data will be appended to it.
2.5.2. Target Azure Active Directory Application
Graph APIs calls are performed through an Azure Active Directory Application which is granted specific permissions.
You can either create an Azure Active Directory Application manually or let the platform create one for you.
Please consult how to create the Azure Active Directory Application and associated permissions.
2.5.2. Web Part installation
As part of the solution, a custom Web Part has been developed to display the content of OneDrive folders within a SharePoint Sites.
Therefore, a OneDrive viewer Web Part provided by Cloudiway must be installed on the tenant before you start your migration.
Please refer to this article to install the Web Part.
3. Create Your Connectors
For Cloudiway to migrate your Sites, it needs to be able to communicate with both your source and target domains. To do this, Cloudiway uses connectors. You will need to set up a connector for each source tenant and each target tenant. Please refer to this page to configure your connectors.
For large projects, it’s possible to create multiple connectors that will be used in parallel. Please contact Cloudiway consulting services if you need to set up such configuration.
4. Google Sites To SharePoint Migration Settings
Note: to test the migration, you can use a Trial License, please consult this article to assign a Trial License.
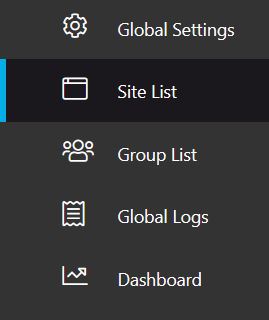
4.1. Site List
To perform the migration, navigate to Sites > Site List
4.1.1. Get Sites
New Google Sites can reside in Users’ Google Drives, or in Shared Drives:
- in order to pull all the Google New Sites that are inside the Users’ Google Drives, we need to connect to every user’s Drives and extract the sites. Cloudiway does it automatically, it’s the equivalent of the following command:
gam all users show filelist query “mimeType = ‘application/vnd.google-apps.site’”
- However, in order to pull the Google New Sites that live inside a Shared Drive, Cloudiway needs to have access to every Shared Drives, by making the Cloudiway migration account (the account you provided in your source Google Connector) a reader of the Shared Drives. Cloudiway can help you add the migration account as Reader of all Shared Drives. Please contact our services team to get assistance in this matter.
Step 1: Get Sites
From the Cloudiway Interface, use the Get Sites option to fill the list of Sites to migrate:
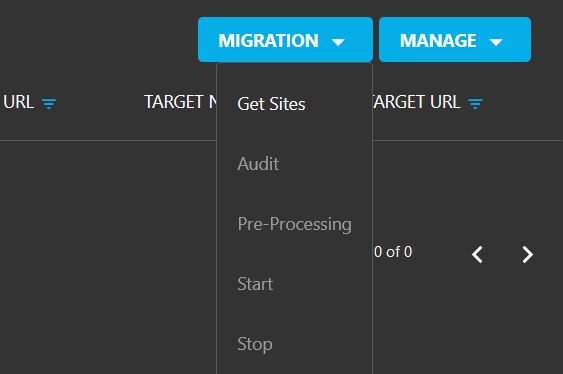
Select the connector you want to connect, click on GET.
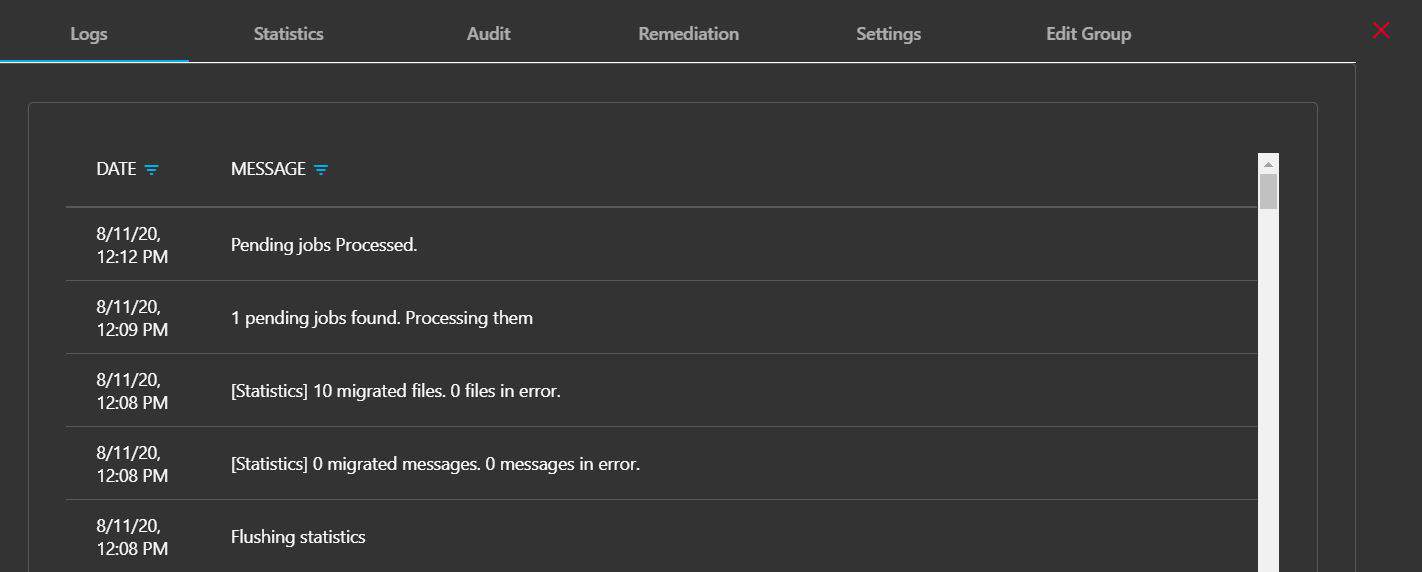
Note: you can monitor the progress of this task in the Global Logs.
Step 2: Assign target
Once the list is retrieved, you need to assign a target connector to the entries.
Select the entries, click on MANAGE, then Assign Target.

Select the Office 365 connector, click on Assign.
4.1.2. Mass renaming (CSV Import)
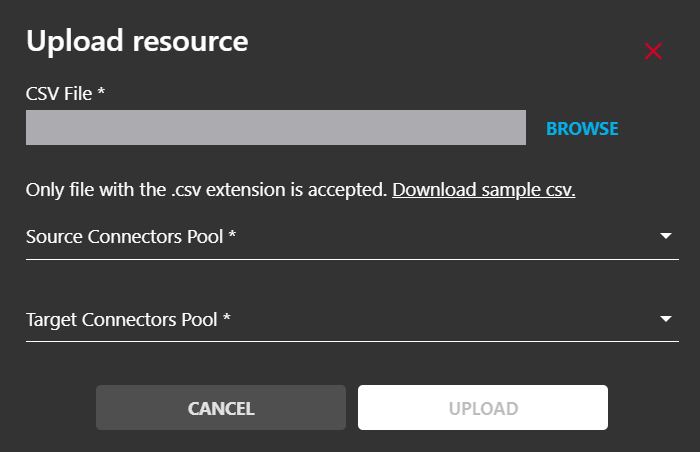
If you wish to make modifications to the entire sites list, you can export the list, edit the CSV file and reimport it.
Learn more about the CSV format: How To Fill The Users/Groups CSV File?
Click on MANAGE, Import, select the CSV File, the Source and Target Connectors, then click Upload.
4.2. Specify Your Destination
You can migrate your Google Sites to Modern SharePoint Sites.
Click on the item to edit the different fields (see picture above).
By default, the target Site prefix Address chosen by the platform is /sites, you can select /teams instead.
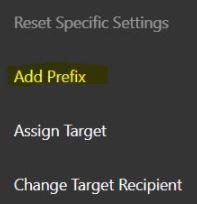 Add a Prefix to the Target?
You can add a Prefix to the Target Site Name and Target URL.
In the Site List, check one or multiple objects, go to MANAGE then click on the “Add Prefix” button.
Enter the Prefix in the pop-up then SAVE.
4.3. Global Settings
At this point, you are ready to migrate.
You can enable or disable the following points:
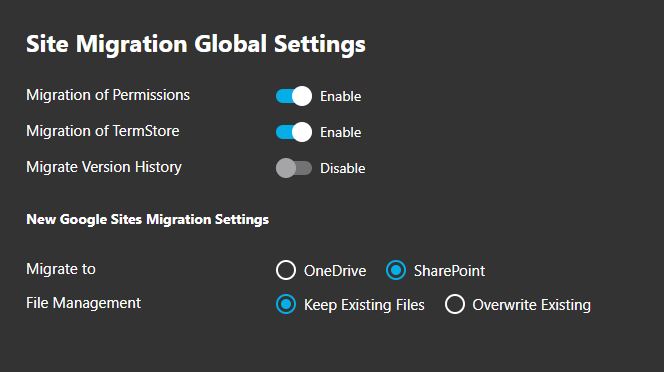
- Migration of Permissions.
- Migration of TermStore: TermStore is a SharePoint feature that doesn’t exist in Google. Therefore, it’s not used for Google Sites migration.
- Migrate Version History: not used for Google Sites migration.
- Migrate to: determine where files are migrated, we recommend to migrate to OneDrive. Files will be migrated to the OneDrive of the user and displayed in the SharePoint sites.
- File Management: when you migrate to an existing destination, determine the behavior when files already exist on the target.
4.4. Perform an Audit
4.4.1. File audit
In order to be able to migrate the files embedded in Google Sites, all the user’s Drives and all Google Shared Drives need to be audited before the migration, this requires a Cloudiway File license for every drive. The audit consumes the Cloudiway file license. (The reason is that the audit task may be long for large drives and will consume a lot of resources charged to Cloudiway by Azure).
4.4.2. Site audit (optional)
The audit is optional and purely informative. It consumes the Cloudiway license. You do not have to run it, unless you wish to see how many files and folders you have in the source site.
The Audit feature allows you to collect various information about the sites:
- Site Name
- Site URL
- Author
- Last Modified Date
- Number of Pages
- Number of Web Pages
- Number of Google Drive Documents
- Etc.
To Audit a site, in Site List, select it and click on MIGRATION, Audit.

4.5. Perform Pre-Processing
The pre-processing tool creates the SharePoint site at the target if necessary.
What does the pre-processing tool do in detail?
At the target:
- It creates the SharePoint sites and libraries.
- It uses the graph APIs (Client ID and Client Secret) and gives the owner role to the migration account defined in the target connector.
- It migrates membership and ownership.
To pre-process a site, in Site List, select it and click on MIGRATION, Pre-Processing.
The site is now ready to be migrated.
4.6. Activate and monitor your Google Sites to SharePoint Migration
Before starting the Google Sites To SharePoint migration, you must run the pre-processing (see step above) of the site.
To start the migration, in Site List, select it and click on MIGRATION, Start.
This will schedule the migration. The migration will start as soon as there is a free spot on the platform.
You can monitor your migration by clicking on the entry in the Site List.
5. Troubleshooting
Cloudiway provides an extensive knowledge base with many resources, including common error messages, video guides, and downloads.
Please visit the knowledgebase here: https://help.cloudiway.com/