
IMAP to Microsoft 365 Migration Guide
This guide explains how to migrate your IMAP server mailboxes to Google Workspace, Microsoft 365, or Exchange using the Cloudiway migration platform.
Overview
This article explains how to migrate your IMAP server to Google Workspace, Microsoft 365, or Exchange with the Cloudiway migration tools.
Looking for our IMAP Migration Solution?
Discover all features, pricing, and use cases for IMAP to Microsoft 365 migration.
View Solution PageMigration Modes
Cloudiway supports two approaches for IMAP migration:
Step 1: Create IMAP Connector
Create an IMAP connector in the Cloudiway platform to connect to your IMAP server:
Create New Connector
Go to Connectors > New and select IMAP as the connector type. Select Mail as the product to migrate.
Configure Connector Settings
Configure your IMAP server connection with the following parameters:
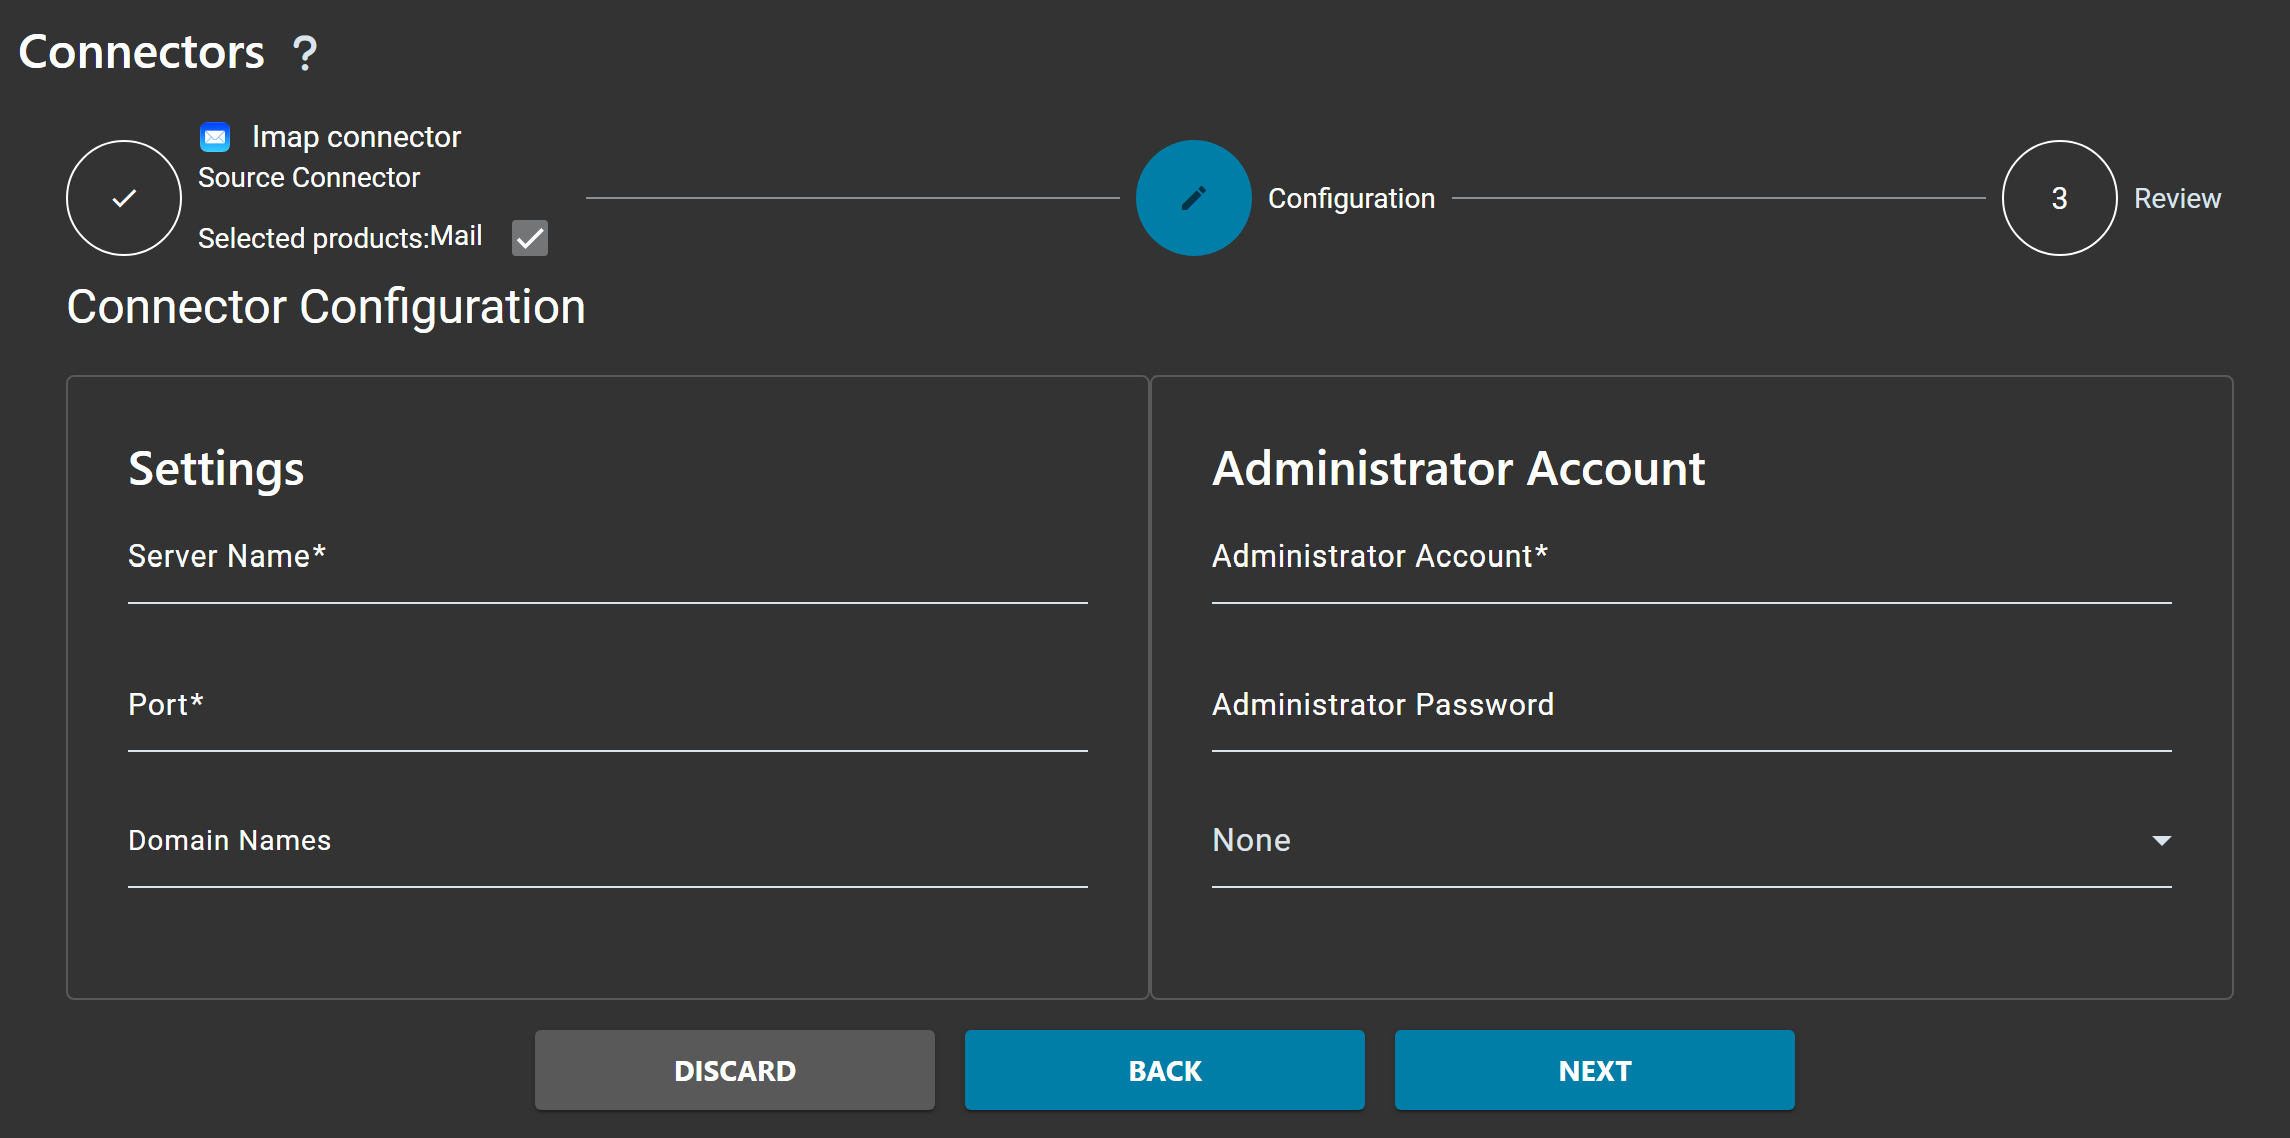
Server Settings
| Parameter | Description |
|---|---|
| Server Name* | The hostname or IP address of your IMAP server (e.g., mail.company.com) |
| Port* | The IMAP port: 993 (SSL - recommended) or 143 (standard) |
| Domain Names | The email domains hosted on your IMAP server (e.g., company.com) |
Administrator Account
| Parameter | Description |
|---|---|
| Administrator Account* | The IMAP administrator email address with access to all mailboxes (leave blank for magic password mode) |
| Administrator Password | The password for the administrator account (or the magic password for all users) |
| Authentication Mode | Select None for admin-based authentication, or Self Service for user-based authentication |
Complete Setup
Click NEXT to review your configuration, then click NEXT again to save your connector.
Step 2: Create Target Connector
Create a target connector for your destination platform. You can migrate IMAP to Microsoft 365, Google Workspace, or Exchange On-Premises.
Option A: Microsoft 365 Target
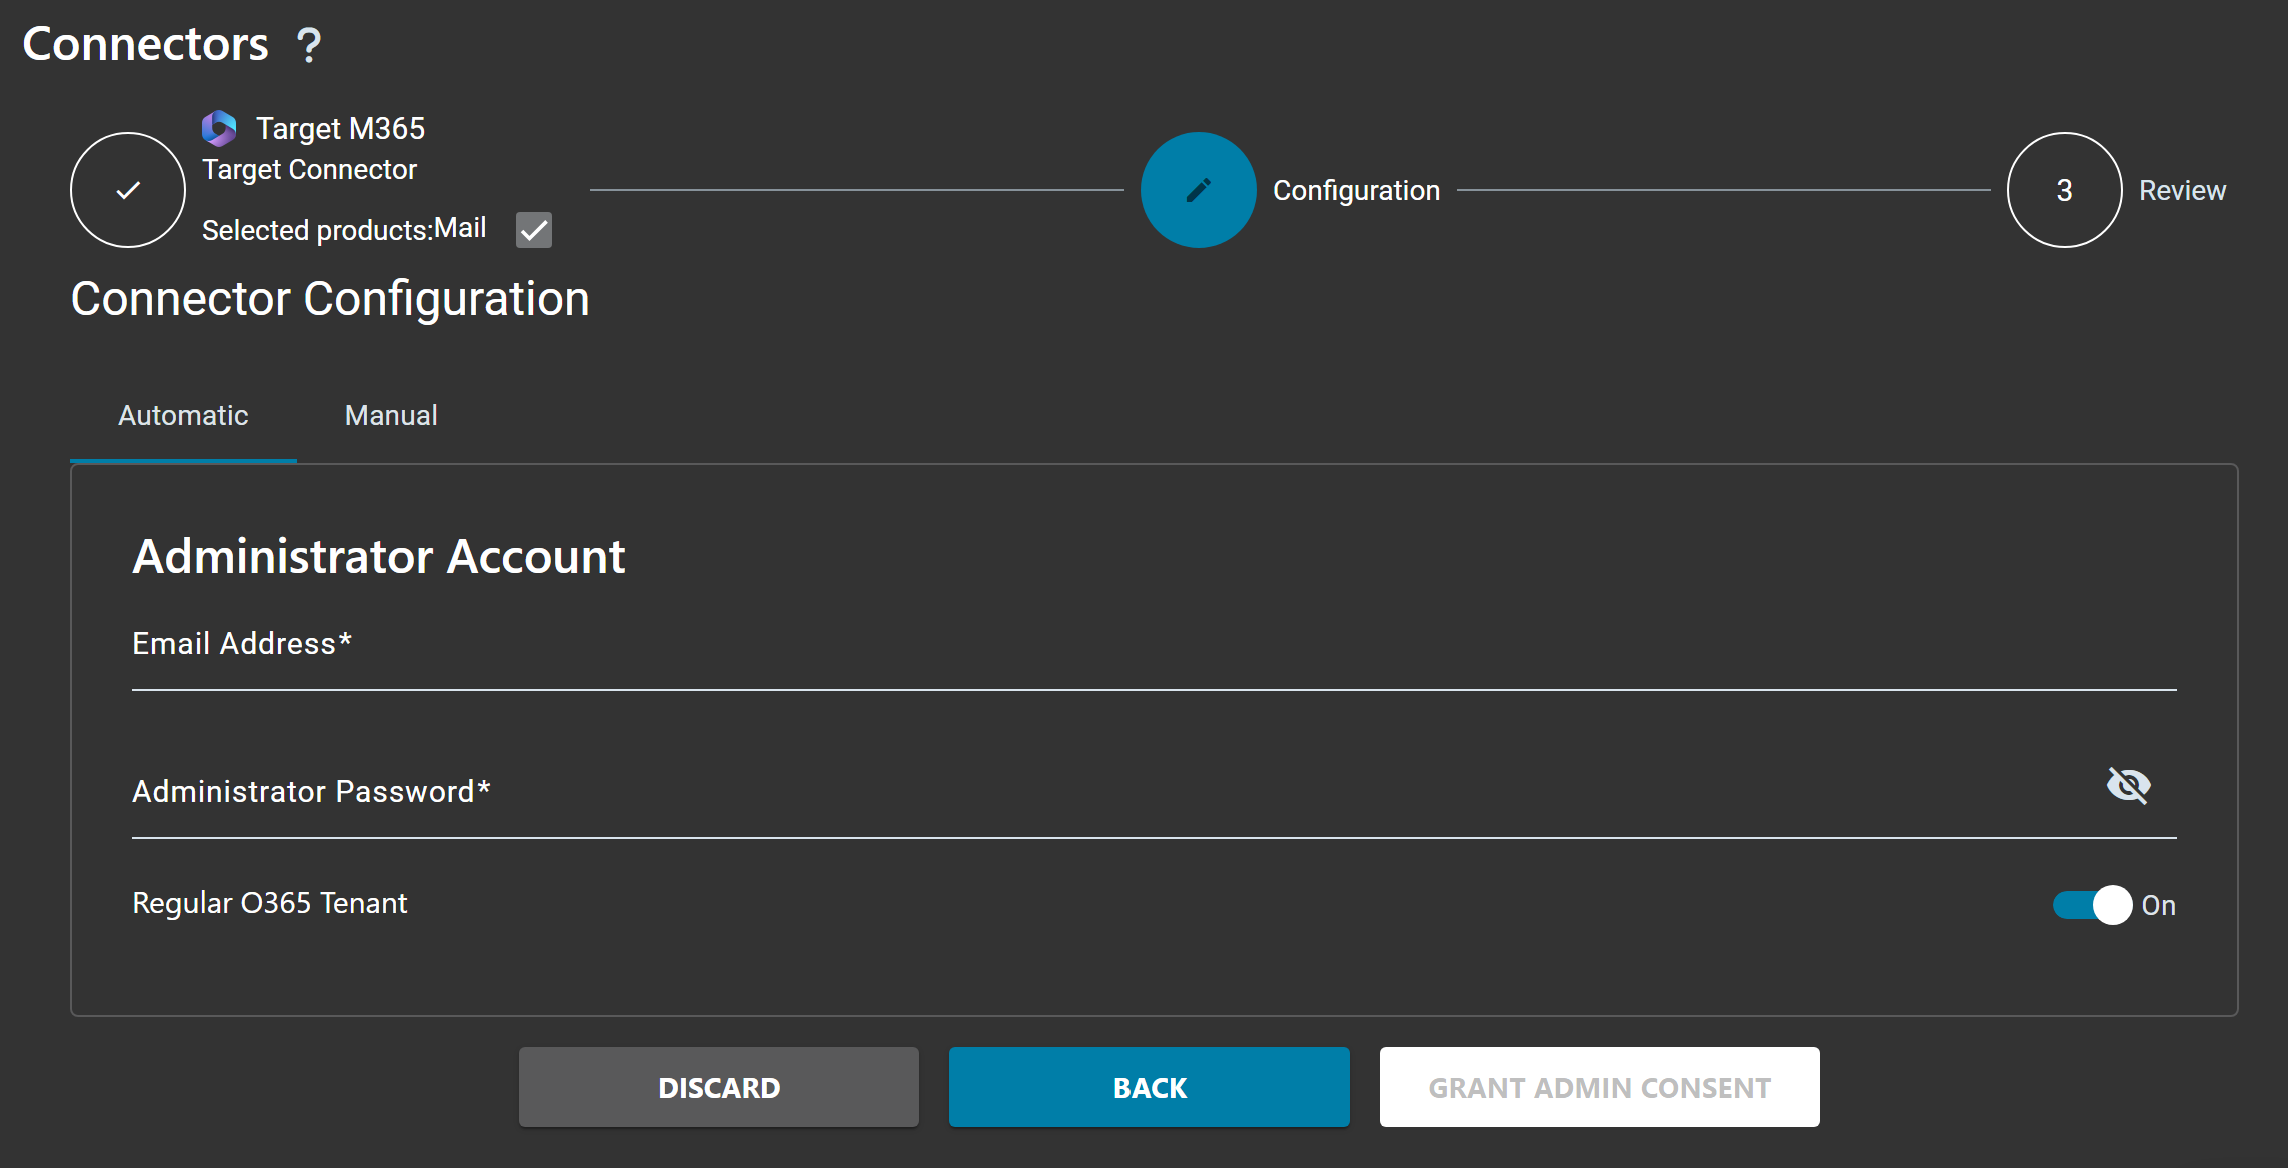
Create New Connector
Go to Connectors > New, select Microsoft 365 as connector type.
Configure Authentication
Choose Automatic mode and enter your Microsoft 365 Global Administrator credentials, then click GRANT ADMIN CONSENT.
Complete Setup
Review settings and complete the connector creation.
Option B: Google Workspace Target
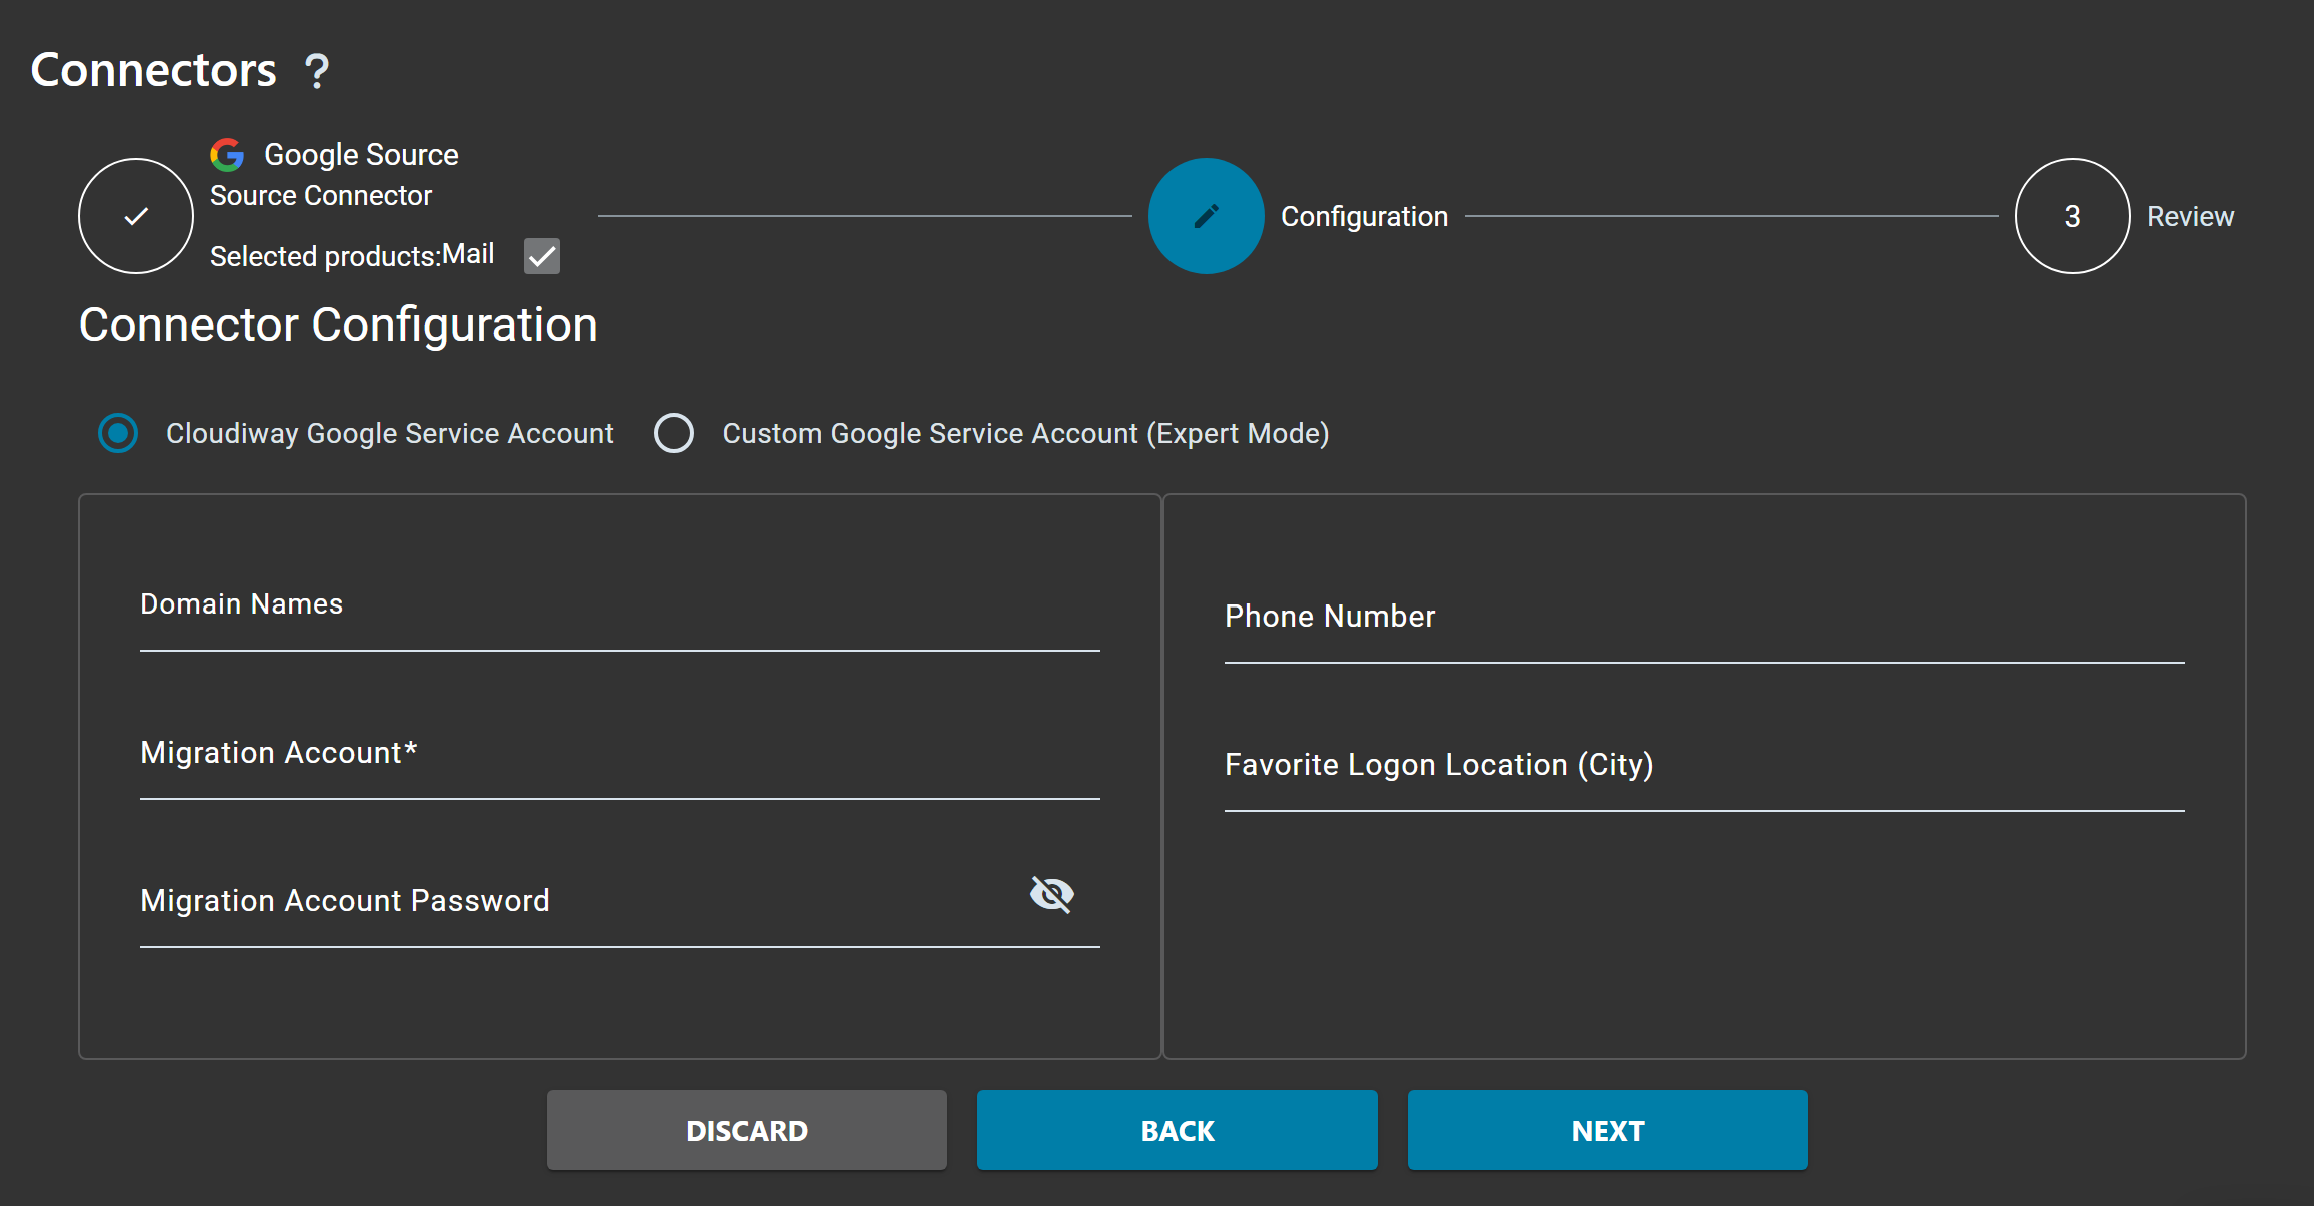
Create New Connector
Go to Connectors > New, select Google Workspace as connector type.
Configure Service Account
Choose Automatic mode and sign in with your Google Workspace Super Admin account to authorize access.
Enable Domain-Wide Delegation
Follow the prompts to enable domain-wide delegation for the Cloudiway service account in your Google Admin Console.
Complete Setup
Review settings and complete the connector creation.
Option C: Exchange On-Premises Target
You can also migrate IMAP to an on-premises Exchange server using EWS (Exchange Web Services).
Create New Connector
Go to Connectors > New, select Exchange On Premises as connector type.
Enter EWS URL
Enter your Exchange Web Services endpoint URL: https://your-exchange-server/EWS/Exchange.asmx
Select Authentication Mode
Choose your authentication method:
- Impersonation: Migration account impersonates each user (requires ApplicationImpersonation role)
- Delegation: Migration account has Full Access rights to each mailbox
- Self Service: Each user provides their own credentials
Complete Setup
Enter the migration account credentials and complete the connector creation.
Step 3: Configure Global Settings
Navigate to Mails > Global Settings to configure your migration options:
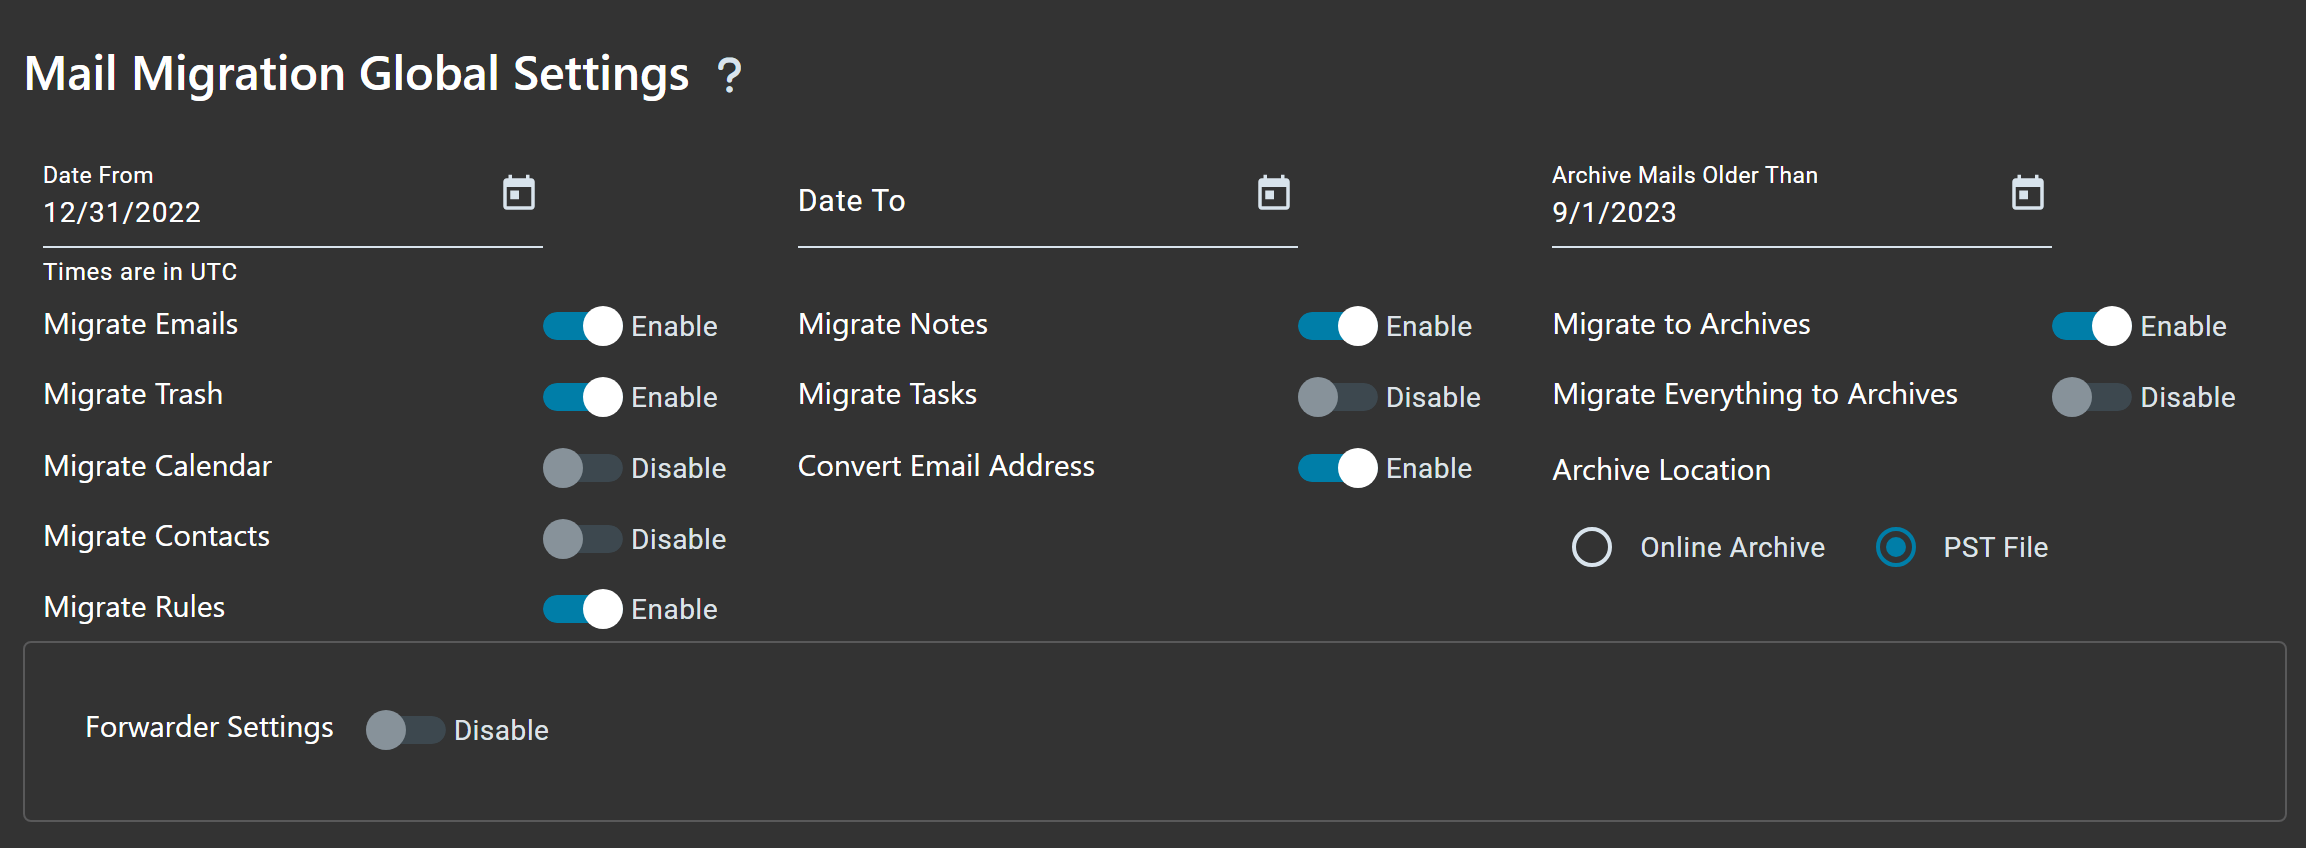
Migration Scope
| Setting | Description |
|---|---|
| Migrate Emails | Enable to migrate email messages from IMAP mailboxes |
| Migrate Trash | Enable to migrate items from the Trash/Deleted Items folder |
Advanced Settings
| Setting | Description |
|---|---|
| Date Filter | Optionally filter items by date range to migrate only recent data |
| Convert Email Address | Rewrites email addresses found in headers from old domain to new domain |
Step 4: Run Migration
Now you can populate the user list and run the migration.
Populate User List
Navigate to Mails > User List to add users for migration. There are three ways to populate the user list:
Option 1: Discovery (Get List)
Under MIGRATION, click on the Get List option:
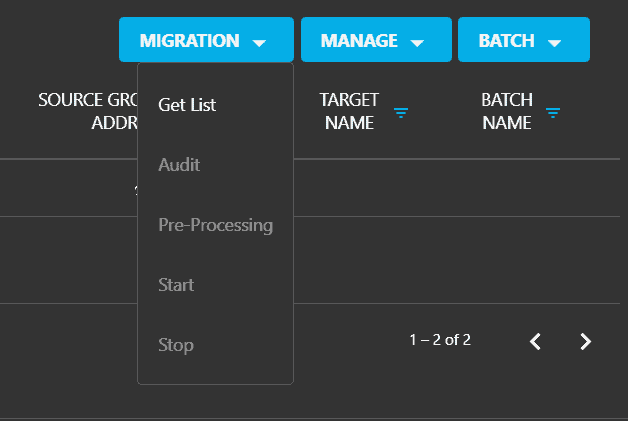
Specify the following parameters:
Source Pool
Select the IMAP source connector you created earlier.
Target Pool
Select the Microsoft 365 or Google Workspace target connector.
Matching Rule
Choose how source emails should be mapped to target emails:
- Mail Exact Match: source email = target email
- Keep Email Prefix Same as Source: only the domain changes
- FirstName.LastName: (e.g., [email protected])
Target Domain
Specify the target domain for the migrated users.
Option 2: Import User List
Click on MANAGE > Import to upload a CSV file containing the users to migrate.
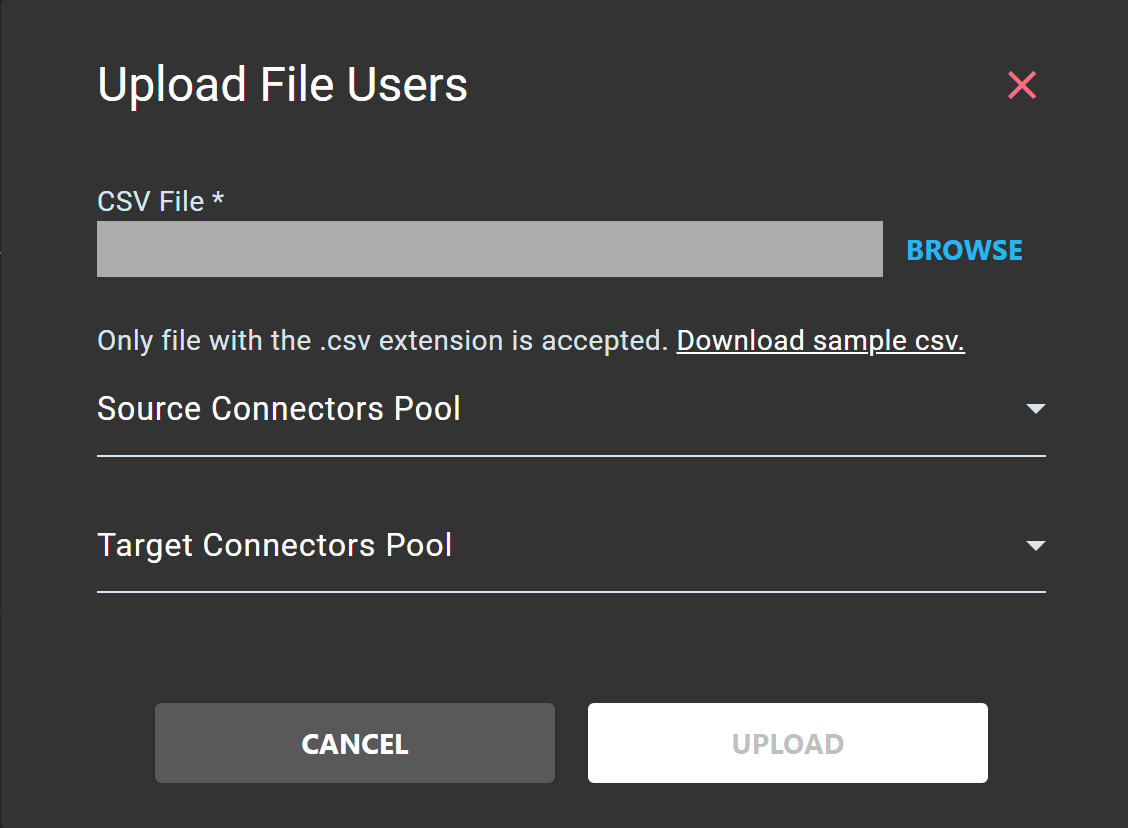
CSV File
Click on BROWSE to select your CSV file. You can click Download sample csv to get a template file.
Source Connectors Pool
Select the IMAP source connector.
Target Connectors Pool
Select the target connector (Microsoft 365 or Google Workspace).
Option 3: Create Manual Entry
Click on MANAGE > Create to manually add individual users. Enter the source IMAP email address and the target email address for each user.
Run Audit (Recommended)
Before migrating, run an Audit task to assess mailbox sizes and identify potential issues:
Select Users
Select the users you want to audit using the checkboxes.
Start Audit
Click MIGRATION > Audit to start the audit process.
Review Results
Check the audit results to see mailbox sizes, item counts, and any errors.
Execute Migration
Once you have reviewed the audit results, you can start the migration:
Select Users or Batches
Select the users you want to migrate. You can migrate all users at once or create batches for phased migration.
Start Migration
Click MIGRATION > Start to begin the migration process.
Monitor Progress
Monitor the migration progress in the dashboard. You can see the status of each user and any errors that occur.
Delta Migration (Optional)
Run a delta migration to sync any new items created since the initial migration. Click MIGRATION > Start again to perform incremental sync.
Special Cases
Postfix IMAP Server
Postfix IMAP servers cannot create admin accounts with universal mailbox access.
Cyrus IMAP Server
Cyrus IMAP servers do not support admin accounts with full permissions to all mailboxes.
Folder Binding Considerations
Cloudiway synchronizes folders between source and target mailboxes before migrating mails. Note that:
- In IMAP or Google, a user can flag a folder to hide it from IMAP
- If a folder is hidden, it and its content will be ignored since Cloudiway cannot access it through IMAP
Frequently Asked Questions
What IMAP servers does Cloudiway support?
Cloudiway supports any IMAP-compliant server including Postfix, Cyrus, Dovecot, hMailServer, and hosted email providers that offer IMAP access.
Can I migrate IMAP without an admin account?
Yes, Cloudiway supports self-service migration where each user provides their own credentials. Users receive an email with a migration link and can start their own migration.
What ports does IMAP migration use?
IMAP uses port 143 for standard connections and port 993 for IMAP over SSL/TLS. We recommend using SSL for secure migrations.
How does magic password authentication work?
Leave the administrator username blank in the connector configuration. The administrator password will then be used as the authentication credential for all users. This is useful for Postfix servers.
Why are some folders not migrated?
In IMAP, users can flag folders to hide them from IMAP access. Hidden folders and their contents are ignored during migration since Cloudiway cannot access them.
Get a free migration quote in minutes — entirely self-service.