MICROSOFT 365 TO MICROSOFT 365 MAIL MIGRATION GUIDE
Overview:
1. Microsoft 365 Mail migration with Cloudiway
How to Video: Microsoft 365 Mail Migration
This guide aims to show you how to perform a Microsoft 365 Mail Migration between Microsoft 365 tenants.
There are several migration methods (Cutover or staged migration) described in the cutover vs staged article. If you plan a long term migration, Cloudiway provides the tools that will allow you to coexist during your transition:
- Calendar coexistence (Free/Busy scheduling)
- Contact synchronization (GALSync)
- Email forwarders
Security
Performance
Numerous parameters can impact the performance of your Microsoft 365 Mail Migration. You can refer to this general article about performances for more information
Audience
This guide is aimed at experienced system administrators who are capable of connecting to remote systems and using a variety of administration tools.
Cloudiway cannot provide support for products and systems that it does not develop. Support of Microsoft 365 should be performed by Microsoft support.
If you are concerned you might have any difficulty completing these steps, please consider engaging our consulting team.
2. Microsoft 365 Mail migration scope
What is migrated?
- Emails and Folders
- Contacts
- Primary and secondary calendars.
- Tasks
- Inbound Rules
- Notes
- Rooms and equipment.
- Shared Mailboxes
- Permissions and delegations on mailboxes and calendars.
- Distribution Lists.
- X500 aliases.
- In-Place/Online Archives.
What is not migrated?
- Out of office messages.
- Attachments to calendar events.
- Public folders are not supported.
- Task steps and “add to my day”.
3.Microsoft 365 Mail migration prerequisites
Before you start, you need the following accounts.
| Name | Description | Location |
| Cloudiway | Account to login to the Cloudiway Platform | https://portal.cloudiway.com |
| Microsoft 365 Administror accounts | Used to configure Azure Active Directory Application and associated permissions in source and target tenants. | https://login.microsoftonline.com |
Protocols
Cloudiway uses Exchange Web Services API (EWS) to migrate emails, contacts, and calendars.
It is using PowerShell for mailbox permissions,shared, rooms and resources.
Your Microsoft 365 Mail Migration takes place over secured TLS 1.2 sessions.
Source Migration Account
To perform the Microsoft 365 Mail Migration , we recommend creating dedicated migration account that will be deleted once the migration is completed.
This migration account is used to access the source mailboxes. It must be configured with multi-factored authentication (MFA) and SSO (ADFS) turned off.
To deactivate MFA on the migration account,see: https://help.cloudiway.com/article/deactivate-mfa-on-your-office365-migration-account/.
A Microsoft 365 account can access up to 100 mailboxes concurrently. Therefore, by default, Cloudiway allows you to migrate 100 concurrent users per connector. To speed up your migration, you can create additional connectors, each with a different migration account. The platform will randomly pickup different connectors to parallelize more migrations.
Source Azure AD (Entra ID) Application
EWS API calls are performed through an Azure AD Application which is granted specific permissions.
You can either create an Azure AD Application manually or let the platform create one for you.
When you create your source Microsoft 365 connector in Automatic mode, an Azure AD Application is automatically created in your source tenant.
If you want to have control over what is created and create yourself the Entra ID Application, please follow this article how to create the Azure Active Directory Application and associated permissions.
Target Migration Account
You must define your target migration account in the same way that you defined your source migration accounts.
Target Azure AD (Entra ID) Application
In the same way that you created automatically or manually your Entra ID source application, you need a Target Entra ID application.
You can let the platform create it for you or create it manually.
Create your users in Microsoft 365
Cloudiway migrates between existing user mailboxes and does not provide a tool to provision user mailboxes. Therefore, the user mailboxes must be created prior to the migration. You can set up user accounts on the target Microsoft 365 tenant in several ways. (The following links are to Microsoft documentation.)
Target : Enable Archiving
Creating a partial archive of emails provides a number of benefits. From a migration perspective, the biggest benefit is reduced bandwidth. End-users who access mail via Outlook have their mailbox locally cached (in .ost file format). After a mail migration, Outlook will download all migrated mailboxes the first time users access their mailboxes. Therefore, if many users are likely to access Outlook at around the same time after migration (for example, if you’ve completed a cutover migration one weekend before staff arrive at 9am Monday morning), your bandwidth might slow down due to a glut of downloads.
This can be avoided by partially migrating data to the online archive. For example, you could choose to migrate all items older than 1 year to a mail archive, which would be performed prior to the final cutover. The data will remain online and accessible from each user’s inbox as an In-Place Archive
folder. The most recent 1 year of emails will be migrated and downloaded when each user first logs in, reducing overall bandwidth usage due to smaller mailbox sizes.
Note: you must ensure that In-Place archiving is switched on within your Exchange Admin center (you can bulk-activate using the instructions on TechNet as https://technet.microsoft.com/enus/library/jj984357(v=exchg.150).aspx).
In-Place archives at the source are treated differently to standard mail and are not migrated by default. You can buy a mail archive quota package to perform an archive migration (see section 7.6.2).
4.Mapping Table
During the Microsoft 365 Mail Migration, Cloudiway uses a mapping table to perform the conversion of email addresses in email headers, calendar items, and mailbox permissions.
Important: the mapping table must be exhaustive, any missing email address will not be converted, and would end up with loss of mailbox permissions, unrepayable emails and broken calendar items. Cloudiway automatically populates this mapping table when source mailboxes are discovered by Get List functionality explained below. However, make sure if the mapping table was populated automatically that you are not missing any email address.
5.Microsoft 365 Mail migration Process
Create the connectors
For Cloudiway to migrate your Mailboxes, it needs to be able to communicate with both your source and target Microsoft 365 tenants. To do this, Cloudiway uses connectors. You will need to set up a connector for each source tenant you wish to migrate and each target tenant that mail should be migrated to. Follow the steps from this page to configure your connectors.
For large projects, it’s possible to create multiple connectors that will be used in parallel from connector pools. Please contact Cloudiway consulting services if you need to set up such configuration.
Configure the Global Settings
For Cloudiway to migrate your Mailboxes, it needs to be able to communicate with both your source and target Microsoft 365 tenants. To do this, Cloudiway uses connectors. You will need to set up a connector for each source tenant you wish to migrate and each target tenant that mail should be migrated to. Follow the steps from this page to configure your connectors.
For large projects, it’s possible to create multiple connectors that will be used in parallel from connector pools. Please contact Cloudiway consulting services if you need to set up such configuration.
Manage Migration List
- CSV file import.
- Cloudiway’s mailbox discover tool (Get List).
- Add manuallt a user.
CSV Import
If you have a CSV file of all your users, you can upload the file to Cloudiway. The file must have the following fields in the header row:
FirstName;LastName;SourceEmail;TargetEmail;SourceRecipientType;TargetRecipientType;BatchName
How To Fill The Users/Groups CSV File?
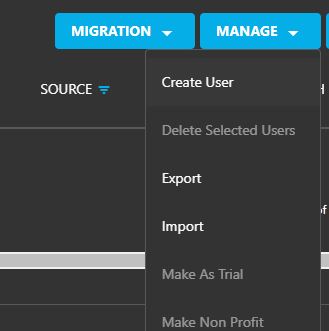
Click on MANAGE and select Import.
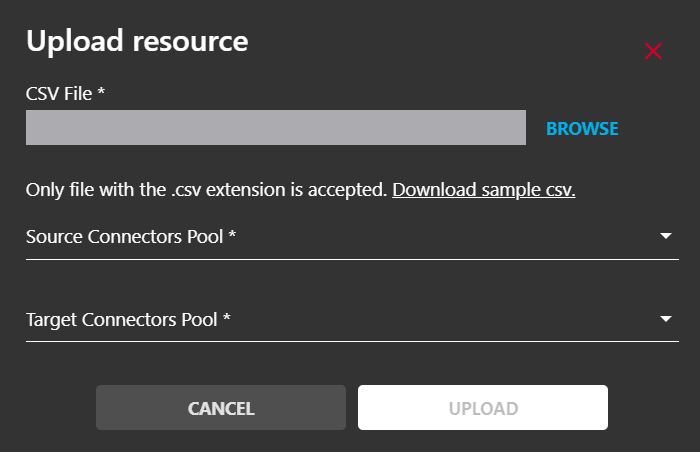
If required, click on Download sample CSV and add your users to the CSV file. When you have a complete CSV file with the correct headers, import it by clicking on the BROWSE button.
Select the appropriate connectors in the Source and Target Connectors Pool fields, then click on the UPLOAD button.
If you see any error messages, check your CSV file to ensure it has seven columns, each with a separator (including the last) and try uploading again.
Discovery (Get List)
Cloudiway’s Get List (Discovery) tool helps you to retrieve mailboxes from your source tenant. There are 5 Get List tools corresponding to the different sections:
- User List: to discover only user mailboxes.
- Shared Mailboxes: to discover only shared mailboxes.
- Room Equipment: to discover only room and equipment mailboxes.
- Distribution list: to discover only distribution lists.
- Archive: to discover only archive mailboxes.
Under each of those sections, go to Migration, and select Get List.
Or Click on Discovery in the header menu and then select the action of your choice.
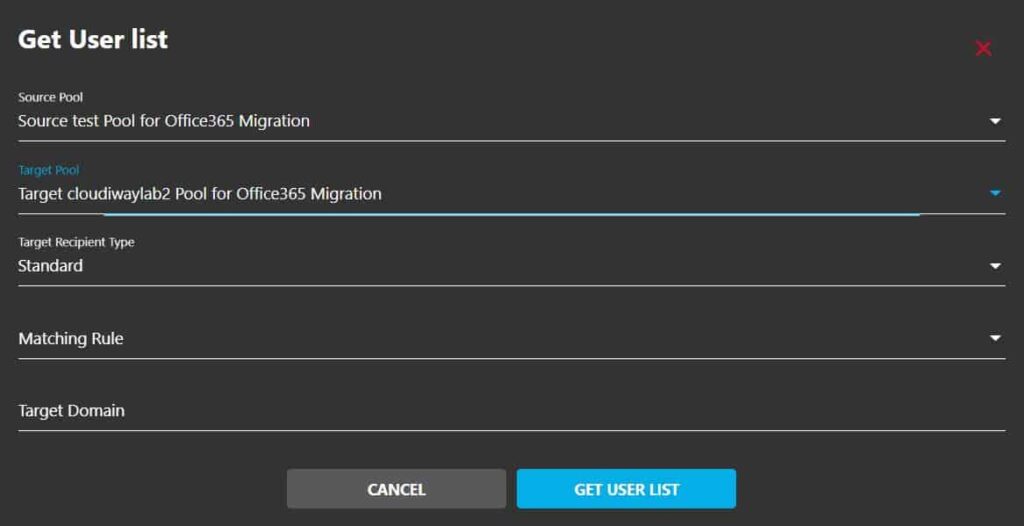
Enter the Source and Target Pool of connectors.
Select the Target Recipient type;
- Then specify the Matching Rule:
Mail Exact Match: the source email = the target email (bob.marley@sourcedomain.com > bob.marley@sourcedomain.com) - Keep Email Prefix Same as Source: only the domain name changed (bob.marley@sourcedomain.com > bob.marley@targetdomain.com)
- FirstName.LastName (i.e. bob.marley@targetdomain.com)
- F.LastName (i.e. b.marley@targetdomain.com)
- FLastName (i.e. bmarley@targetdomain.com)
- LastNameF (i.e. marleyb@targetdomain.com)
Target Domain: Specify the target domain assigned to the target emails addresses in the list.
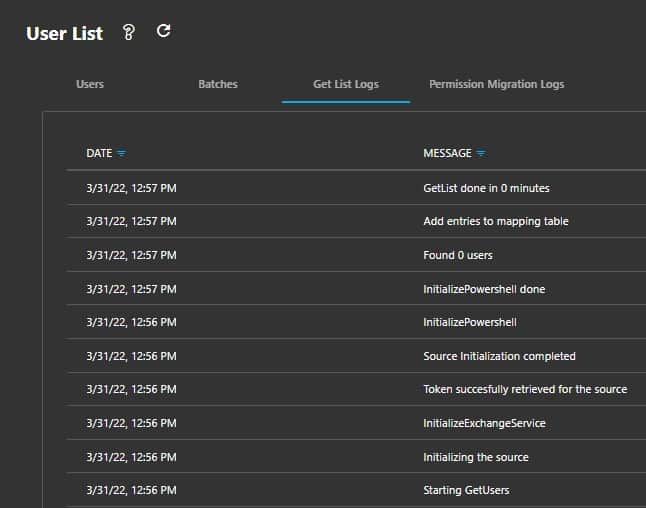
You can monitor the progress of this task in the User List / Get List Logs.
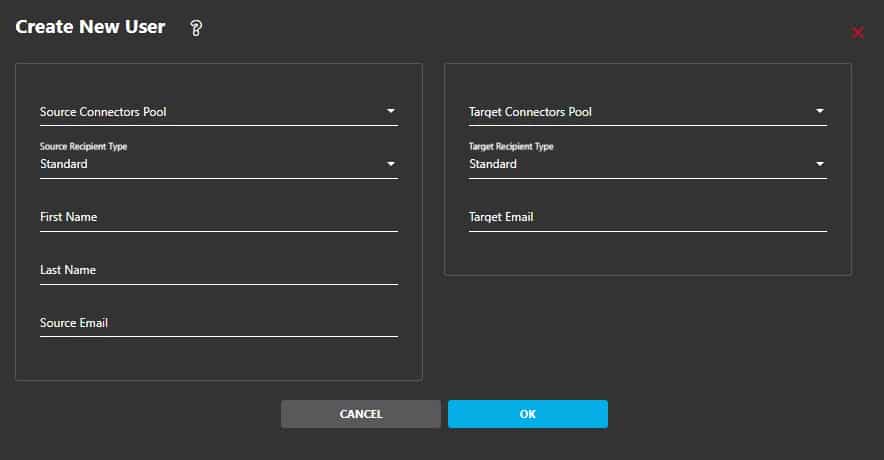
Manual Creation
Many of our first-time customers create a single user for testing purposes. This provides a means of watching the migration process without affecting all users.
Click on MANAGE > Create User and enter the following details:
User Migration
Cloudiway needs to communicate with both your source and target Microsoft 365 tenants. To do this, Cloudiway uses connectors. You will need to set up a connector for each source and target tenant. Follow the steps from this page to configure your connectors.
For large projects, it’s possible to create multiple connectors that will be used in parallel from connector pools. Please contact Cloudiway consulting services if you need to set up such configuration.
Shared Mailboxes Migration
You are ready to start your Microsoft 365 mail migration,
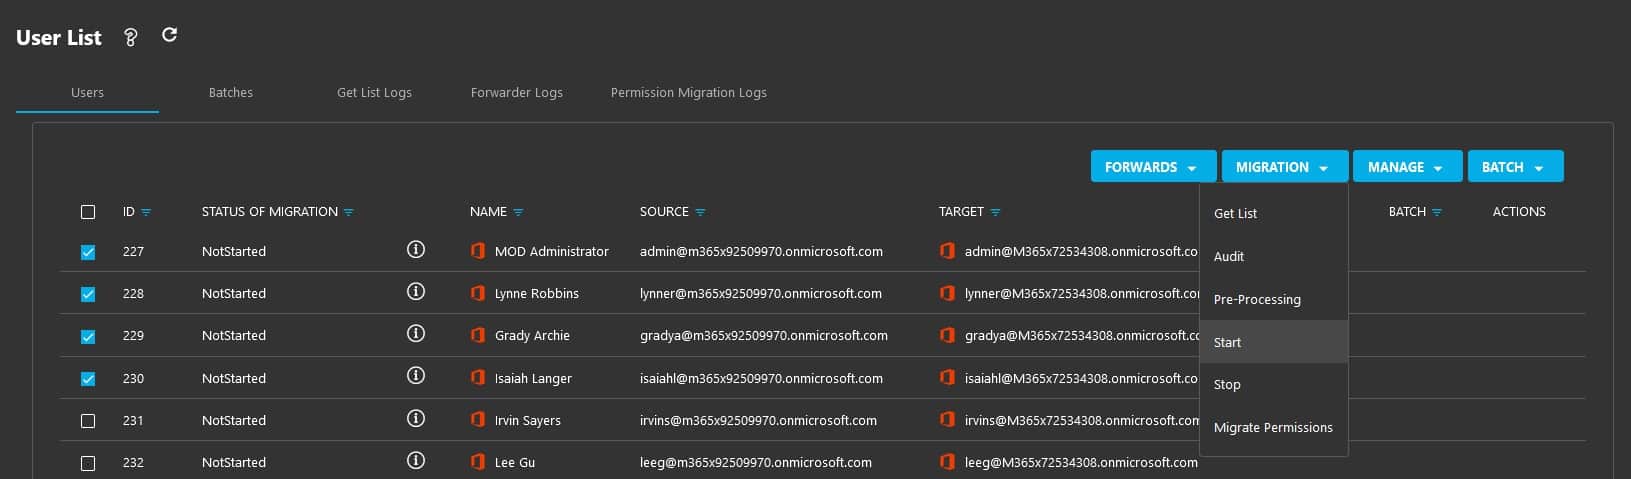
First of all, we recommend you run a test migration on a single user first to check that your configuration produces the outcome you expect.
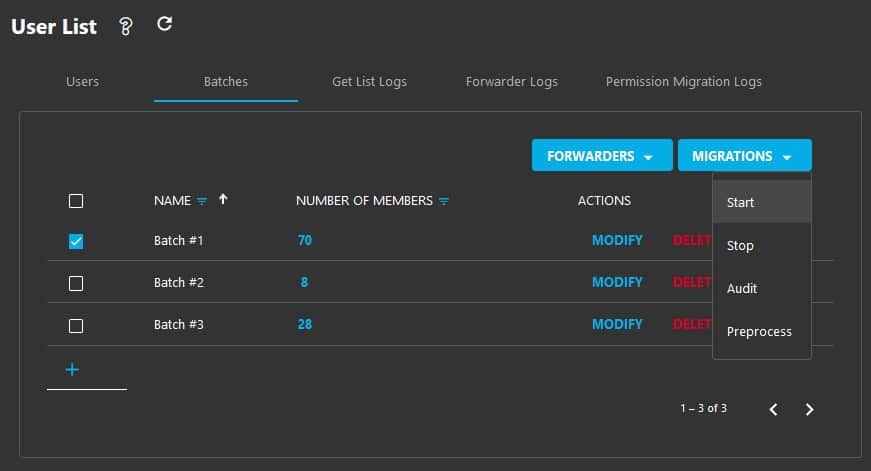
To start your migration, select the users or batch you wish to migrate and click MIGRATION/Start.
This will schedule your migrations that should normally start within 2 minutes.
Rooms & Equipment Migration
Cloudiway provides a tool to provision and migrate the shared mailboxes.
The Shared Mailboxes migration tool is accessible under the Mails Migration tool
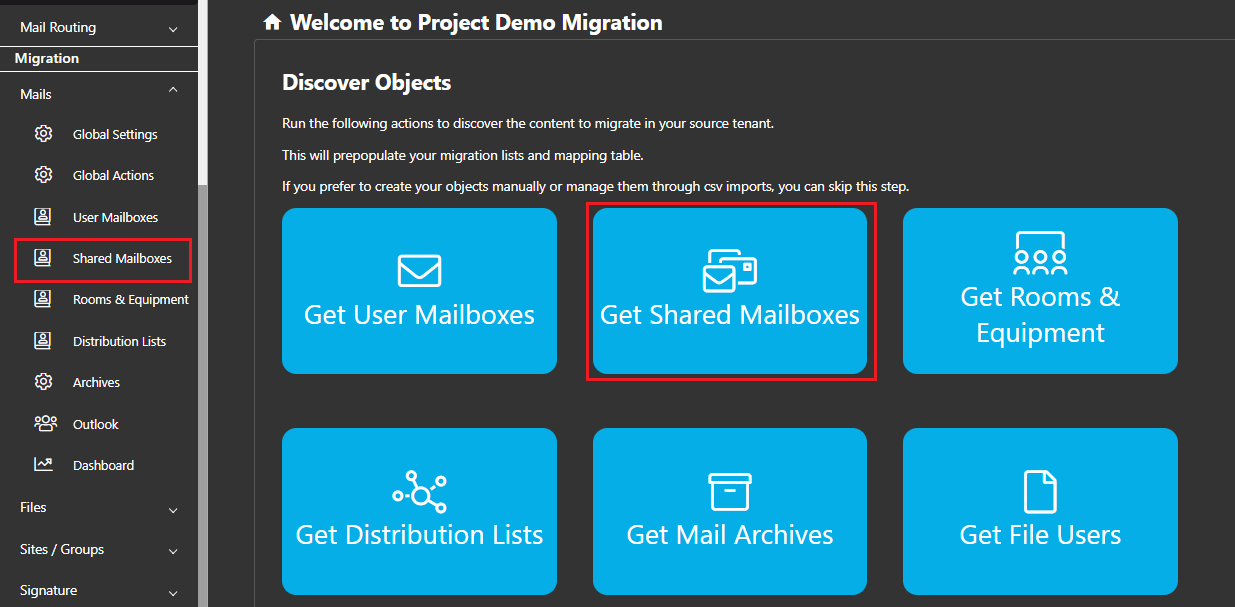
The migration process is similar to the user migration process.
The only difference is that you once you have run the discovery process, you must run the preprocessing task before the migration. The preprocessing task will recreate the shared mailboxes in Microsoft 365. Once done, you can start the migration to migrate its content.
Distribution Lists Migration
Similarly to the Shared Migration process, you can migrate the rooms and equipment from its specific submenu.
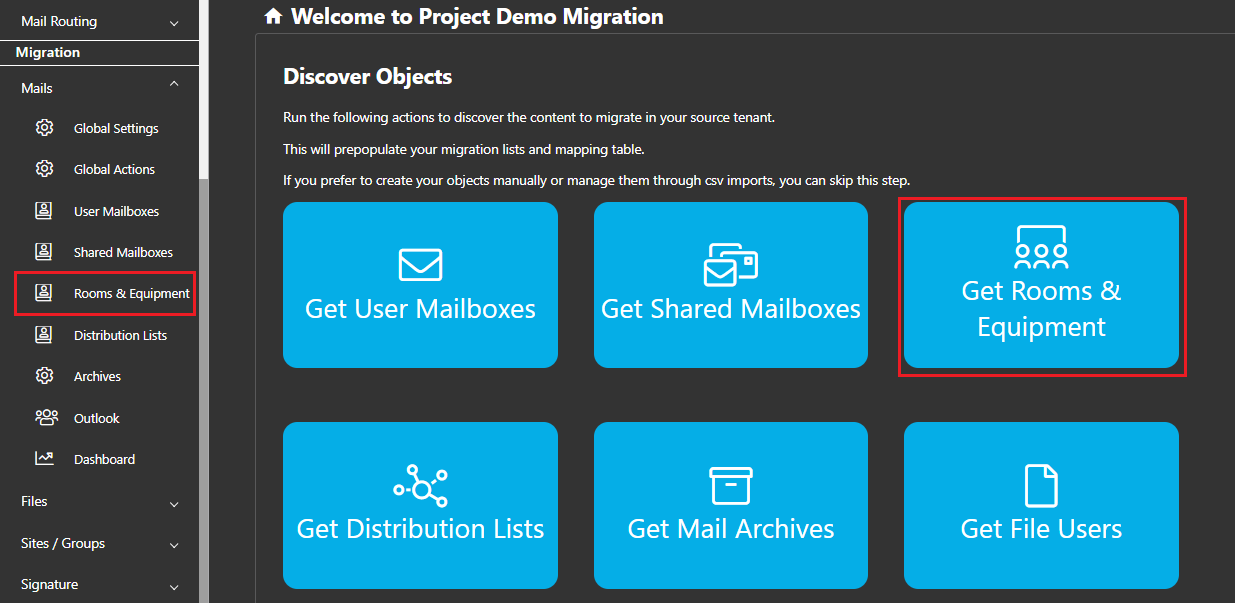
The migration process is then similar.
Before starting the migration, start the prerprocessing task. It will recreate the Rooms and Equipment in the target tenant.
Migration of Permissions
Migrate from archives
Migrate to archives
6.Migrate by batches
You can create user batches from the Batches tab to easily group subset of mailboxes. Click on the + icon and enter a batch name:
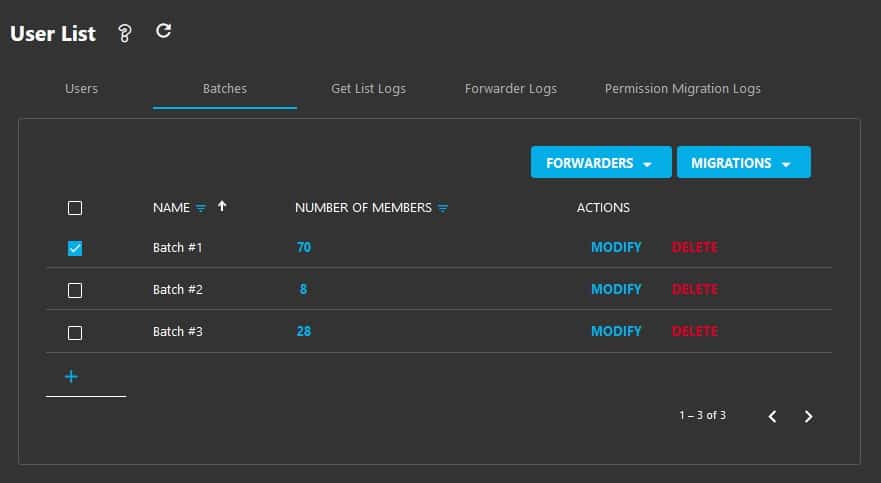
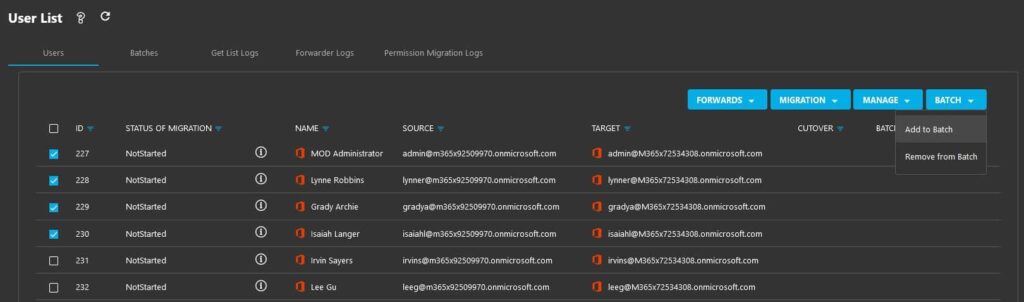
Once you have created the different batches, from the Users tab, select the users that you want to assign to a specific batch, click on the BATCH button and Add to Batch.
Once your batches are defined, you can easily start the migration of any batch. Just select the batch and click on Migrations / Start
7. Domain Migration
A Microsoft 365 Mail Migration project may require to move a domain name between two tenants.
Moving a domain name between two Microsoft 365 tenants can be tricky: the domain name can only be attached to one Office 365 tenant at a time. Microsoft documents how to remove a domain and advises that it may take several hours. Therefore, you may have a downtime.
To avoid this downtime, Cloudiway provides a solution that makes the transition trouble-free. Cloudiway’s mail relay enables emails to continue to be received and delivered to the correct inboxes during a domain name change. Mail headers are not modified.
Once you’ve pointed your MX records to our mail relay, it will deliver incoming mails to the target. This will allow you to detach your domain without interruption.
During migration, Outlook profiles are not recreated. The creation of Outlook profiles is straightforward, this article describes how to create an Outlook profile.
8. Switch domain task
If you have moved the source domain before performing one or more delta passes, the Switch Domain global action will need to be used.
see :
Switch Domain Global Action
9. Delta passes
Cloudiway is a migration platform, not a synchronisation platform. For this reason, we are limiting the number of delta passes that you can run. You can submit as many migration passes as you want for 3 months and until consuming the amount of GBs allowed by the assigned licenses but usually, you only need one before the cutover and another after the cutover. Find out more about the delta passes mechanism.
Cloudiway is an incremental migration platform that supports delta passes. Every time you restart the migration of a mailbox, only items that haven’t already been copied to the target will be migrated and for those already migrated items that have been modified in the source will be updated in the target. The platform, therefore, does not duplicate items in the target, just updates them.
The migration strategy usually consists of at least 2 migration passes, one before the cutover and another pass after the cutover:
- 1st migration pass: which migrates the majority of the mailbox. Select mailboxes, click on MIGRATION, then the Start button. Explained below in more detail.
- 2nd migration pass, delta pass: which migrates what hasn’t been migrated and updates modified items. Select mailboxes, click on MIGRATION, then the Start button. Explained below in more detail.
- 3rd migration pass, delta pass: 24 hours after cutover you can submit an additional delta pass to make sure no residual email is left behind due to DNS propagation delays. Select mailboxes, click on MIGRATION, then the Start button. Explained below in more detail.
To start a delta pass, simply restart the migration and the platform takes care of everything.
Delta Pass During Mail Migration
10. Other migration
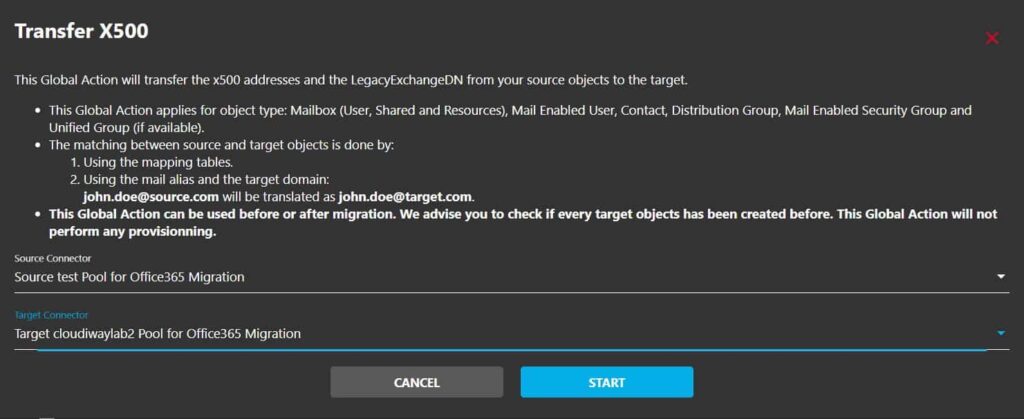
LegacyExchangeDN migration
From the Transfer X500 section of Global Actions, you can migrate the X500 addresses and LegacyExchangeDN from your source mailboxes to your target mailboxes.
Select your Source and the Target, click on START.
11. Migrate From / To Archives
Migrate From Archives
To migrate your archives, create your users from the Archive menu. You can add entries manually, through a Discovery or by importing a CSV file.


Once your entries are created, go to MIGRATION. Select the archives to migrate then Start.
Note: by default, archives are migrated to archives. You can eventually decide to migrate an archive to a standard mailbox.
Migrate To Archives
To migrate content to archives, In-Place archiving must be enabled for the user, learn more: https://technet.microsoft.com/enus/library/jj984357(v=exchg.150).aspx.
The Cloudiway platform can migrate mails to the Microsoft 365 archive or to a PST file that will be uploaded to the OneDrives of the users.
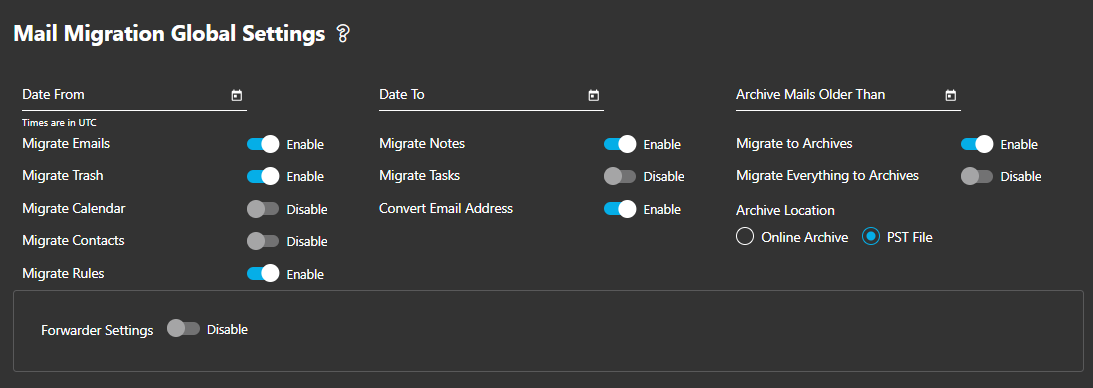
To migrate to archives:
1.) in the Global settings, enable Migrate to Archives
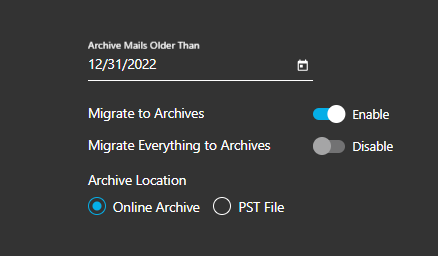
2.) Select the destination: Online Archive or PST File.
If you select PST file, the PST will be automatically uploaded to the OneDrive of the target user in a folder named PST.
3.) Select which mails are going to the archive and which mails are going to the standard mailboxes. Mails that are pushed to the archives are the Mails Older Than date or all the maild if you select Migrate Everything to Archives.
Special Note:
Date From and Date To are filters that determine what is extracted from the source mailbox. If nothing is selected, all the maillbox is extracted. Once the mails are extracted from the source, Archive mails Older than or Migrate Everything to Archives is then evaluated to the determine where the extracted mail is pushed (to the online mailbox or to the archive).
12. Troubleshooting
Cloudiway provides an extensive Help Center, also known as knowledge base, with many resources, including common error messages, guides, and downloads.
Please visit the Help Center here (where you can search for keywords or read through topics): https://help.cloudiway.com/
The Help Center also contains information on how you can ask for further support.