
Microsoft 365 to Gmail Migration Guide
This guide shows you how to migrate your Microsoft 365 mailboxes, calendars, and contacts to Google Workspace Gmail using Cloudiway.
Overview
This Microsoft 365 to Gmail Migration Guide shows you how to migrate your Microsoft 365 mailboxes, calendars, and contacts to Google Workspace Gmail.
Cloudiway uses Microsoft Graph API and Exchange Web Services to read data from Microsoft 365. It uses Google APIs (Gmail API, Calendar API, People API, Tasks API) to write data to Google Workspace. All network operations are performed over TLS 1.2.
Looking for our Microsoft 365 to Google Workspace Migration Solution?
Discover all features, pricing, and use cases for Microsoft 365 to Google Workspace migration.
View Solution PagePrerequisites
To perform the Microsoft 365 to Gmail Migration, you need to configure both an Entra ID Application and a Google Service Account.
Microsoft 365 Requirements (Source)
Cloudiway uses an Entra ID Application with Application Permissions to access Microsoft 365 mailboxes:
App Registration
Create an application in Microsoft Entra ID
API Permission
Microsoft 365 Exchange Online: full_access_as_app (Application)
Admin Consent
Granted by a Global Administrator
Google Workspace Requirements (Target)
Cloudiway uses a Google Service Account with domain-wide delegation to access Google Workspace:
Google Cloud Project
Create a project in Google Cloud Console (or use automatic mode)
Service Account
Create a Service Account with domain-wide delegation
API Scopes
Gmail, Calendar, People, and Tasks API scopes enabled
What is Migrated
The following items are migrated during a Microsoft 365 to Gmail migration:
Limitations
The following items are NOT migrated:
- Email signatures
- Out-of-office / automatic replies
- Calendar attachments
Migration Process
The Microsoft 365 to Gmail migration is a five-step process:
Step 1: Create Connectors
For Cloudiway to migrate your mailboxes, it needs to communicate with both your source Microsoft 365 and target Google Workspace tenants. To do this, Cloudiway uses connectors.
Microsoft 365 Connector (Source)
Go to Connectors > New, select Microsoft 365 as connector type, set a connector name and select Mail. Click Next to configure the connector.
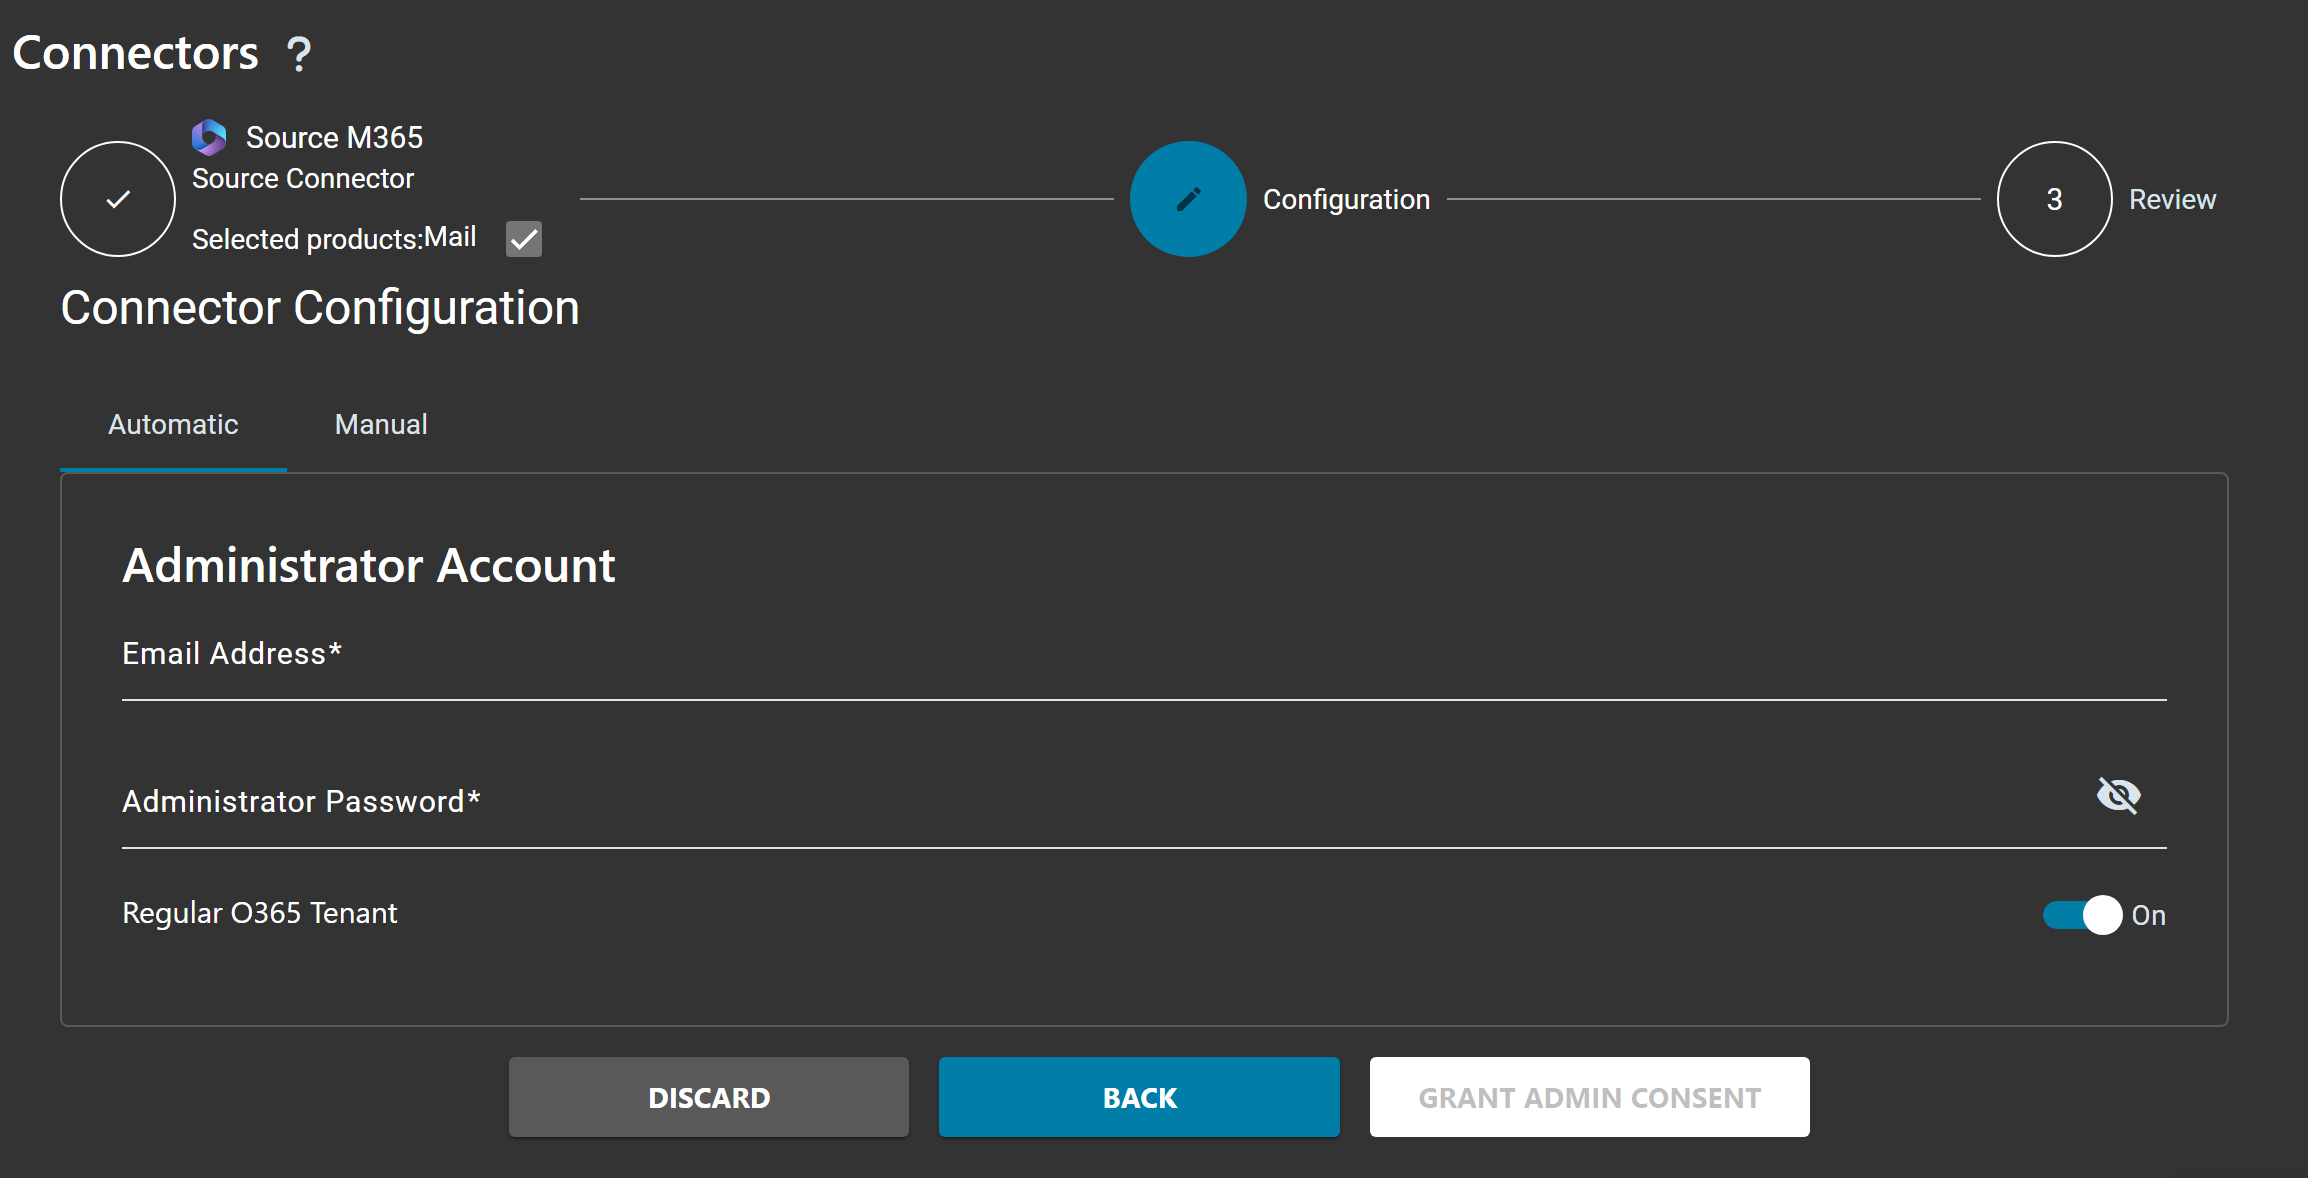
| Field | Description |
|---|---|
| Automatic | Cloudiway automatically creates and configures the Entra ID Application (recommended) |
| Manual | Manually configure your own Entra ID Application |
| Email Address | Microsoft 365 Global Administrator email address |
| Administrator Password | Password for the Administrator account |
| Regular O365 Tenant | Enable for standard Microsoft 365 tenants. Disable for GCC or government tenants. |
| Grant Admin Consent | Click to authorize Cloudiway to access your Microsoft 365 tenant |
Google Workspace Connector (Target)
Go to Connectors > New, select Google as connector type, set a connector name and select Mail. Click Next to configure the connector.

| Field | Description |
|---|---|
| Cloudiway Google Service Account | Use the Cloudiway-managed service account (recommended) |
| Custom Google Service Account | Expert mode - use your own Google Service Account |
| Domain Names | Your Google Workspace domain(s) |
| Migration Account | Google Workspace Super Admin email address |
| Migration Account Password | Password for the Super Admin account |
Step 2: Configure Global Settings
After setting up source and target connectors, configure your global settings. Navigate to Mails > Global Settings.
Migration Settings
| Setting | Default | Description |
|---|---|---|
| Migrate Emails | Enable | Migrates email messages from Microsoft 365 to Gmail. |
| Migrate Deleted Items | Enable | Migrates items from the Deleted Items folder. |
| Migrate Calendar | Disable | Migrates Outlook Calendar events, attendees, and recurring meetings to Google Calendar. |
| Migrate Contacts | Disable | Migrates Outlook Contacts to Google Contacts. |
| Migrate Rules | Enable | Migrates Outlook rules to Gmail filters. |
| Migrate Tasks | Disable | Migrates Outlook Tasks to Google Tasks. |
| Convert Email Address | Enable | Rewrites email addresses found in email headers, calendar items, and contacts. Recommended to leave on. |
Date Filters
| Setting | Default | Description |
|---|---|---|
| Date From | Empty | Only migrate emails newer than this date. If empty, no lower date limit is applied. |
| Date To | Empty | Only migrate emails older than this date. If empty, no upper date limit is applied. |
Save Your Settings
Click on the Save button to apply your global settings.
Step 3: Fill User List
The User List contains all Microsoft 365 mailboxes to be migrated. There are three ways to populate it:
Option 1: Discovery (Get List)
Click on User List > Get List to automatically discover all mailboxes from the source Microsoft 365 tenant.
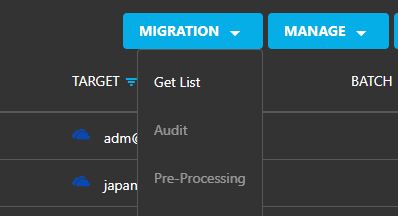
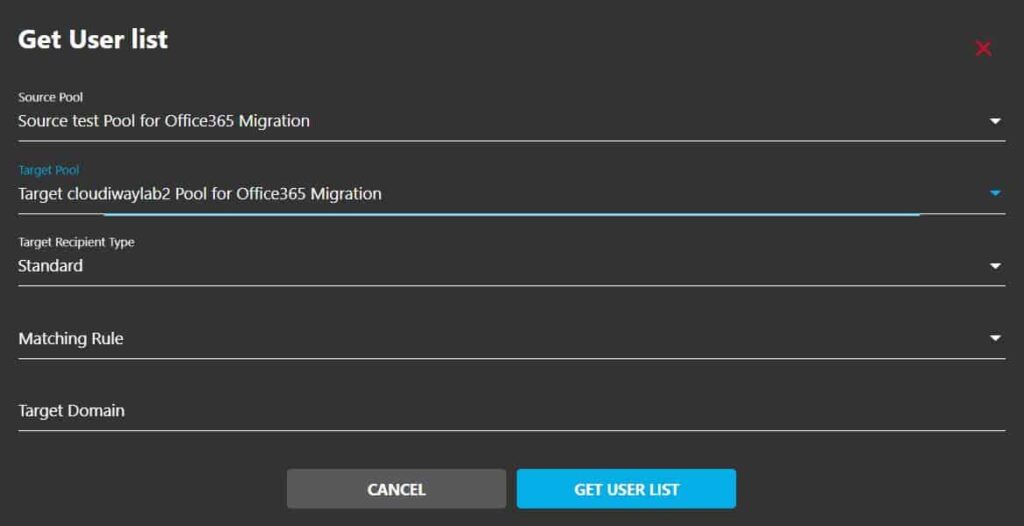
Then specify the following parameters:
Target Recipient Type
Select Mail as the Target Recipient Type.
Matching Rule
Choose how source emails should be mapped to target emails:
- Mail Exact Match: source email = target email ([email protected] → [email protected])
- Keep Email Prefix Same as Source: only the domain changes ([email protected] → [email protected])
- FirstName.LastName: (e.g., [email protected])
- F.LastName: (e.g., [email protected])
- FLastName: (e.g., [email protected])
- LastNameF: (e.g., [email protected])
Target Domain
Specify the target Google Workspace domain for the migrated users.
Option 2: Import User List
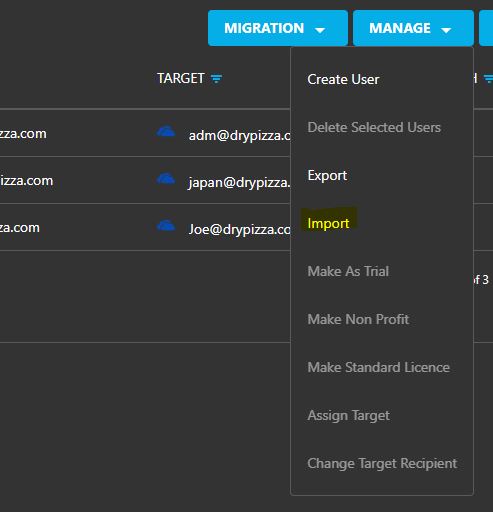
Click on User List > Import to upload a CSV file containing the users to migrate.
Prepare your CSV file
Create a CSV file with the source and target email addresses. For more details on the syntax of the CSV file, read our guide: How to Fill the Users/Groups CSV File
Click on Browse
Click on the BROWSE button to open the file selector.
Select your CSV file
Locate your CSV file on your computer and select it.
Select Connectors
Select the appropriate connectors in the Source and Target fields.
CSV File Format

Option 3: Create Manual Entry
Click on User List > Create to manually add individual users. Enter the source Microsoft 365 email address and the target Google Workspace email address for each user.
Step 4: Verify Mapping Table
Cloudiway automatically populates this mapping table when source mailboxes are discovered. Make sure that the mapping table was populated correctly and that you are not missing any email addresses.
If you make an error in your mapping table, you will have to erase everything and restart the migration with new licenses.
Ensure that Microsoft 365 email addresses are correctly mapped to their corresponding Google Workspace email addresses.
Step 5: Run Migration
Now that you have performed all the pre-migration steps, you're ready to migrate.
- Verify that the target email address is correct for each user
- Ensure the target account already exists in Google Workspace
- Ensure the target account has a valid Google Workspace license assigned
Important: Cloudiway does not provision user accounts. All target accounts must be created and licensed before starting the migration.
Start Migration
- Under the Users tab, select all the users you want to migrate
- Click on MIGRATION
- Click the Start button
The migration will start as soon as there is a free spot on the platform. You can monitor your migration by clicking on an entry and checking the logs.
Delta Pass
Cloudiway is an incremental migration platform that supports delta passes.
Every time you restart the migration of a mailbox:
- Only items that haven't already been copied to the target will be migrated
- Items that have been modified in the source will be updated in the target
- The platform does not duplicate items, just updates them
How to Start a Delta Pass
To start a delta pass, simply restart the migration and the platform takes care of everything.
Delta Pass Limitations
- You can submit as many migration passes as you want for 3 months
- Until consuming the amount of GBs allowed by the assigned licenses
- Usually, you only need one pass before the cutover and another after the cutover
Frequently Asked Questions
How are Outlook folders migrated to Gmail?
Outlook folders are converted to Gmail labels. Cloudiway preserves the folder hierarchy by creating nested labels in Gmail that mirror the original folder structure.
What happens to Outlook calendar events?
Outlook calendar events are migrated to Google Calendar including recurring events, attendees, reminders, and event details. Both primary and secondary calendars are supported.
Are Outlook contacts migrated?
Yes, Outlook contacts are migrated to Google Contacts including contact details, photos, and contact groups.
Does Cloudiway support delta passes?
Yes, Cloudiway supports delta passes. Every time you restart the migration, only items that haven't been copied will be migrated. You can submit migration passes for 3 months within your license quota.
Do I need admin access to both platforms?
Yes, you need Global Admin access to Microsoft 365 and Super Admin access to Google Workspace. However, Cloudiway can automatically create and configure the required Entra ID Application and Service Account for you.
Get a free migration quote in minutes — entirely self-service.