
Google Vault Mail Migration User Guide
This guide shows you how to migrate Google Vault mail archives to Microsoft 365 using Cloudiway. Export permanently deleted emails and preserve eDiscovery data for compliance.
Overview
This Google Vault Mail Migration User Guide shows you how to migrate your Google Vault mail archives to Microsoft 365. Cloudiway exports Vault data to PST files and uploads them directly to Microsoft secure blob storage for import.
Looking for our Google Vault Migration Solution?
Discover all features, pricing, and use cases for Google Vault archive migration.
View Solution PagePrerequisites
To perform the Google Vault mail archive migration, you need to configure your Google Workspace and Microsoft 365 environments with the appropriate permissions.
Google Workspace Requirements
Cloudiway requires access to your Google Workspace environment to read Google Vault archives:
Super Admin Account
Google Workspace Super Admin credentials for authentication
Vault API Access
Google Service Account with Vault API enabled and domain-wide delegation
Vault Role
Migration account must have Vault privileges assigned in Google Admin Console
Microsoft 365 Requirements (Target)
Cloudiway uploads PST files directly to Microsoft secure blob storage:
Global Admin
Microsoft 365 Global Administrator access for import service
Import Service Access
Microsoft 365 data import service access for PST upload
Archive License
Cloudiway Archive migration license (separate from mailbox license)
What is Migrated
The following items are migrated during a Google Vault mail archive migration:
Limitations
The following items are NOT migrated and require manual recreation:
- Vault Holds (Legal Holds)
Legal holds cannot be automatically transferred and must be recreated in Microsoft 365 Purview after migration.
- Audit Logs
Google Vault audit logs are not migrated as they are platform-specific. Export audit logs separately before migration.
- Retention Policies
Retention rules need to be recreated in Microsoft 365 retention policies. Configure equivalent policies in Microsoft Purview.
Migration Process
The Google Vault mail archive migration is a five-step process:
Step 1: Create Connectors
For Cloudiway to migrate your Google Vault archives, it needs to communicate with both your source Google Workspace and target Microsoft 365 tenants. You will need to set up a connector for each source tenant and each target tenant.
Google Vault Source Connector
Create a Google Vault connector to connect to your Google Workspace environment.
Navigate to Connectors
Click on Connectors > New in the Cloudiway platform.
Select Connector Type
Select Connector Type: Google Vault and set a Connector Name with Mail selected as product.
Choose Service Account Mode
Select either Cloudiway Google Service Account (recommended) or Custom Google Service Account (Expert Mode).
Configure Settings
Enter your Domain Names and Migration Account. Configure the Deleted items option and optionally enable Migrate All Google Chats and Hangouts/Google Talk Messages.
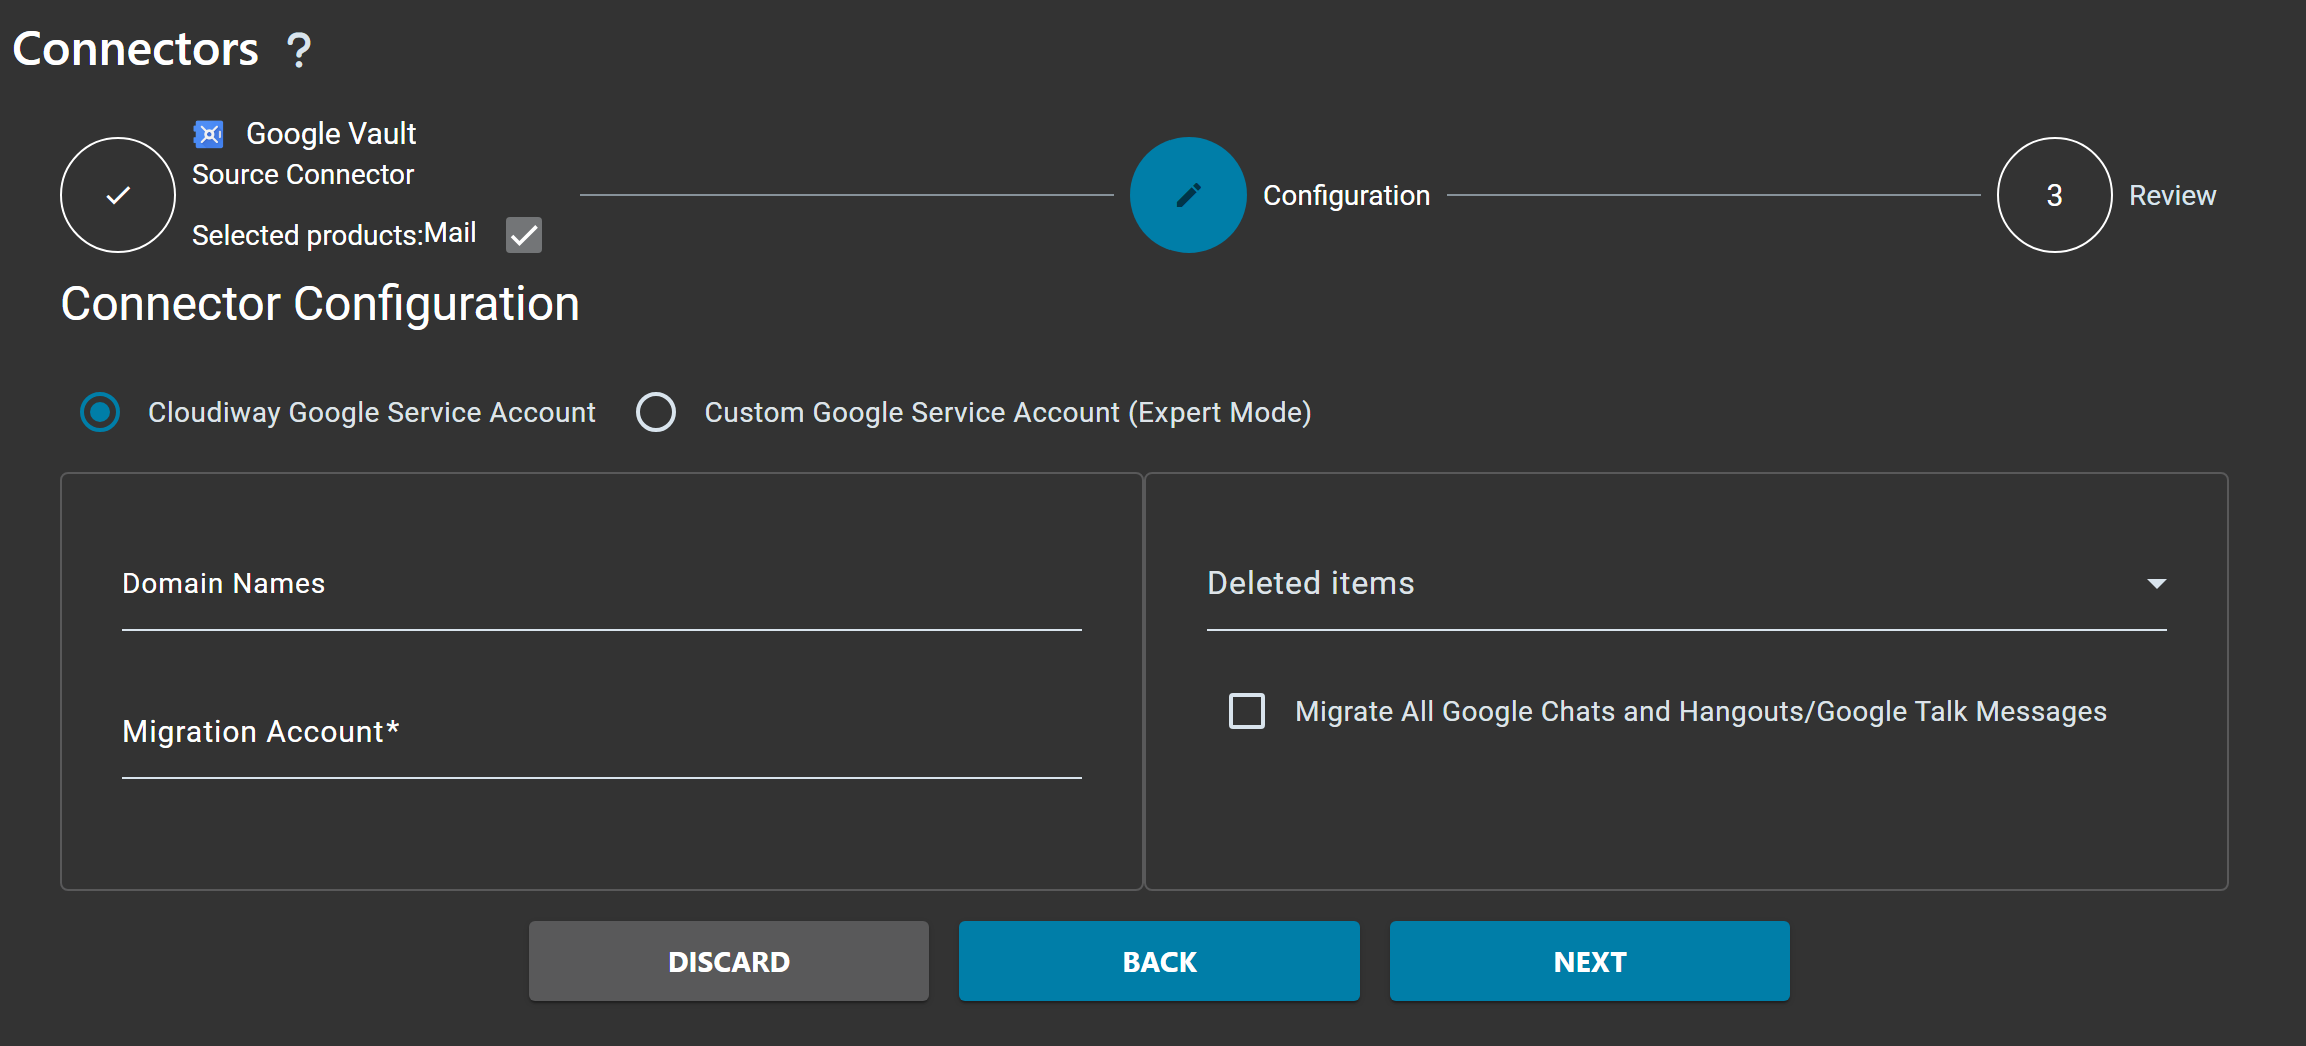
| Field | Description |
|---|---|
| Domain Names | Your Google Workspace domain(s) |
| Migration Account | Google Workspace Super Admin email with Vault role |
| Deleted items | Select which items to migrate from the Vault archive |
| Migrate All Google Chats... | Enable to include Google Chats and Hangouts/Google Talk Messages in the migration |
PST Import Target Connector
Create a PST Import connector to upload the exported Vault data to Microsoft 365 via the PST Import Service. The Cloudiway platform automates the upload of PST files to Office 365.
Navigate to Connectors
Click on Connectors > New in the Cloudiway platform.
Select Connector Type
Select Connector Type: PST Import and set a Connector Name with Mail selected as product.
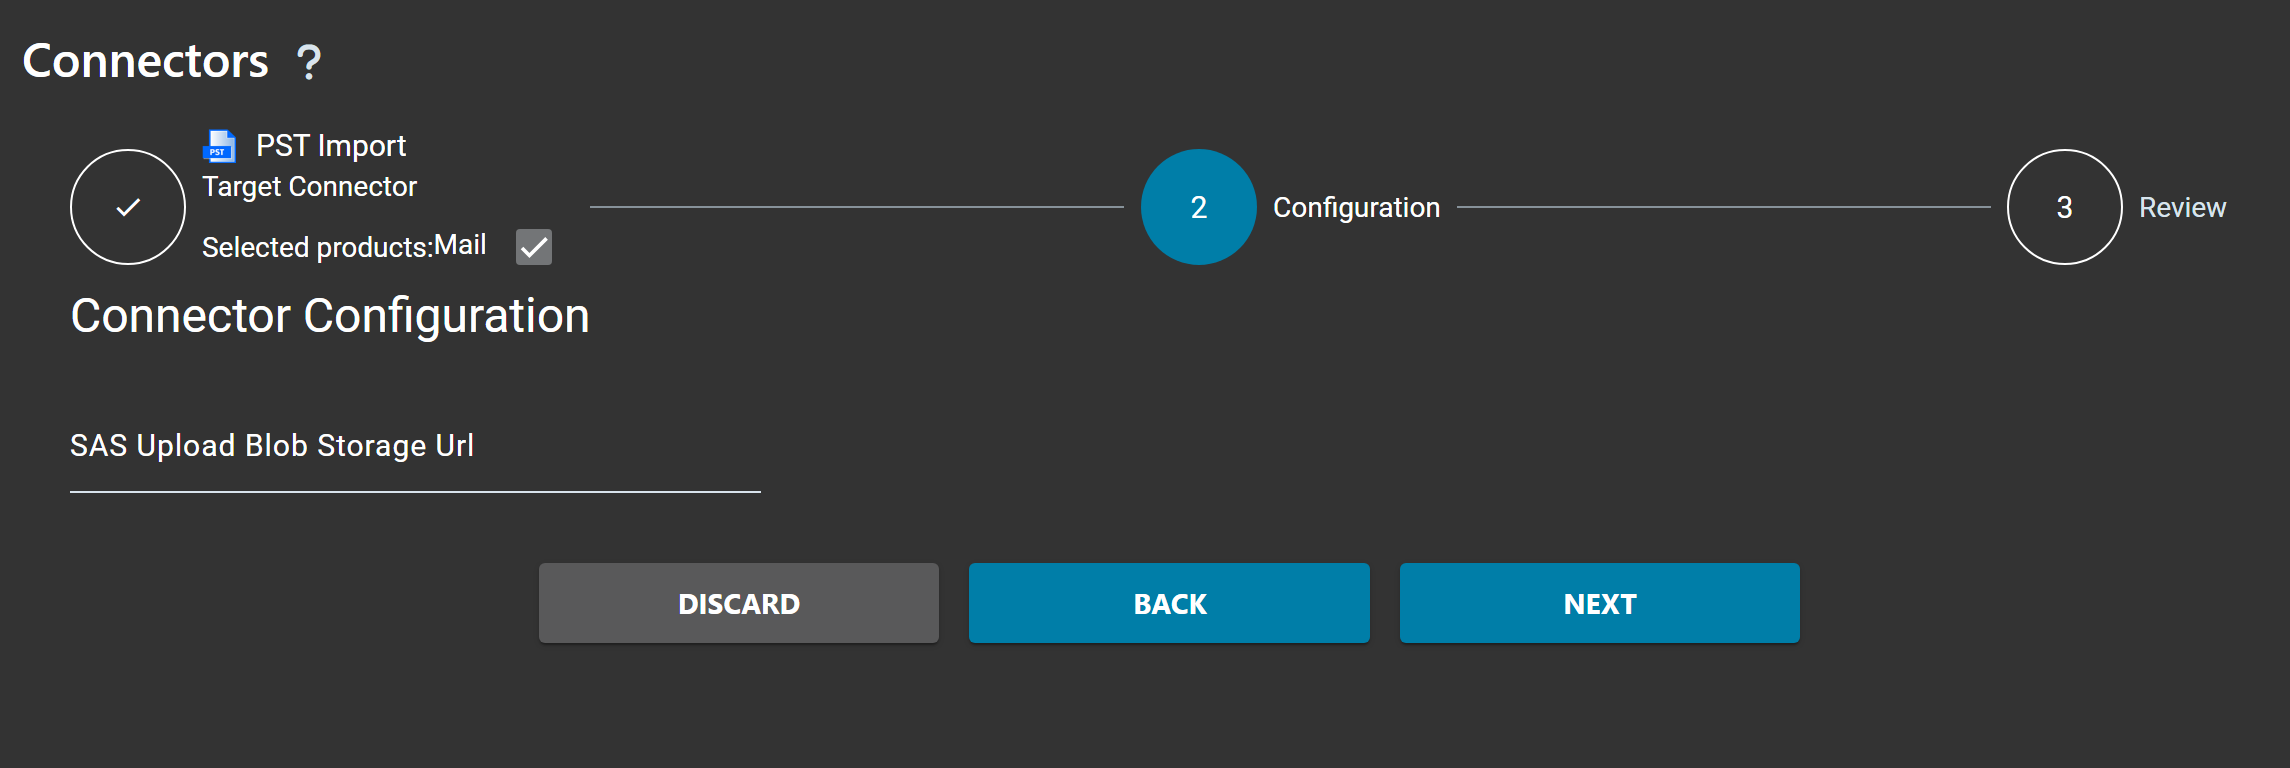
Get Your SAS Upload Blob Storage URL
To configure the PST Import connector, you need to obtain the Azure SAS URL from the Microsoft 365 compliance portal.
Open Microsoft Compliance Portal
Go to https://compliance.microsoft.com/homepage. On the left side menu, click on Data lifecycle management.
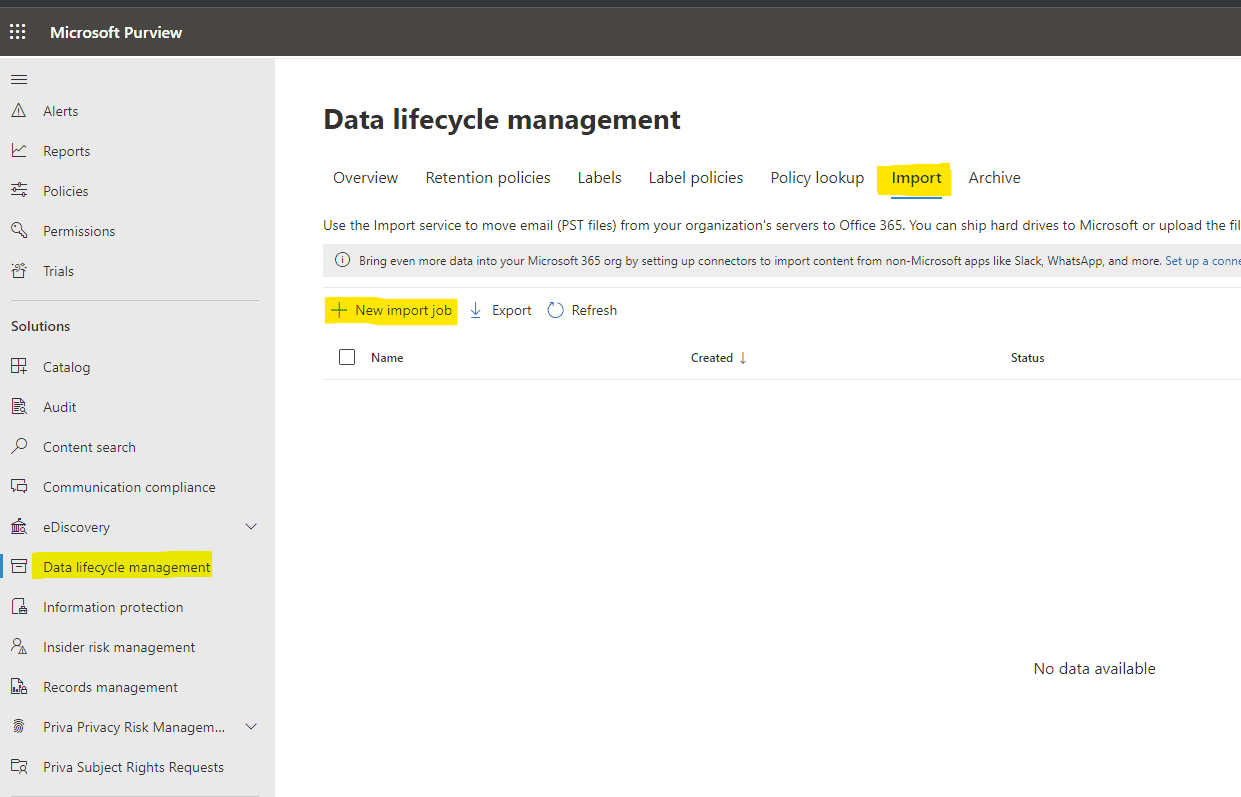
Create New Import Job
Click on Import, then click on New import Job. Give your job a name and click Next.
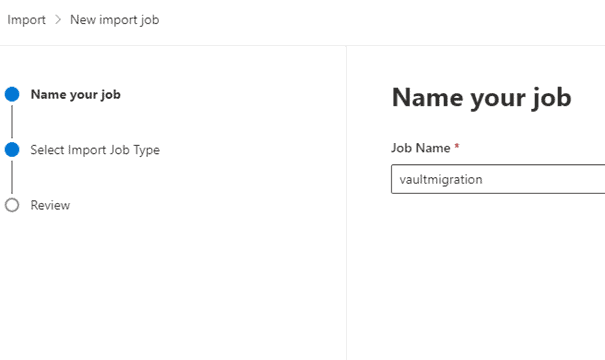
Select Upload Method
Select Upload your Data and click Next.
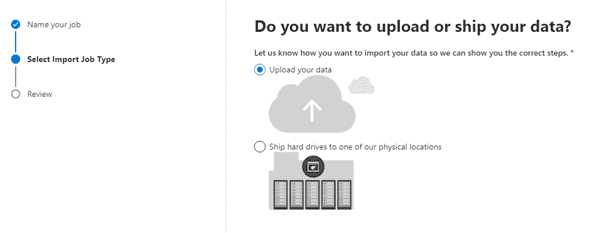
Copy the SAS URL
Click on Show Azure SAS URL and copy its value.
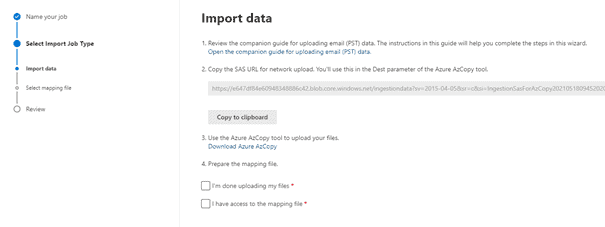
Paste in Cloudiway Connector
Paste the Azure SAS URL in the SAS Upload Blob Storage Url field of your Cloudiway PST Import connector.
| Field | Description |
|---|---|
| SAS Upload Blob Storage Url | The Azure SAS URL obtained from the Microsoft 365 compliance portal. This URL allows Cloudiway to upload PST files directly to Microsoft's secure blob storage. |
Step 2: Global Settings
After setting up source and target connectors, navigate to Archive > Settings to configure your migration settings.
Key Settings
| Setting | Description |
|---|---|
| Target Type | Select Standard (mailbox root) or Archive (archive folder). |
| Date Range | Optionally filter by date range to migrate specific time periods. |
| Include Deleted Items | Include permanently deleted emails from Vault. |
| PST Segmentation | Automatic PST file splitting for large archives (1GB per PST). |
Click Save to apply your global settings.
Step 3: Import or Create Users
There are two ways to add users that you wish to migrate:
Option 1: CSV Import
If you have a CSV file of all your users, you can upload the file to Cloudiway.
Ensure you're in the Mail Migration area of portal.cloudiway.com and go to Mails then Archive.
Click on Manage on the action bar and select Import.
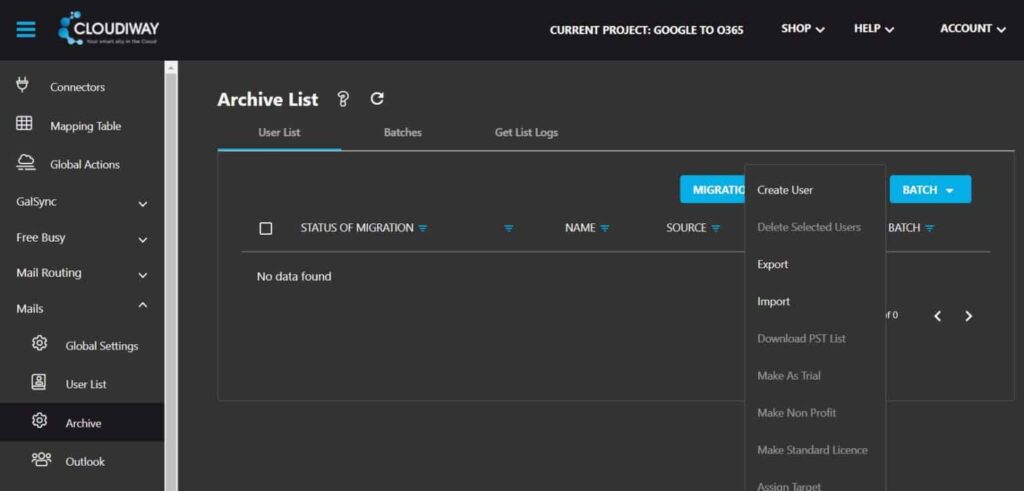
Download Sample CSV
If required, click on Download sample CSV and add your users to the CSV file using the sample headers (FirstName;LastName;SourceEmail;TargetEmail;BatchName).
Upload Your CSV File
When you have a complete CSV file with the correct headers, click on the Upload button. Locate your CSV file within your own file system and double-click on it to select it.
Select Connectors
Select the appropriate connectors in the Source (Google Vault) and Target (PST Import Service) fields.
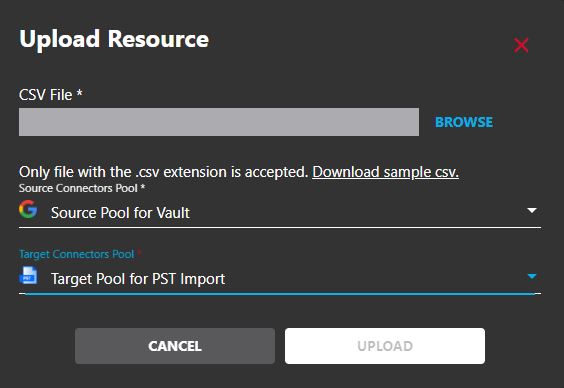
Click on the UPLOAD button. If you see any error messages, check your CSV file and try uploading again. Once the CSV file format is correct, you will see a confirmation message. Refresh the screen to see when the user list has been updated.
Option 2: Single User Creation
Many customers create a single user for testing. This lets you watch the migration process without affecting all users. Single users can also be created for migrations affecting just a few users.
Click on Manage then Create User to display the pop-up screen:
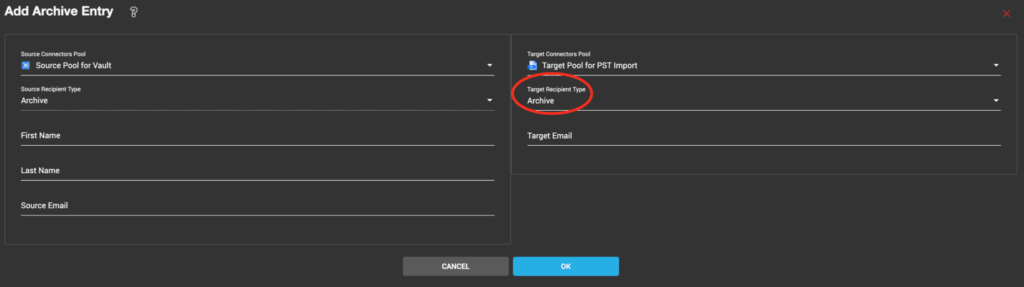
Notice on this page that you can choose in the "Target Recipient Type" field between "Standard" or "Archive" type.
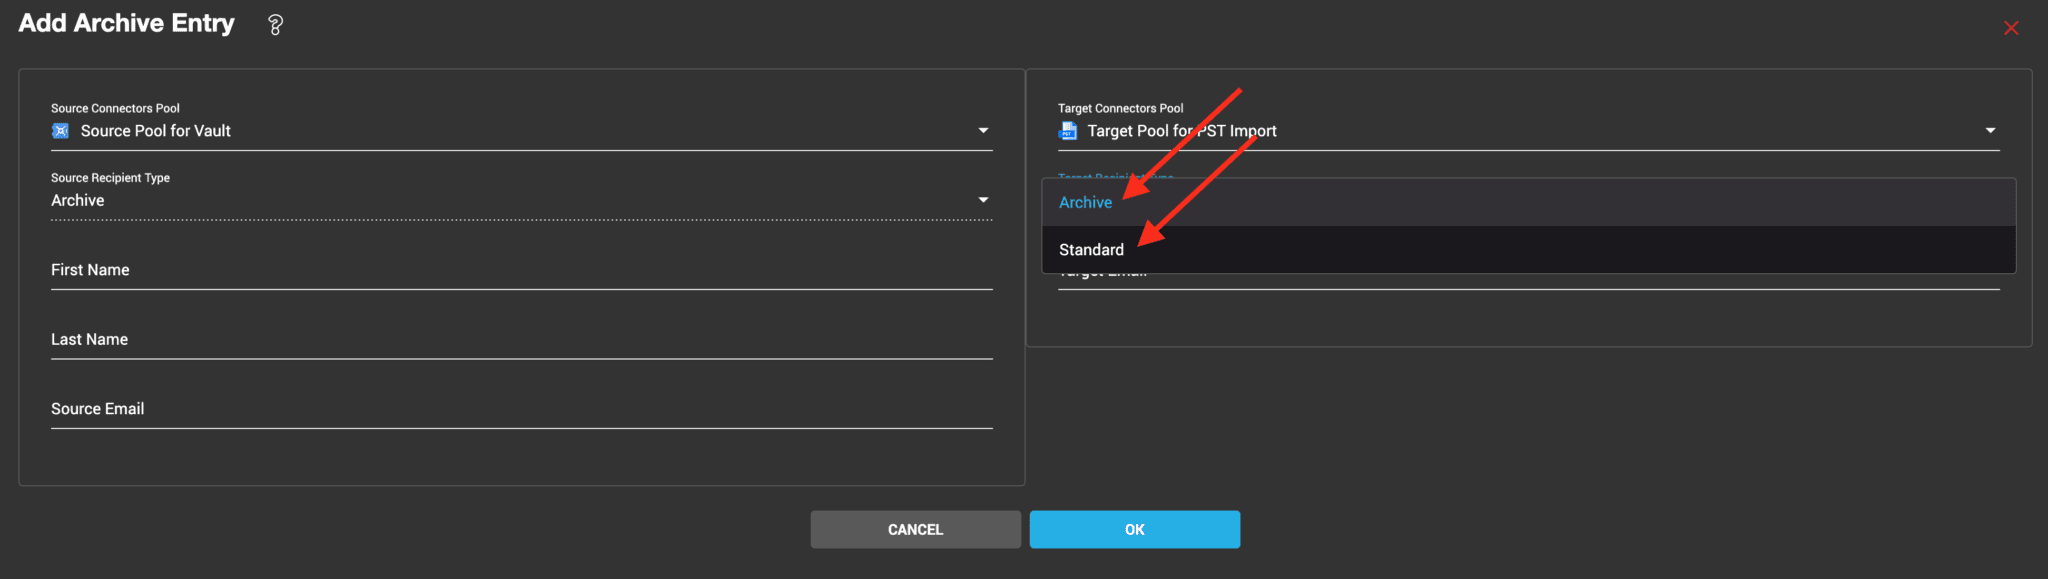
Fill in all details for a new user, then click OK to add the new user to the Archive Migration / User List. Repeat the process for any more users you'd like to create.
Step 4: Verify Mapping
Review and verify the mapping between source Google users and target Microsoft 365 mailboxes.
Review User Mapping
Verify that each Google user is mapped to the correct Microsoft 365 mailbox.
Edit Target Mailbox
Modify target mailboxes if needed (e.g., for renamed or migrated users).
Check Archive Size
Review the estimated archive size for licensing and planning purposes.
Step 5: Run Migration
Once your users are discovered and mapping is verified, you can start the migration process.
Select Users
Select the users whose Vault archives you want to migrate from the Archive List.
Run Audit (Optional)
Run an audit to verify connectivity and gather archive statistics before migration.
Start Migration
Click Actions > Start Migration to begin the migration process.
Monitor Progress
Track migration progress: Vault export → PST generation → Upload to Microsoft → Import processing.
Validate Results
After migration, verify the archived data in Microsoft 365 mailboxes or Purview.
Frequently Asked Questions
Why do I need to migrate Google Vault separately?
Google Vault contains permanently deleted emails that are no longer in the online mailbox. While the online mailbox is migrated separately, Vault data includes items that users have permanently deleted but are retained for compliance. These items only exist in Vault and require separate migration.
What Google Vault data can be migrated?
Cloudiway migrates archived emails (including permanently deleted items), email attachments, Chat messages, and Vault matter exports. The platform handles both mail and file vault data types.
How does the Vault migration process work?
Cloudiway exports Vault data to PST files and uploads them directly to Microsoft secure blob storage. Once uploaded, the Microsoft import service processes the PST files and imports the data to the target mailbox or archive folder. This process maintains chain of custody for compliance.
What happens to legal holds during migration?
Legal holds (Vault holds) cannot be automatically migrated between platforms. You must recreate legal holds in Microsoft 365 Purview after migration. We recommend documenting all existing holds before migration for recreation.
Can I migrate to the archive mailbox or primary mailbox?
You can choose either destination. If you select "Standard" type, emails are placed in the mailbox root. If you select "Archive" type, emails are placed in the archive folder. This allows flexibility based on your retention strategy.
What is the PST file size limit for Microsoft import?
Microsoft allows up to 100 PST files per import job. Google Vault export generates 1 PST file per 1GB of data. Cloudiway handles archives up to 100GB automatically. For larger archives, multiple import jobs may be required.
Do I need a special license for Vault migration?
Yes, Google Vault migration requires an Archive migration license from Cloudiway, which is separate from the standard mailbox migration license. You can also purchase a combined Mail and Archive license for cost savings.
How long does a Vault migration take?
Migration duration depends on the volume of archived data. The process involves export from Google Vault, PST generation, upload to Microsoft, and import processing. Large archives may take several days to complete.
Ready to Migrate Your Google Vault Archives?
Get a free migration quote in minutes — entirely self-service.