FREEBUSY FOR GOOGLE WORKSPACE AND MICROSOFT 365 TENANTS
This guide is aimed at system administrators who are capable of connecting to remote systems such as Google Workspace (formerly G Suite) for Business and Office 365 Admin Panel.
Cloudiway’s Free/Busy calendar coexistence solution is ideal for company mergers, or for companies that require a long-term solution to interoperability. It’s simple to set up and maintain. Cloudiway provides a cloud-based application that manages coexistence without requiring any software installation or overhead.
1. FreeBusy calendar coexistence with Cloudiway
1.1. Free/Busy
Calendar coexistence manages cross-platform communication with no impact on the end-user. It provides a seamless connection between different remote systems, such as Google Workspace, Microsoft 365, and Exchange.
For example, a Google user can check the Free/Busy time of an Office 365 user using Google’s standard calendar interface. Similarly, an Office 365 user on one domain can check the free/busy time of an Office 365 or Google user on an entirely different domain.
To achieve this, each remote system needs to be configured to communicate with Cloudiway, including its own ‘connector’ on the Cloudiway platform.
1.2. How it works
When a Google user wants to know if another user on Office 365 is available, the user creates a meeting request and clicks on the Find a Time tab to see Free/Busy time. Likewise, from Office 365, the user will click on “Scheduling Assistant” to see the Free/Busy time.

- Google detects that the other user is not on Google Workspace, then sends the query to Cloudiway
- Cloudiway finds the connector and queries Office 365
- Office 365 looks up the Free/Busy Calendar info of the user requested from Google
- Office 365 received back Free/Busy details
- Office 365 sends the Free/Busy response to Cloudiway
- Cloudiway sends the details to Google
- Google updates the Free/Busy display
You can also use coexistence during mailbox migrations. End users can continue working without interruption.
When a mailbox is migrated, address books are synchronized, the mails are rerouted with forwarders, and free/busy time is available at both the source of the migration and at the target.
1.3. Supported Systems
Calendar Free/Busy coexistence can be implemented between two or more remote systems. Currently, the following systems are supported:
- Office 365/Exchange Online;
- Google Workspace; and,
- Exchange On-Premises 2013 and later.
If you are using Exchange On-Premises 2010 or any other system, please get in touch with our technical consultants here to discuss how coexistence can be implemented with your combination of remote systems.
The following scenarios are not supported:
- Google to Google Free/Busy lookups.
- Email addresses registered in a user’s free Gmail account. Example: An O365 user has a free Gmail account and has associated their O365 work email address in that account.
For more questions please contact your Cloudiway Sales Manager.
1.4. Performance & Security
We take your privacy and security seriously at Cloudiway, and we have invested significant effort into making our platform and your data secure. Cloudiway provides a cloud-based application hosted in Windows Azure… For more information about security, please refer to this article.
2. FreeBusy : Prerequisites
The Google service account stored in the Google Connector requires a valid Google license and the calendar App must be activated for that account.
No permissions are required for the Office 365 service account; only an Exchange license is needed. The account cannot have a plan Microsoft 365 PI (formerly Kiosk).
There are four simple steps to configuring a remote system to coexist with another remote system:
- Create the Cloudiway FreeBusy connectors.
- Activate the Cloudiway FreeBusy connectors.
- Contact Cloudiway services to receive the FreeBusy service URL and generate Cloudiway credentials
- Configure your remote system settings to enable communication.
- Test coexistence, add users and go live.
Each Cloudiway connector requires a domain name as well as security credentials to allow two-way communication. Google also requires Service Account details (email and private key) before the connector can be saved.
You can set up any remote system to coexist at any time. However, you must adhere to the order outlined in each section below, to avoid coexistence being activated before all the required steps have been completed.
NOTE: If you configure your remote systems prior to contacting Cloudiway, you risk being blacklisted by Google and/or Office 365.
3. Configure remote system settings
3.1. Google Workspace Configuration
Follow these steps to set up Google.
- Go to https://admin.google.com and from the Home page, click on Apps, then Google, then Calendar
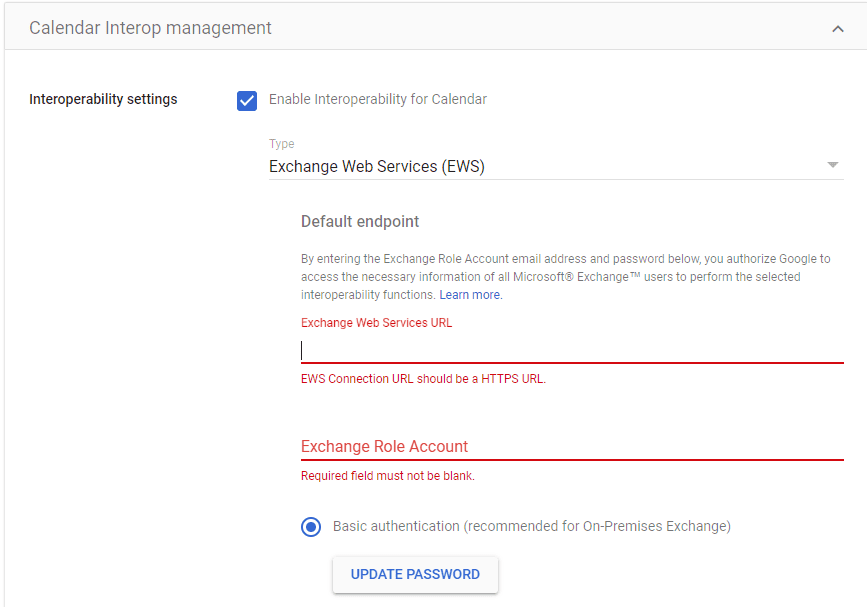
- Scroll down and click on Calendar interop management
- In the Exchange Web Services URL field, type the Cloudiway URL that has been provided to you by our consultant:
- In Exchange Role Account, enter your Consumer Key, the one you entered when generating your own Cloudiway credentials.
- Click on Update Password and paste your Consumer secret, the one you entered when generating your own Cloudiway credentials.
- Ensure that the checkbox for Show event details and Room booking are checked
- Click on Save to complete the process
3.2. Office 365 Configuration
Follow these steps to set up Office 365.
The configuration of Free/Busy requires an AvailabilityAddressSpace.
In the steps below, we will create an AvailabilityAddressSpace.
Launch Windows PowerShell and connect to Exchange Online using the Connect-exchangeonline cmdLet of the EXO Module.
Before you can create an availability address, you must run the following command at least once:
New-AvailabilityConfig -OrgWideAccount limitedUser@company.com
Note: Replace limitedUser@company.com above by any of your existing Exchange Online users without specific privilege.
The script will output something similar to the text below:
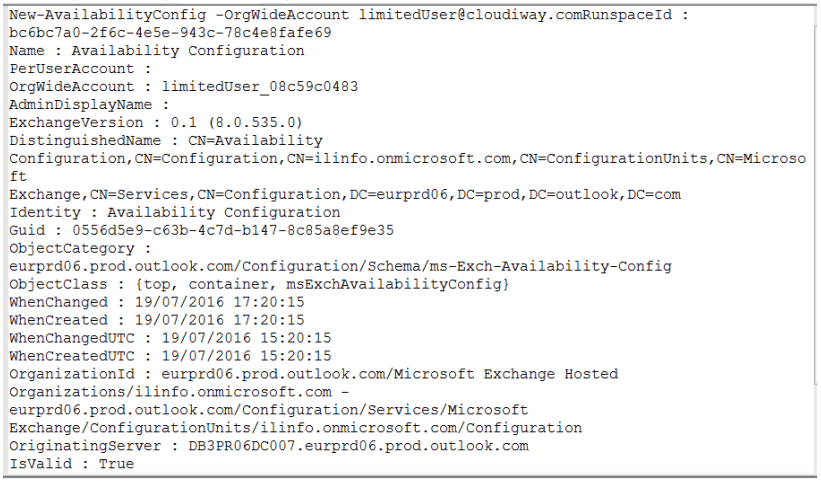
Copy the commands below
Note:
- remotedomain.com is the domain of the other tenant: if Office 365 users want to be able to query Free/Busy of bob@remotedomain.com, you must enter -ForestName remotedomain.com
- customer-coex is the alias provided by Cloudiway
If you receive any error messages, check TechNet online (eg, https://technet.microsoft.com/enus/library/bb124122(v=exchg.160).aspx) for more details.
Google Resources Management From Office 365
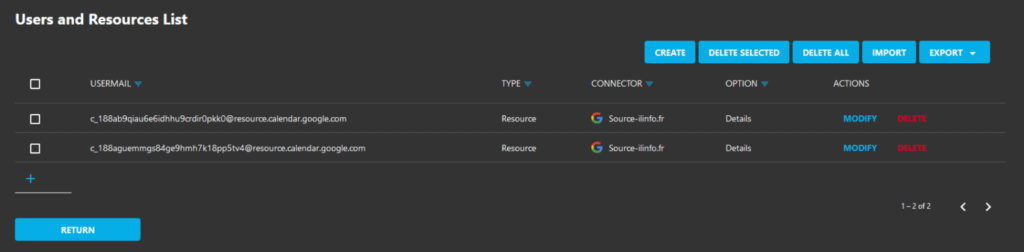
All Google resources are in the domain named resource.calendar.google.com. To be able to query free/busy availability of Google resources, you must do two things:
- Add an Add-AvailabilityAddressSpace for the foreign domain resource.calendar.google.com.
- From Manage Users and Resources List upload a CSV file containing the definition of all your resources. Make sure you select the resources. The Cloudiway coexistence platform will use this list to determine that these resources should be looked up in your tenant.
3.3. Exchange On-Premises Configuration
The steps below work only for Exchange On-Premises 2013 and later. If you have Exchange OnPremises 2010, please get in touch to discuss calendar free/busy coexistence implementation.
Launch Exchange Management Shell to connect to your Exchange server
Copy the commands below
Note:
- remotedomain.com is the domain of the other tenant: if Exchange users want to be able to query Free/Busy of bob@remotedomain.com, you must enter -ForestName remotedomain.com
- customer-coex is the alias provided by Cloudiway
If you receive any error messages, check TechNet online (eg: https://technet.microsoft.com/enus/library/bb124122(v=exchg.160).aspx) for more details.
4. Set up Cloudiway for coexistence
For Cloudiway to successfully provide coexistence between two remote systems, you will need to set up a connector for each domain intended to coexist.
The following chapter shows how to setup Free/Busy between Google Workspace, Office 365, and On-Premises environments.
4.1. Create FreeBusy Connectors
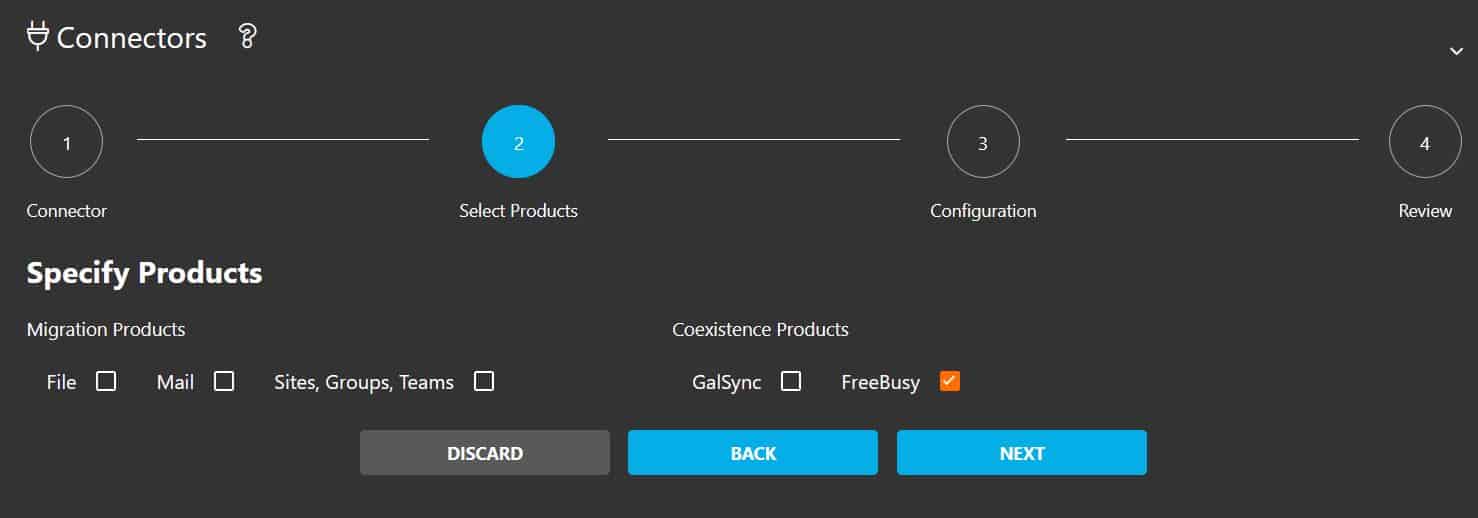
Cloudiway needs to be able to communicate with both your source and target domains. To do this, Cloudiway uses connectors. Please refer to this page to configure your connectors.
When you create your connectors, make sure to select FreeBusy in Coexistence Products:
Once you have correctly configured your connectors and remote systems, you can edit the Global Settings and Configuration.
4.2. Free Busy Global Settings
You will be able to query all users, to manage the user list automatically.
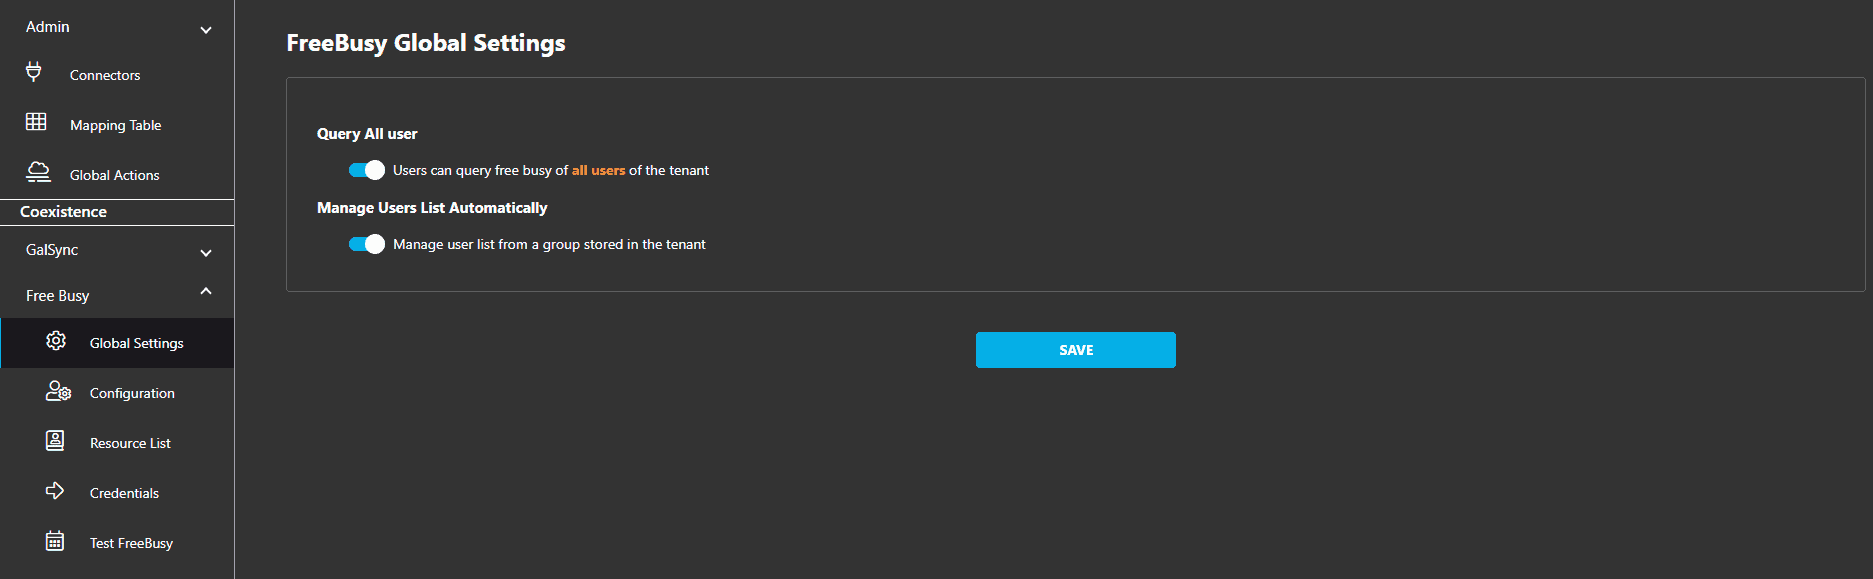
1) Query All Users
This setting alters the default behavior of the Users and Resources list.
By default: if the user list is empty, you can query the Free/Busy of any users in the tenant. But as soon as the user list is filled, you can query the Freebusy of only the users in the list. This behavior can be overwritten by this settings.
If enabled: Users can query free-busy of all users of the tenant, the list of users that can be queried is not restricted to the User List.
If Disabled: Only members of the list can be queried.
2) Manage Users List Automatically
There are 3 ways to manage the list of users that can be queried.
Note that you can’t restrict who can issue free-busy requests.
Indeed, the request sent by Google or by Office 365 does not contain the identification (email address) of the requester: Their servers send the request to the Cloudiway platform and route the response to the requester without telling Cloudiway who requested it.
All Cloudiway can do is restrict which Free-busy can be queried.
When a request is received, Cloudiway can filter the request based on the email address whose Free-busy is requested.
The user list is used as a restriction list.
There are 3 modes:
- If the user list is empty, any user in the target tenant can be queried
- As soon as the user list is filled, by default, only users in the list can be queried.
- You can change this default behavior. If you enable the option “Users can query free busy of all users of the tenant”, any user in the target tenant can be queried even if the user list is not empty.
How to manage the user list.
- You can add/edit/delete users manually
- You can import a CSV File
- You can use the rest APIs to manage the list programmatically
- You can manage the list from a group in your tenant.
How to manage the user list from a group.
First, you have to activate this feature in the Global settings: Enable Manage user list from a group stored in the tenant.

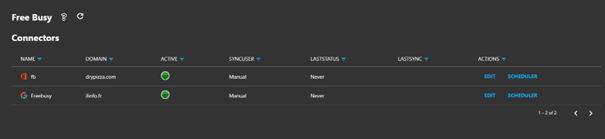
Now, navigate to Configuration, and for each connector, click on Scheduler
In your tenant, create a group that contains the users to be authorized to be queried.
In the scheduler configuration, enter the name of the group and define the pulling frequency.
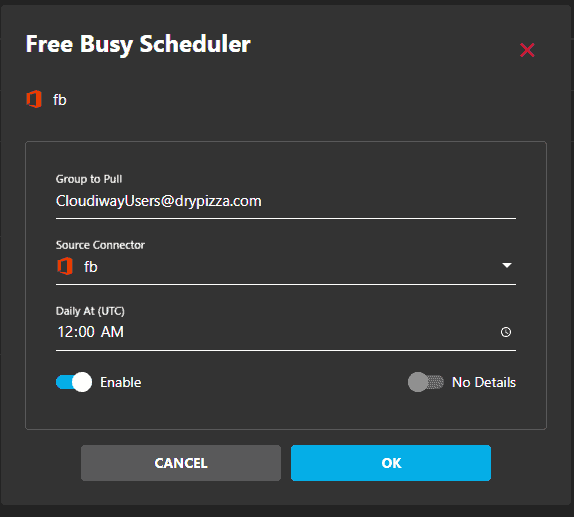
You can also do a manual pulling for testing.
For this click on Pull and it will schedule a pulling that should start ASAP.

4.3. Manage Users and Resources List
Users – It is highly recommended to let the system manage automatically the user list.
Note: if the user list is empty, you can query the Free/Busy of any users of the company. However, as soon as you fill the list, only members of the list can be queried. In order to avoid to have to maintain the list, we recommend to leave it empty.
For testing purposes, you can add a few users in the list, at least one in each connector.
In the Free Busy page, in the Users and resources list, go to MANAGE
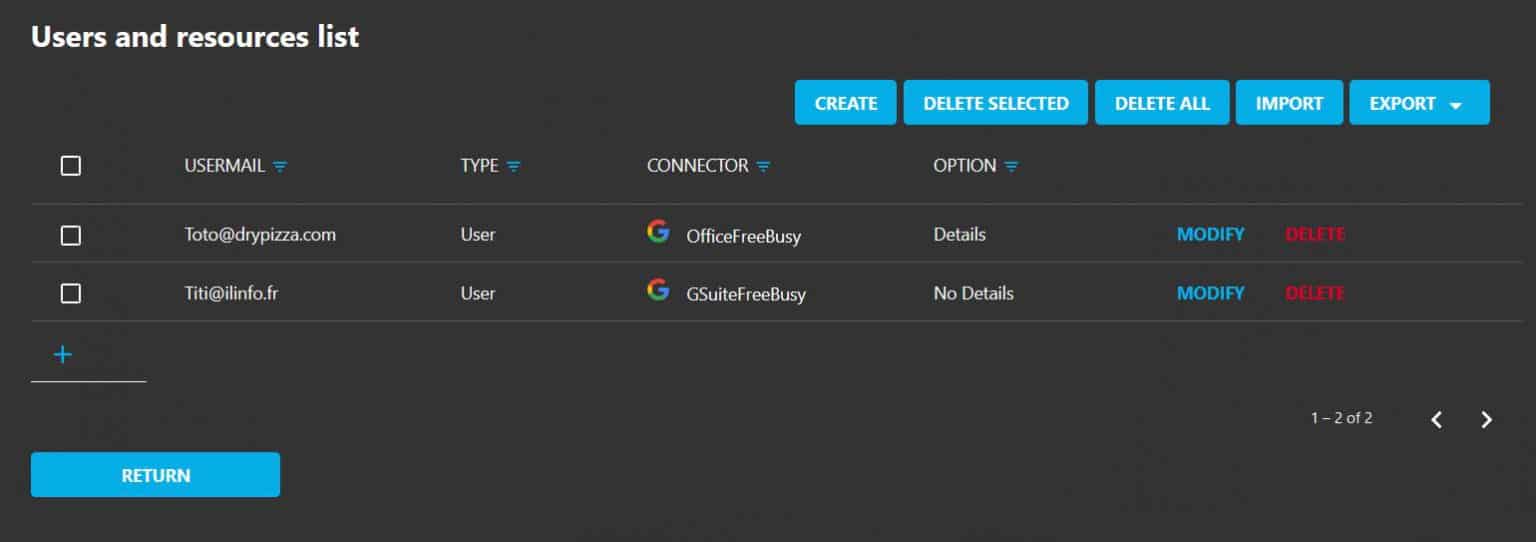
Click on CREATE (single), IMPORT (CSV), or EXPORT (CSV) users.
Click on SAVE.
Resources – You can query the Free/Busy of resources (room and equipment).
Note: Please be aware that Google resources cannot be booked outside of a Google client calendar. Office 365 doesn’t have this restriction. Therefore, you may want to manage your resources in Office 365 instead of Google.
That said, if you want to query the Free/Busy of Google resources, just add them in the list as resources.
Read more: https://help.cloudiway.com/article/how-to-set-coexistence-google-rooms-and-resources/
4.4. Generate Cloudiway credentials
The systems (Office 365, Google, Exchange) that will be connected through the platform need to authenticate to the Cloudiway service so you have to create your own credentials that will be provided to each system to authenticate.
Go to Free Busy > Credentials to manage your own credentials:
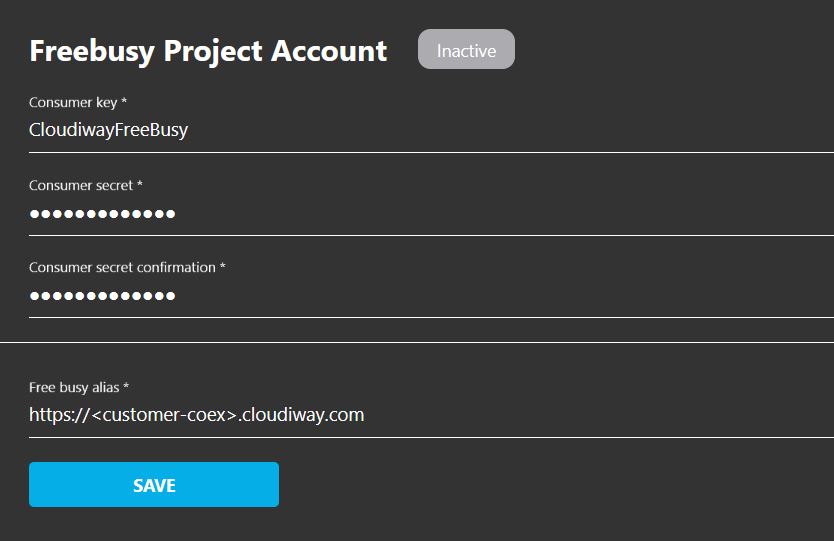
Note: Free busy alias is the URL used to access the platform, it is communicated by Cloudiway.
4.5. Activate FreeBusy
Go to Free Busy >
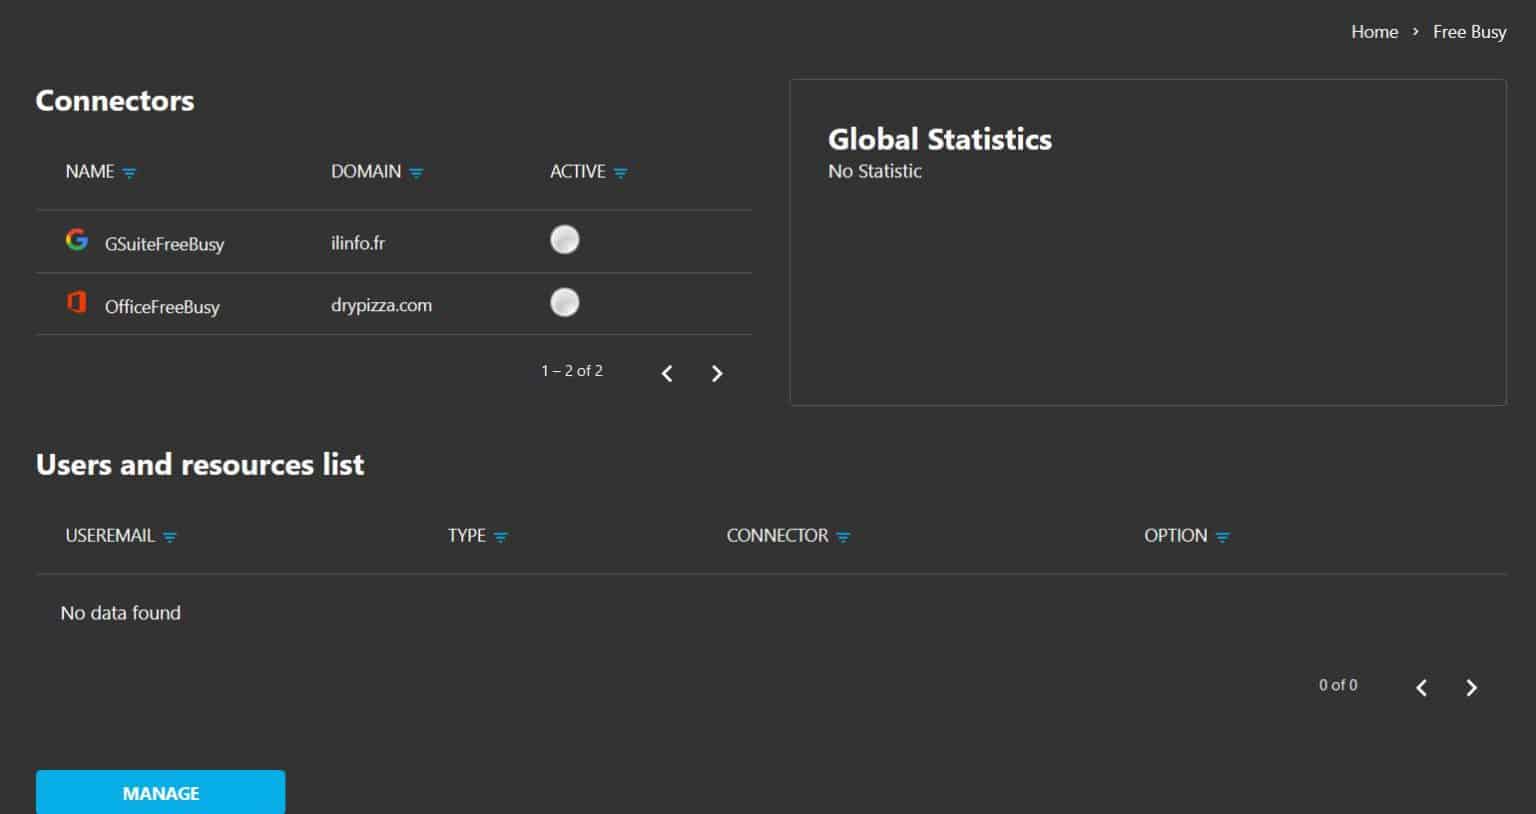
Click on a connector:
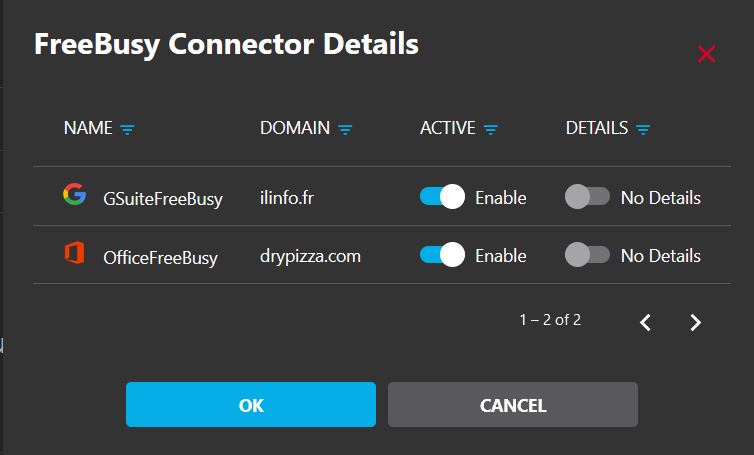
ACTIVE: Enable or disable the connector.
DETAILS: Enable or disable event details. In addition to the availability status, the platform gives you the choice to display the event details. Be careful with this option because all users will be able to see all calendar details of the other organization.
Note: This setting can be overwritten for each user in the MANAGE Users and resources list section.
5. Test FreeBusy
Office 365 and Exchange can only query the free/busy time of objects that exist in the global address book.
In order to test the free/busy time of the remote system, you must:
- In the Office 365 address book, create a test contact that represents the remote user (with domain name matching the ForestName of the AvailabilityAddressSpace)
- Assign an Address Lists management role to an admin user
In the following chapter, we will create a contact in the global address list and rebuild the address book. Exchange Online doesn’t rebuild the address book every time to modify a contact. You can force the rebuild using PowerShell.
For this, you need the Address List Management role in Exchange.
- Create the test user in your Exchange/Office 365 global address list
- Login to the Office 365 portal with your administrator account
- Go to the Exchange admin center, then click on permissions and the admin roles
- Click on the plus sign (+) to create a new role
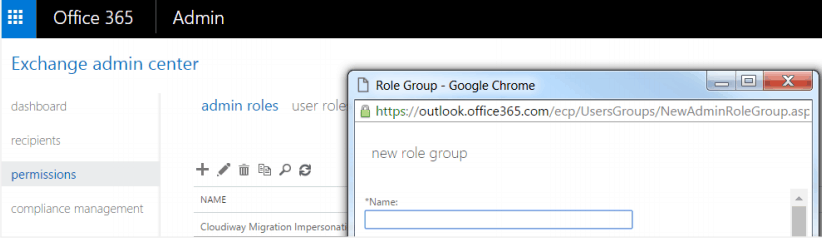
5. Give your group a name and assign it the role of Address Lists, then add an admin user to the group:
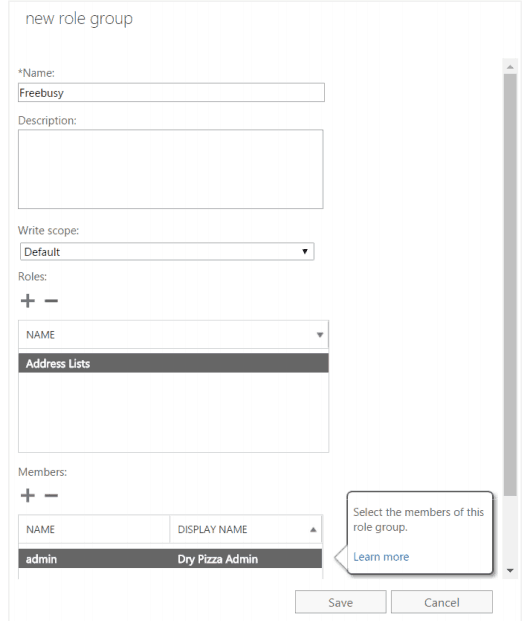
6. Click on the Save button to save your group, wait for this role to be applied. Once done, you can log in through PowerShell and force the refresh of the address book by running this command: Set-AddressList -Identity “All users”.
- Update the address book (using PowerShell).
Run the command and verify that it’s working
Run the command
Check that the global address list now contains the test user
At this point, your system configuration is complete and you’re ready to test coexistence from your calendars.
Once you’re satisfied that coexistence is working as expected, you can import your remaining users and go live (or empty the list to open it to all users).
6. Troubleshooting
We provide a command-line utility to test the Free/Busy here.
Cloudiway provides an extensive knowledge base with many resources, including common error messages, guides, and downloads. Please visit the Help Center here (where you can search for keywords or read through topics).