Google Workspace to Google Workspace Migration Guide
This GSuite to GSuite migration guide shows you how to migrate your mailboxes between two Google Workspace tenants. Migrate Gmail, calendars, contacts, and more.
Overview
This Google Workspace to Google Workspace Migration Guide shows you how to migrate your mailboxes between two Google Workspace tenants (also known as GSuite to GSuite migration).
Cloudiway uses IMAP and Google APIs (Calendar API, People API, Tasks API) to read data from the source Google Workspace tenant and write data to the target Google Workspace tenant. All network operations are performed over TLS 1.2.
Looking for our Google Workspace Migration Solution?
Discover all features, pricing, and use cases for Google Workspace cross-tenant migrations.
View Solution PageSecurity
The Cloudiway platform complies with international security standards:
Performance
The Cloudiway platform is designed for high-performance migrations:
- Parallel Processing: Multiple mailboxes can be migrated simultaneously
- Optimized Data Transfer: Efficient handling of large mailboxes
- API Throttling Management: Automatic handling of Google API quotas
- Delta Migrations: Only new and changed items are migrated in subsequent passes
What's Migrated
The following items are migrated during a Google Workspace to Google Workspace migration:
Prerequisites
To perform the Google Workspace to Google Workspace migration, you need admin access to both tenants.
Source Google Workspace Requirements
Super Admin Account
A Google Workspace Super Admin account for the source tenant
IMAP Access Enabled
IMAP must be enabled in Google Admin Console for the source tenant
Service Account
A Google Service Account with domain-wide delegation (Cloudiway can create this automatically)
Target Google Workspace Requirements
Super Admin Account
A Google Workspace Super Admin account for the target tenant
Target Mailboxes Created
User accounts must be created in the target tenant before migration
Service Account
A Google Service Account with domain-wide delegation for the target tenant
Migration Process
The Google Workspace to Google Workspace mail migration follows these steps:
Step 1: Create Connectors
For Cloudiway to migrate your mailboxes, it needs to communicate with both Google Workspace tenants. You'll need to create two Google connectors: one for the source and one for the target.
Enable IMAP Access (Source Tenant)
Before creating the source connector, you must enable IMAP access in the Google Admin Console:
Access Google Admin Console
Go to admin.google.com and sign in with your Super Admin account.
Navigate to Gmail Settings
Go to Apps > Google Workspace > Gmail > End User Access.
Enable IMAP Access
Check Enable IMAP access for all users and select Allow any mail client.
Save Changes
Click Save. Changes may take up to 24 hours to propagate.
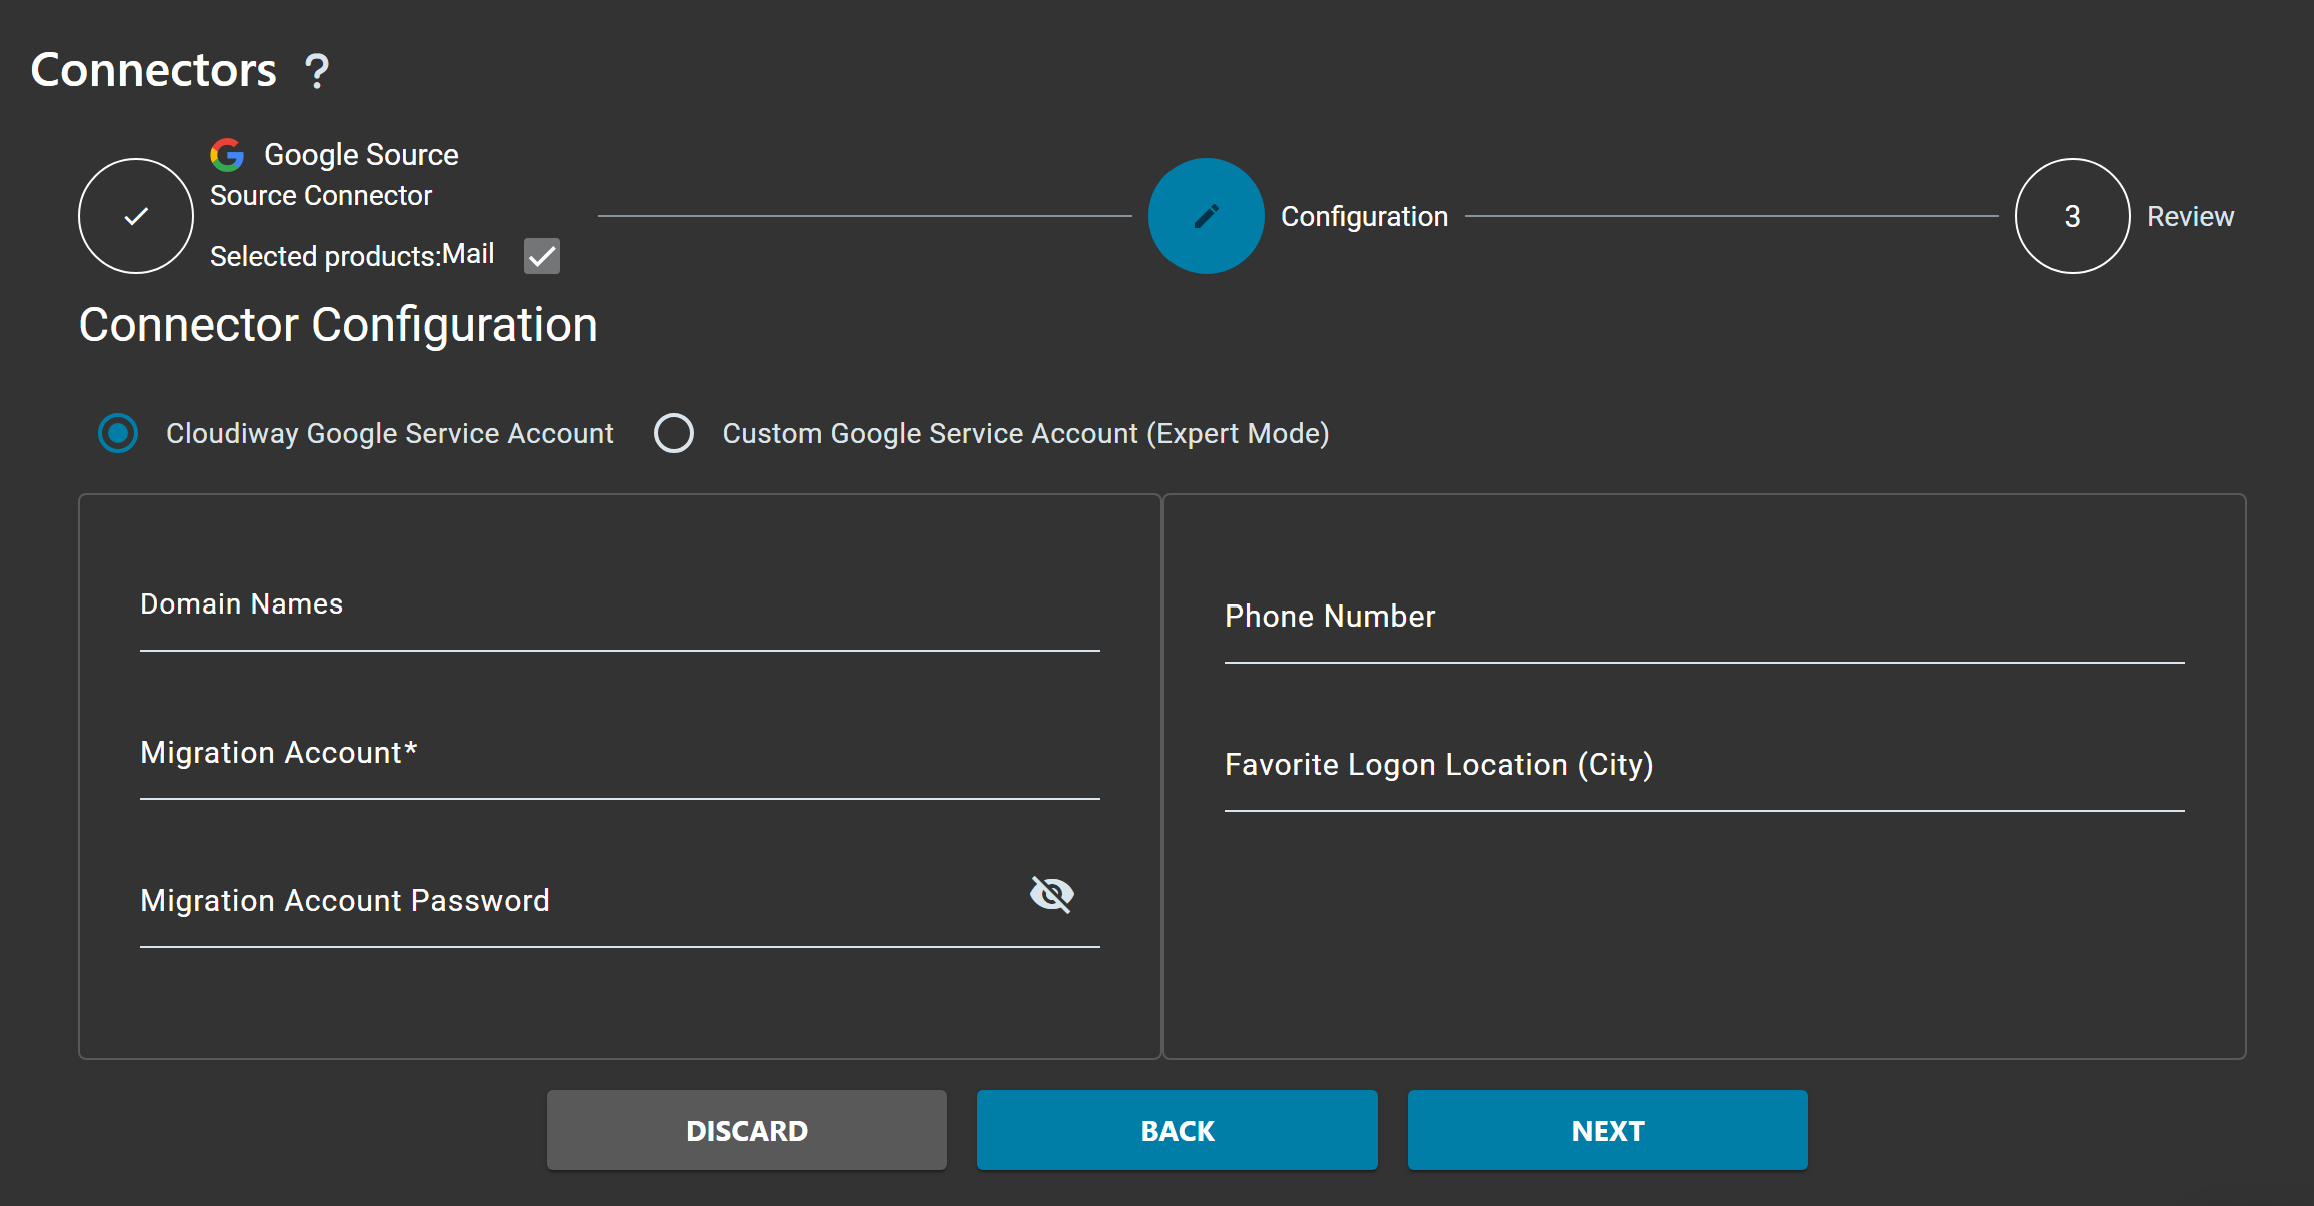
Google Workspace Connector (Source)
Go to Connectors > New, select Google as connector type, set a connector name and select Mail. Click Next to configure the connector.

| Field | Description |
|---|---|
| Cloudiway Google Service Account | Use the Cloudiway-managed service account (recommended) |
| Custom Google Service Account | Expert mode - use your own Google Service Account |
| Domain Names | Your source Google Workspace domain(s) |
| Migration Account | Source Google Workspace Super Admin email address |
| Migration Account Password | Password for the Super Admin account |
Google Workspace Connector (Target)
Create a second Google connector for the target tenant using the same process.
| Field | Description |
|---|---|
| Cloudiway Google Service Account | Use the Cloudiway-managed service account (recommended) |
| Custom Google Service Account | Expert mode - use your own Google Service Account |
| Domain Names | Your target Google Workspace domain(s) |
| Migration Account | Target Google Workspace Super Admin email address |
| Migration Account Password | Password for the Super Admin account |
Step 2: Configure Global Settings
Navigate to Mails > Global Settings to configure your migration options.
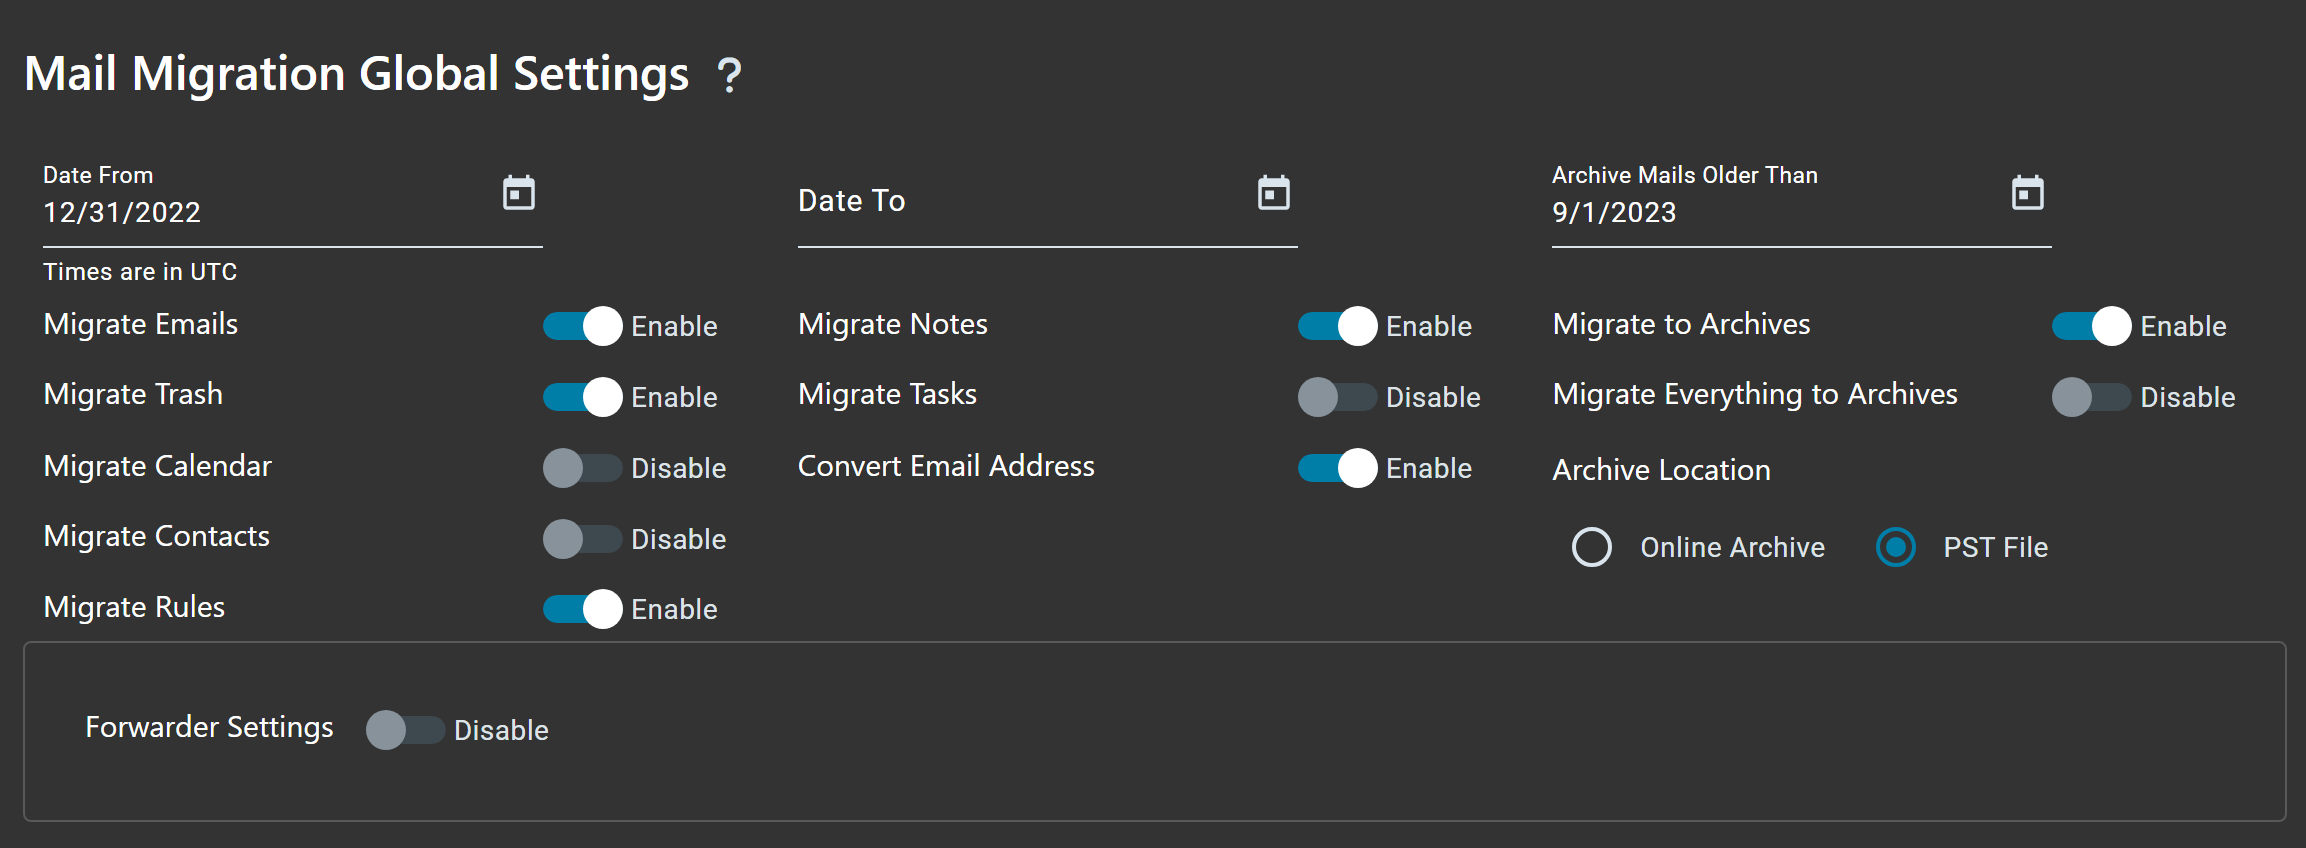
Migration Settings
| Setting | Default | Description |
|---|---|---|
| Migrate Emails | Enable | Migrates email messages from source to target Gmail. |
| Migrate Trash | Enable | Migrates items from the Gmail Trash folder. |
| Migrate Calendar | Disable | Migrates Google Calendar events and settings. |
| Migrate Contacts | Disable | Migrates Google Contacts and contact groups. |
| Migrate Rules | Enable | Migrates Gmail filters. |
| Migrate Tasks | Disable | Migrates Google Tasks. |
| Convert Email Address | Enable | Rewrites email addresses from source domain to target domain in email headers, calendar items, and contacts. |
Date Filters
| Setting | Description |
|---|---|
| Date From | Only migrate emails newer than this date. Leave empty for no lower limit. |
| Date To | Only migrate emails older than this date. Leave empty for no upper limit. |
Step 3: Fill User List
The User List contains all Gmail mailboxes to migrate. There are three ways to populate it:
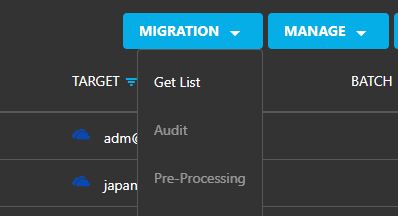
Option 1: Discovery (Get List)
Navigate to Mails > User List and click Get List to automatically discover all Gmail mailboxes from the source tenant.
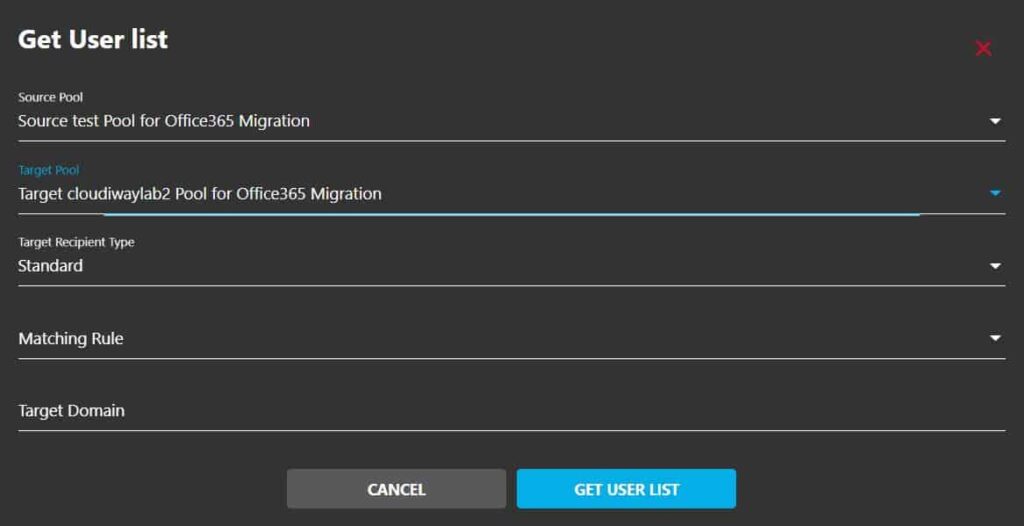
Matching Rules
| Rule | Example |
|---|---|
| Mail Exact Match | bob.marley@source.com → bob.marley@source.com |
| Keep Email Prefix Same as Source | bob.marley@source.com → bob.marley@target.com |
| FirstName.LastName | bob.marley@target.com |
| F.LastName | b.marley@target.com |
| FLastName | bmarley@target.com |
| LastNameF | marleyb@target.com |
Select Source Pool
Select your Google Workspace source connector pool from the dropdown.
Select Target Pool
Select your Google Workspace target connector pool.
Configure Matching Rule
Choose how source emails should be mapped to target emails based on your naming convention.
Specify Target Domain
Enter the target domain for the migrated users.
Click Get
Click the GET button to start the discovery process.
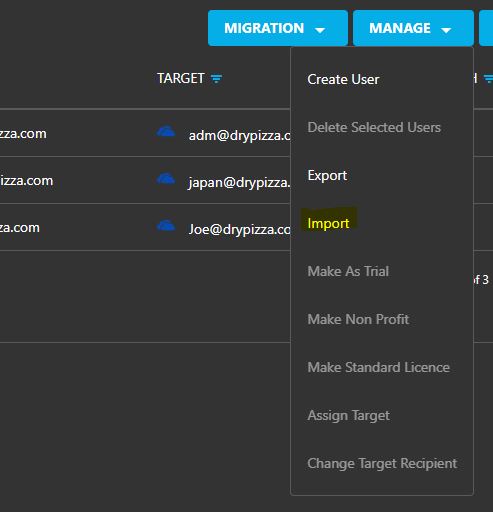
Option 2: Import User List
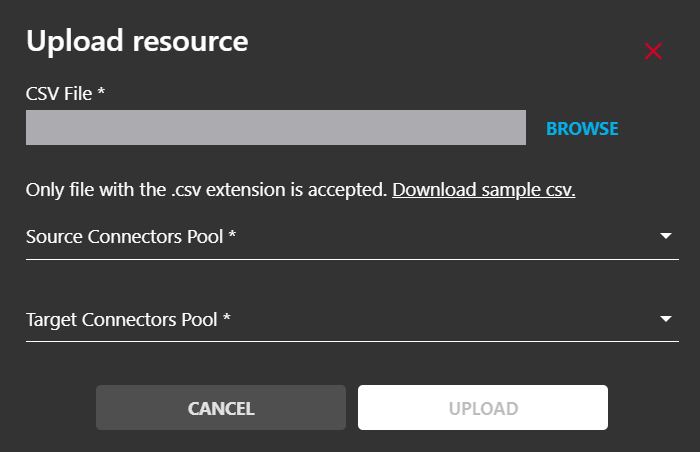
Click on User List > Import to upload a CSV file containing the users to migrate.
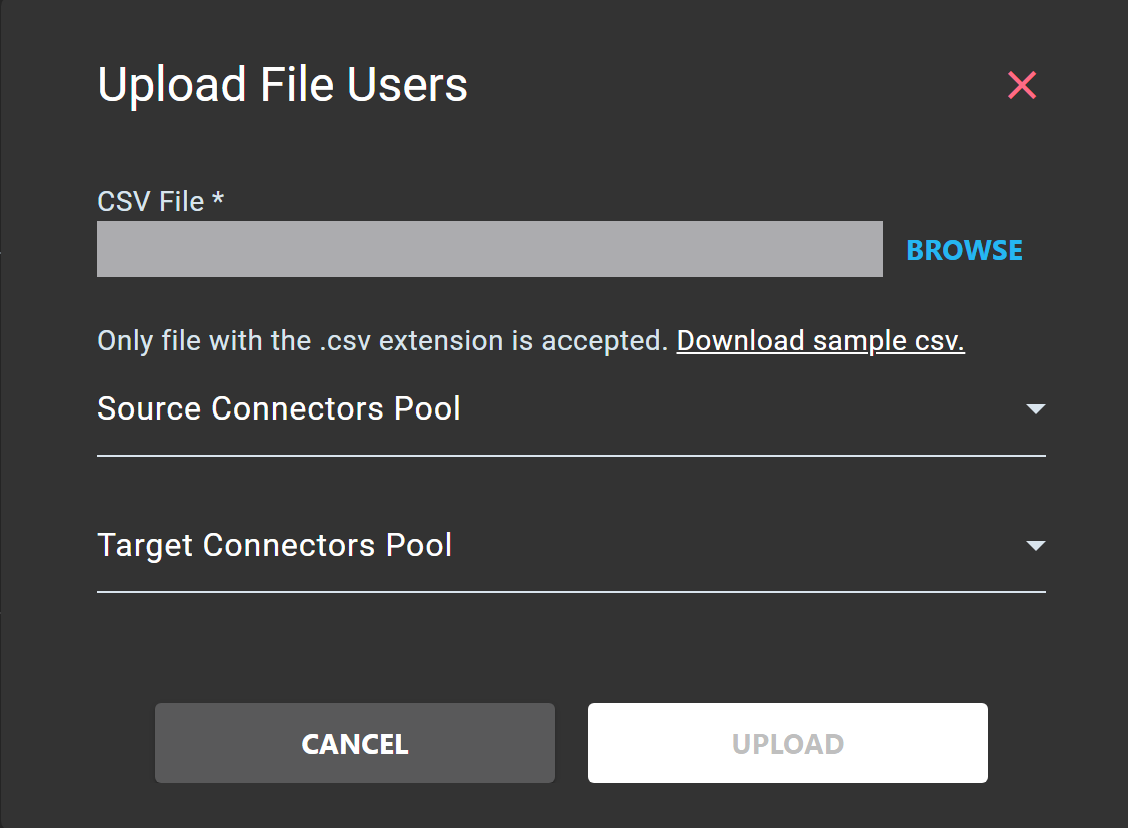
| Field | Description |
|---|---|
| CSV File | Browse and select your CSV file containing the users to migrate |
| Source Pool | Select your Google Workspace source connector pool |
| Source Recipient Type | Select Mail as the source recipient type |
| Target Pool | Select your Google Workspace target connector pool |
| Target Recipient Type | Select Mail as the target recipient type |
Prepare your CSV file
Create a CSV file with the source and target email addresses. Download the sample CSV for the exact format: How to Fill the Users/Groups CSV File
Click on Browse
Click on the BROWSE button to open the file selector.
Select your CSV file
Locate your CSV file on your computer and select it.
Select Connectors
Select the appropriate connectors in the Source Pool and Target Pool fields.
Click Upload
Click the UPLOAD button to import the users.
CSV File Format
The CSV file should contain the following columns:
| Column | Description | Required |
|---|---|---|
| FirstName | User's first name | Optional |
| LastName | User's last name | Optional |
| SourceEmail | Source Gmail address | Required |
| TargetEmail | Target Gmail address | Required |
| SourceRecipientType | Set to "Mail" | Required |
| TargetRecipientType | Set to "Mail" | Required |
| BatchName | Name of the migration batch | Optional |
Option 3: Create Manual Entry
Click on User List > Create to manually add individual users one by one.
Click Create
Click on the CREATE button in the User List menu.
Enter Source Email
Enter the source Gmail address to migrate.
Enter Target Email
Enter the target Gmail address where the mailbox will be migrated.
Select Connectors
Select the source and target connector pools.
Save
Click SAVE to add the user to the list.
Step 4: Verify Mapping Table
Navigate to Settings > Mapping Table to verify that all email addresses are correctly mapped between source and target.
Ensure that all source Google Workspace email addresses are correctly mapped to their corresponding target Google Workspace email addresses.
Step 5: Run Migration
Now that you have performed all the pre-migration steps, you're ready to migrate.
- Verify that the target email address is correct for each user
- Ensure the target account already exists in the target Google Workspace tenant
- Ensure the target account has a valid Google Workspace license
Start Migration
- Under the Users tab, select all the users you want to migrate
- Click on MIGRATION
- Click the Start button
Delta Pass
Cloudiway supports delta passes for Google Workspace migrations. Every time you restart the migration:
- Only items that haven't already been copied will be migrated
- Items that have been modified in the source will be updated in the target
- The platform does not duplicate items
How to Start a Delta Pass
To start a delta pass, simply restart the migration and the platform takes care of everything.
Delta Pass Limitations
- You can submit as many migration passes as you want for 3 months
- Until consuming the amount of GBs allowed by the assigned licenses
- Usually, you only need one pass before the cutover and another after the cutover
Frequently Asked Questions
Can I migrate between two Google Workspace tenants?
Yes, Cloudiway supports cross-tenant Google Workspace migrations. You can migrate Gmail mailboxes, calendars, contacts, and tasks between two different Google Workspace organizations.
Are Gmail labels preserved during migration?
Yes, Gmail labels are preserved during the migration. Labels and their hierarchical structure are migrated to the target tenant.
Does Cloudiway support delta passes for Google to Google migration?
Yes, Cloudiway supports delta passes. After the initial migration, subsequent runs only migrate new and changed items. You can run delta passes for up to 3 months within your license quota.
Do I need admin access to both tenants?
Yes, you need Super Admin access to both the source and target Google Workspace tenants. Cloudiway can automatically create and configure the required Service Accounts for you.
What about shared calendars and contacts?
Primary calendars and personal contacts are migrated. Shared calendar permissions need to be re-established in the target tenant.
Get a free audit of your migration project from our experts.