
Cross-Tenant Mailbox Migration Orchestrator User Guide
Learn how to use Microsoft's native cross-tenant migration with Cloudiway's user-friendly orchestrator interface.
Introduction
Microsoft's native solution for migrating mailboxes between tenants is powerful but notoriously complex: it requires PowerShell expertise, manual configuration, and lacks any graphical interface.
Cloudiway's Cross-Tenant Mailbox Migration Orchestrator solves these challenges by providing a user-friendly graphical interface that handles configuration, provisioning, migration, and monitoring automatically.
Key Benefits
- No PowerShell expertise required
- Automatic prerequisite validation
- User-friendly graphical interface
- Automatic user provisioning and attribute management
- Complete permissions preservation (unlike Microsoft native tool)
Looking for our Orchestrator Solution?
Discover all features, pricing, and use cases for the Microsoft 365 Tenant to Tenant Orchestrator.
View Solution PageWhat's Migrated
The Cross-Tenant Mailbox Migration uses Microsoft's native migration engine. The following items are migrated:
Prerequisites
Before starting your cross-tenant mailbox migration, ensure you have the following:
Microsoft Cross-Tenant User Data Migration License
Required for each user to be migrated. One-time fee per migration. Can be assigned to source or target user.
Cloudiway License
In addition to Microsoft licenses, a Cloudiway license is required to run the orchestrator service.
Microsoft Enterprise License
This solution is reserved for Microsoft Enterprise customers.
Valid Exchange License
A valid Exchange license must be assigned to users before starting the migration.
Validation Checks Performed
The orchestrator validates the following for each user:
- User is a member of the security group defined in MailboxMovePublishedScopes of the source's organizationRelationship
- ExchangeGuid at the target matches ExchangeGuid at the source
- ArchiveGuid at the target matches ArchiveGuid at the source
- Source mailbox does not have more than 12 auxArchives
- Source mailbox is not "On Hold"
- TotalDeletedItemsSize of the source mailbox is less than target MailUser recoverable items size
- LegacyExchangeDN attribute of the source is copied to target's proxyAddress as X500
- X500 attributes of the source are copied to the target
- PrimarySMTPAddress of the target is in an approved domain
- EmailAddresses (ProxyAddresses) of the target are in approved domains
Migration Wizard
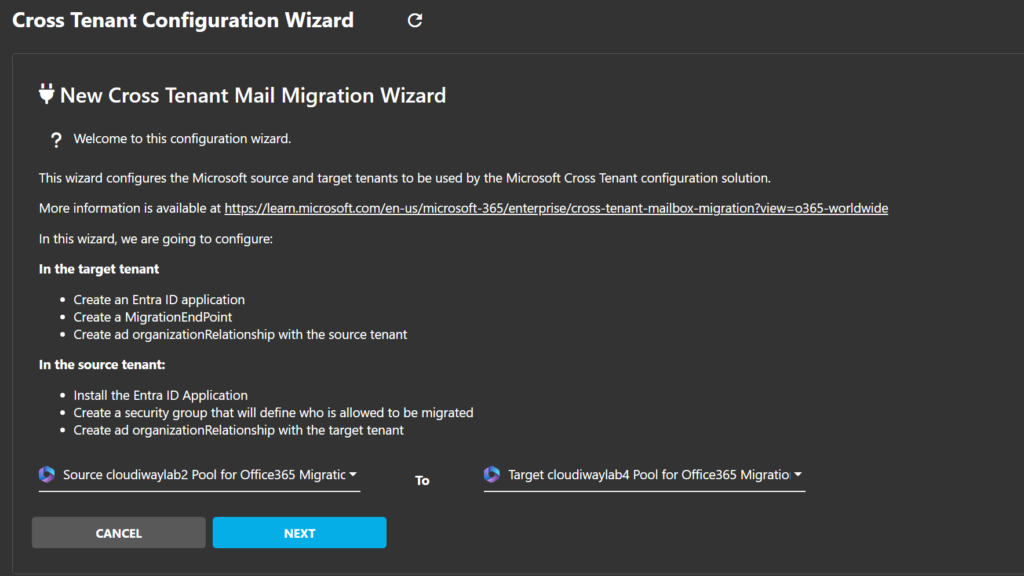
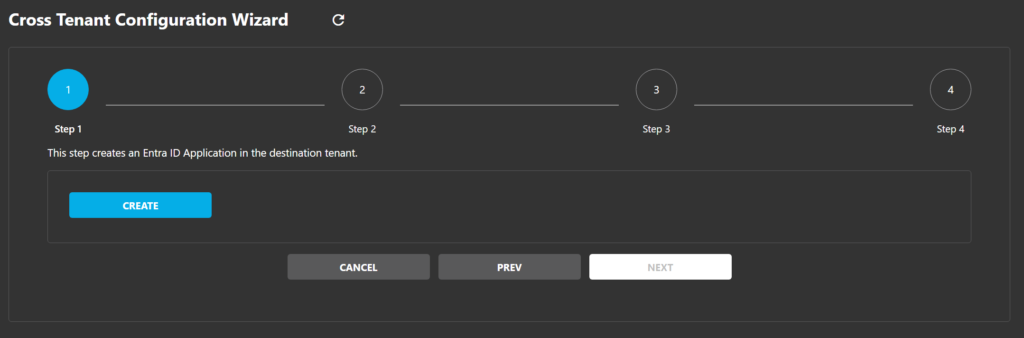
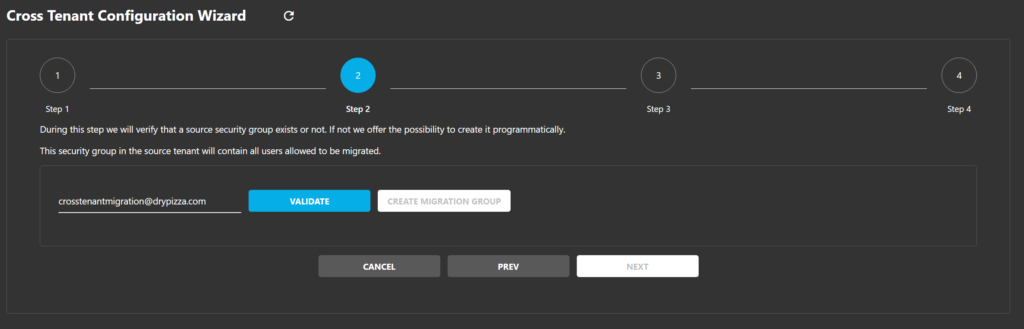
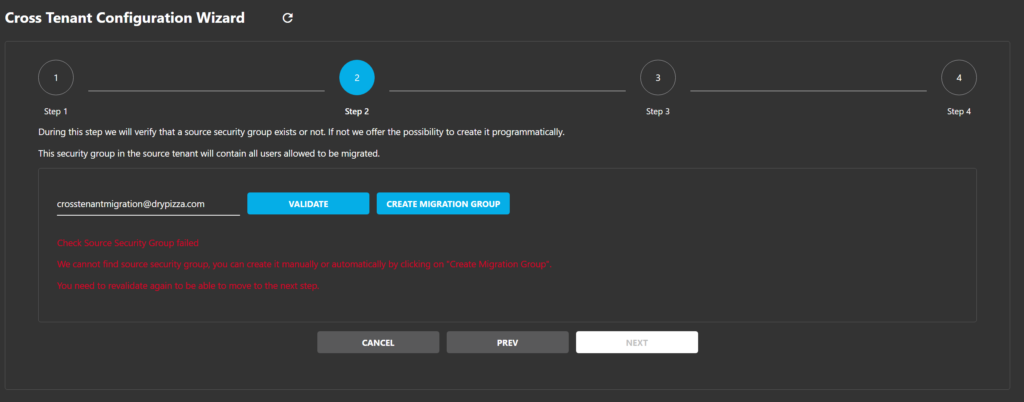
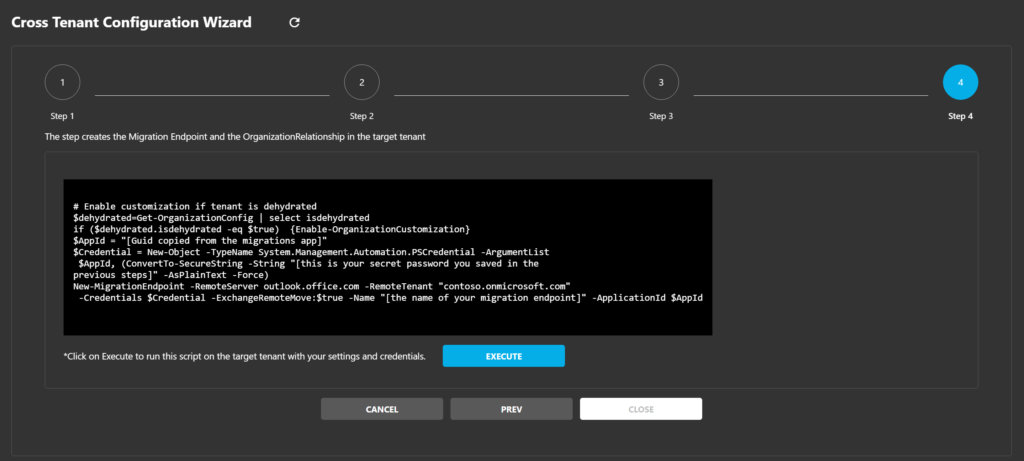
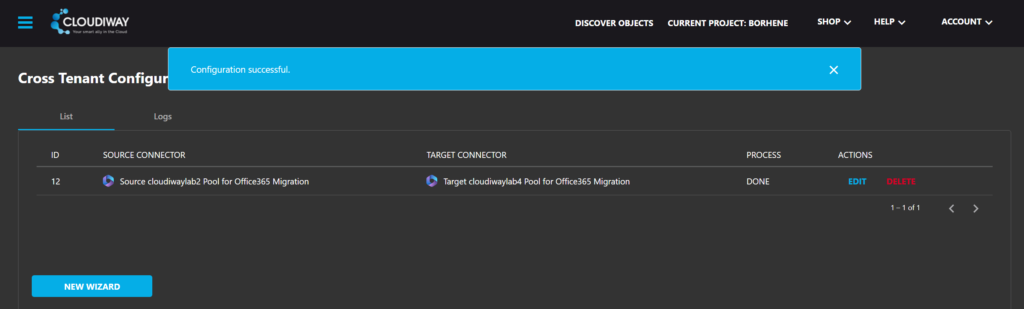
The Migration Wizard guides you through setting up all the prerequisites in both source and target tenants automatically.
11-Step Configuration Wizard
Automatically configure organization relationships, migration endpoints, security groups, and all required settings in both tenants.
Cross-Tenant Migration Wizard

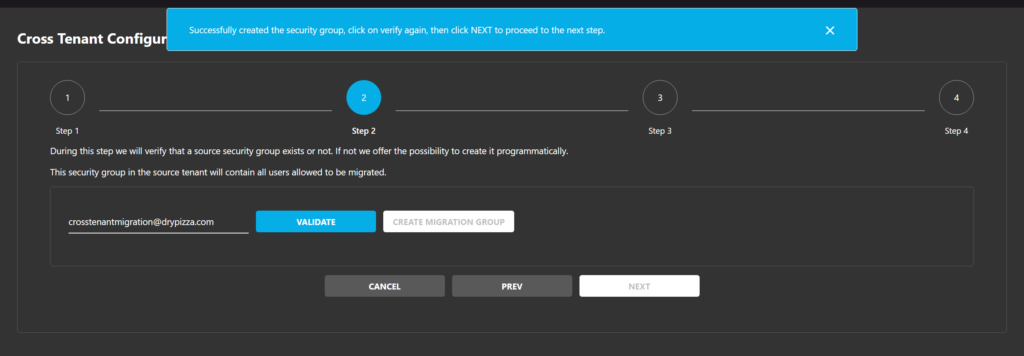
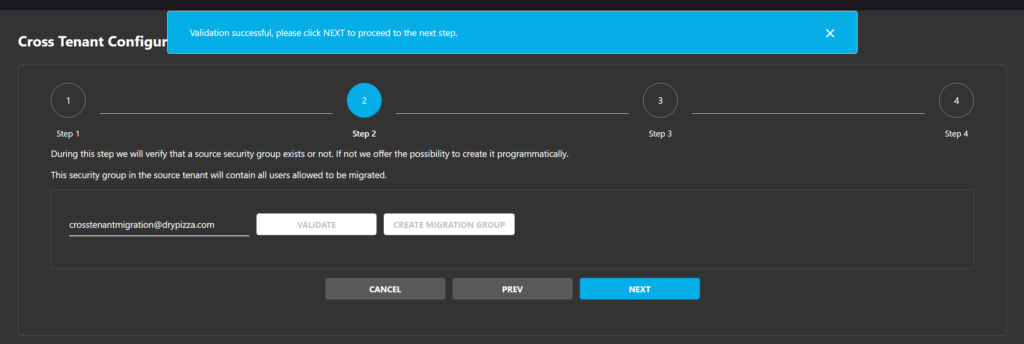
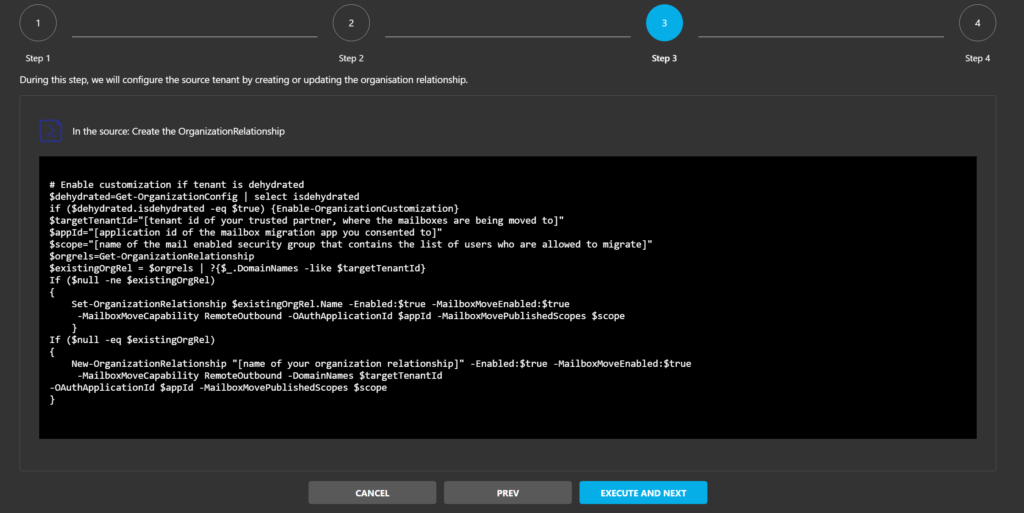
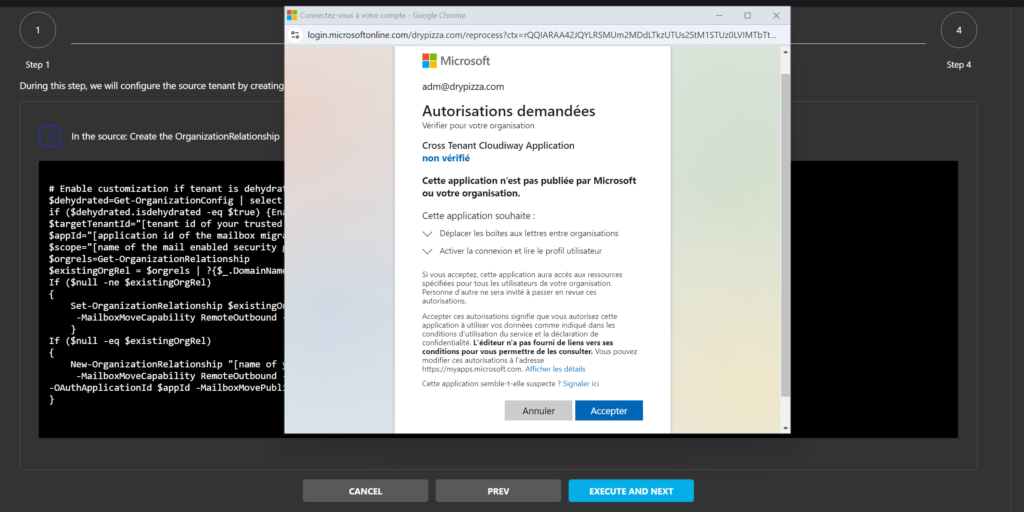
Step 1: Get User List
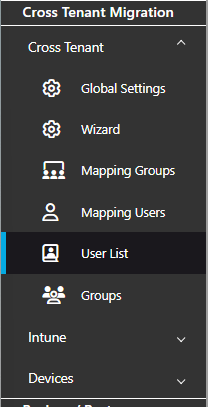
Before you can migrate users, you need to populate the migration list by running a discovery task. This will identify all the users that can be migrated from the source tenant to the target tenant.
There are three ways to retrieve or upload your user list:
GetList (Discovery)
Click on GetList to automatically discover all mailboxes from the source tenant.
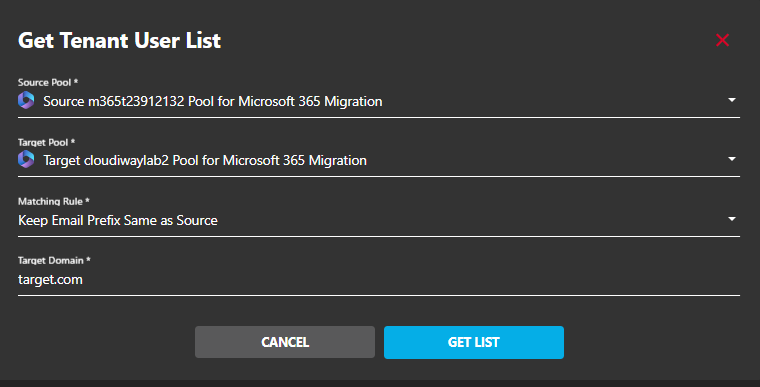
The discovery task retrieves the list of all users in your tenant for all domains defined in the Source connector. Specify the following parameters:
Select Connectors
In the popup window, select your Source and Target connectors.
Matching Rule
Choose how source emails should be mapped to target emails:
- Mail Exact Match: source email = target email ([email protected] → [email protected])
- Keep Email Prefix Same as Source: only the domain changes ([email protected] → [email protected])
- FirstName.LastName: (e.g., [email protected])
- F.LastName: (e.g., [email protected])
- FLastName: (e.g., [email protected])
- LastNameF: (e.g., [email protected])
Target Domain
Specify the target domain for the migrated users.
Run Discovery
Click on GET LIST to start the discovery process.
CSV Import
Click on Import to upload a CSV file containing the users to migrate.
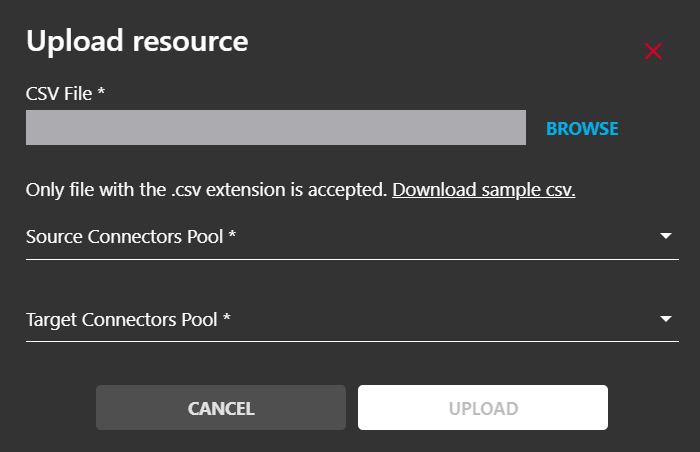
Prepare your CSV file
Create a CSV file with the source and target email addresses. For more details on the syntax of the CSV file, read our guide: How to Fill the Users/Groups CSV File
Click on Browse
Click on the BROWSE button to open the file selector.
Select your CSV file
Locate your CSV file on your computer and select it.
Select Connectors
Select the appropriate connectors in the Source and Target fields.
Create Single User
Click on Create to manually add individual users to the migration list.
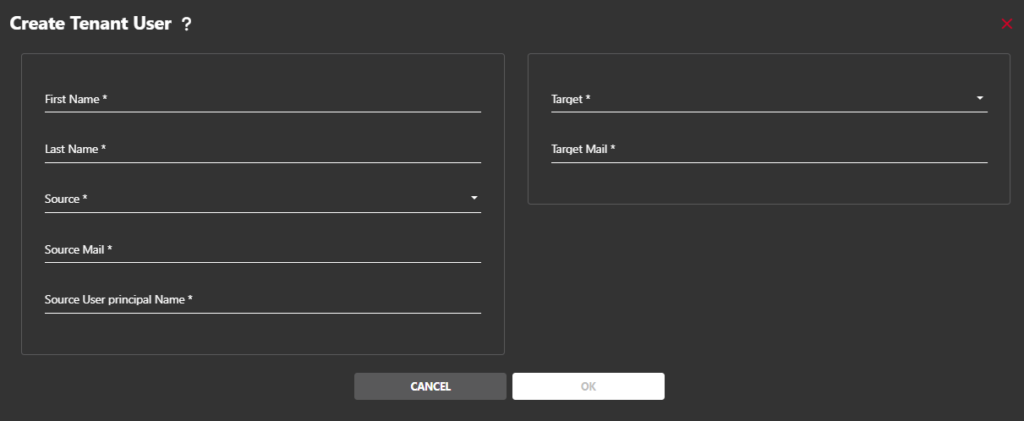
Enter Source Email
Enter the source user's email address (the mailbox to migrate from).
Enter Target Email
Enter the target user's email address (the mailbox to migrate to).
Select Connectors
Select the appropriate Source and Target connectors.
Click Create
Click the CREATE button to add the user to the migration list.
Step 2: Add to Migration Group
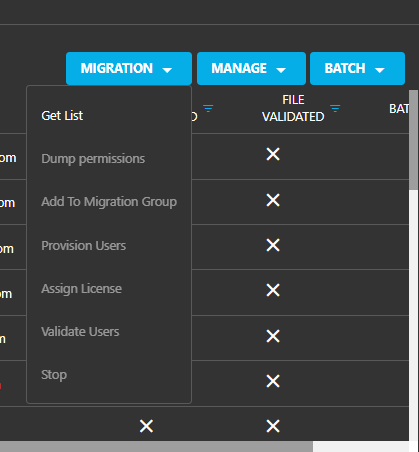
The Microsoft Cross-Tenant migration engine migrates only mailboxes that are members of the selected Security Group. You need to add users to this security group before migration.
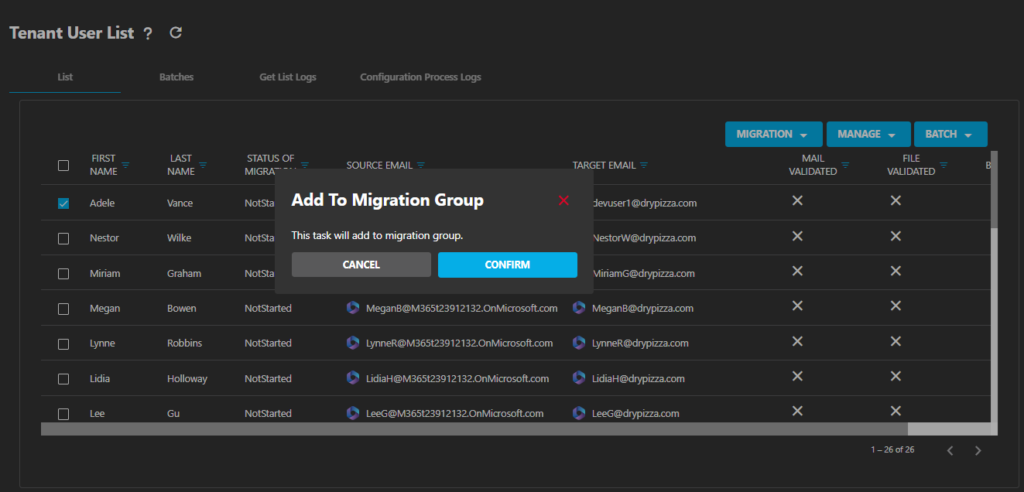
Procedure
- Select the users you want to migrate
- Click on Migration in the toolbar
- Select Add to Migration Group
Step 3: Provision Users
Before starting migration, you need to provision users as specified by Microsoft. The provisioning task creates the MailUser objects in the target tenant and copies the mandatory attributes required for cross-tenant migration.
Prerequisites for Provisioning
Before you can provision users, ensure the following requirements are met:
Wizard Completed
The Migration Wizard must be completed to establish organization relationships between tenants.
Users in Migration Group
Users must be added to the security group defined in MailboxMovePublishedScopes.
Source Mailbox Active
The source mailbox must exist and not be on litigation hold or in-place hold.
Target Domain Verified
The target email domain must be verified and approved in the target tenant.
What Does Provisioning Do?
The provisioning task automatically copies the following mandatory attributes from source to target:
- ExchangeGuid - Unique identifier for the mailbox
- ArchiveGuid - Identifier for the archive mailbox (if applicable)
- LegacyExchangeDN - Copied as X500 proxy address for reply-ability
- X500 addresses - All X500 proxy addresses from the source
- Primary SMTP address - Mapped to the target domain
- Proxy addresses - Email aliases mapped to approved domains

Procedure
- Select the users that you wish to migrate
- Click on Migration in the toolbar
- Select Provision Users
- Select if you want to provision for Mail Migration and/or OneDrive Migration
- Click OK to start provisioning
Step 4: Assign License
Cloudiway facilitates the management of licenses by automatically assigning and transferring the requisite Microsoft Cross-Tenant User Data Migration licenses during the migration period.
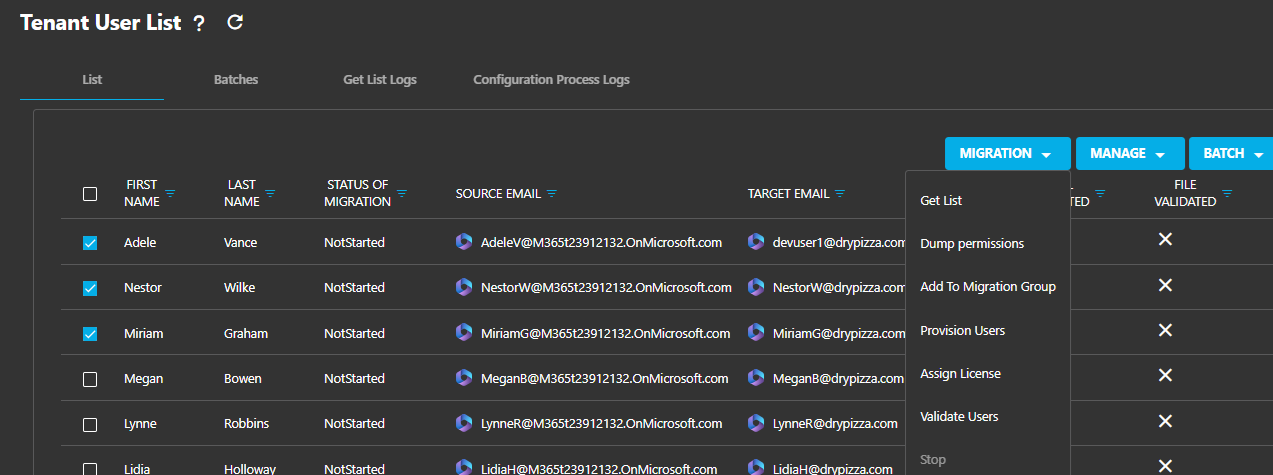
Procedure
- Select the users to assign licenses to
- Click on Migration in the toolbar
- Select Assign License
Step 5: Create Batch
Organize your migration by creating batches of users. This allows you to run validation tasks and migrate users in groups.
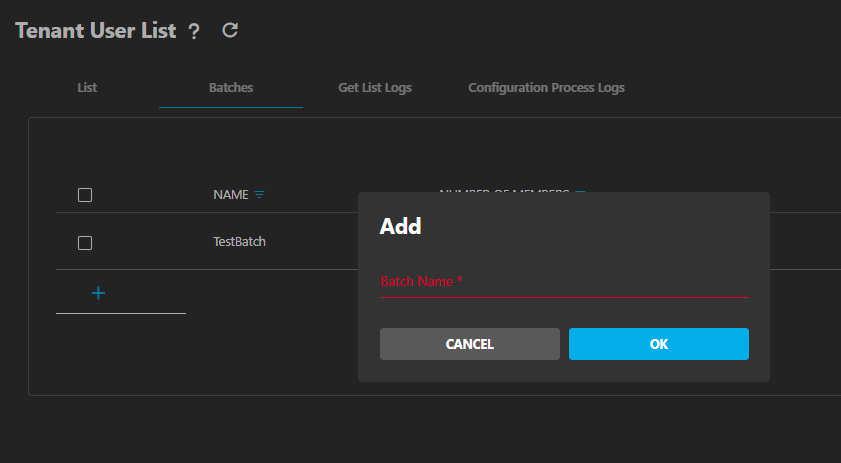
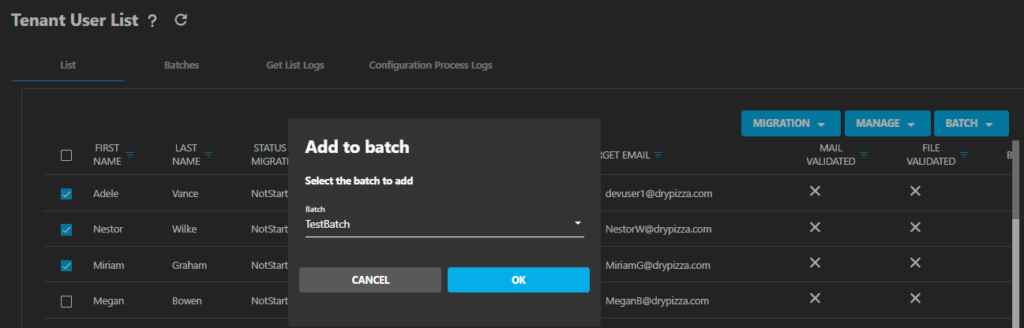
Add Users to Batch
After creating a batch, add users to it:
Run Validation
Run the validation task on your batch of users. The validation performs many tests to ensure the migration will execute correctly and allows you to detect all problems before starting.
Validation Checks
The validation task will verify:
- Security group membership
- Attribute matching (ExchangeGuid, ArchiveGuid)
- Mailbox hold status
- Recoverable items size
- X500 and LegacyExchangeDN attributes
- Domain approval status
Step 6: Start Migration
Once all prerequisites are validated, you can start the migration.
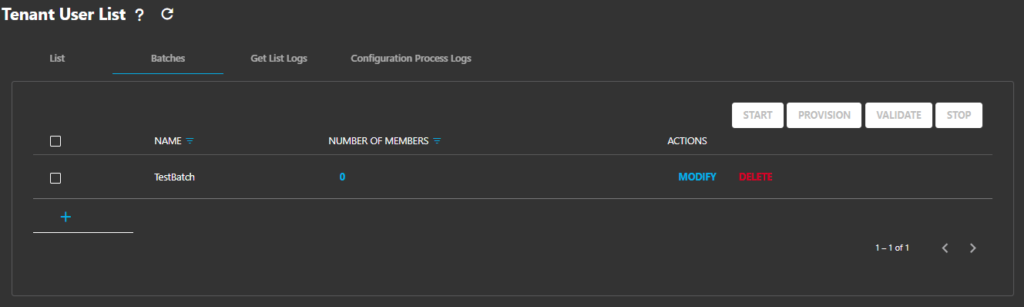
Procedure
- Go to the Batches tab
- Select the batch you want to migrate
- Click on Migration
- Click Start to begin the migration
- Ensure all validation checks have passed
- Verify all users have the required licenses
- Confirm users are in the migration security group
Troubleshooting
Common issues and solutions when using the Cross-Tenant Mailbox Migration Orchestrator:
Validation fails: User not in security group
Ensure the user has been added to the migration security group using the "Add to Migration Group" action. The user must be a member of the security group defined in MailboxMovePublishedScopes of the source's organizationRelationship.
ExchangeGuid mismatch between source and target
The ExchangeGuid at the target must match the ExchangeGuid at the source. Run the provisioning task again to ensure attributes are properly synchronized, or manually update the attribute using PowerShell.
Mailbox is on hold and cannot be migrated
The source mailbox must not be "On Hold" for migration to proceed. You need to remove any litigation hold, in-place hold, or retention policy hold from the mailbox before migration.
Target domain not approved
The PrimarySMTPAddress and all EmailAddresses (ProxyAddresses) of the target mailbox must be in approved domains. Verify your domain configuration in both tenants.
Permissions not migrated after cutover
Microsoft's native cross-tenant migration does not properly migrate permissions. Use Cloudiway's permission restoration feature to restore Full Access, SendAs, and other delegations after migration completes.
Get a free migration quote in minutes — entirely self-service.