
Cross-Tenant OneDrive Migration Orchestrator User Guide
Learn how to use Microsoft's native cross-tenant OneDrive migration with Cloudiway's user-friendly orchestrator interface.
Introduction
The Cloudiway Cross-Tenant OneDrive Migration Orchestrator automates migrations using the Microsoft native migration engine. All complexity is hidden behind a user-friendly graphical interface.
This guide will show you how to perform your Cross-Tenant OneDrive Migration using the Cloudiway Orchestrator.
In addition to the Microsoft migration license, you need a Cloudiway license to run this service.
Key Benefits
- Leverages the Microsoft Cross-Tenant OneDrive migration engine
- User-friendly graphical interface - no PowerShell required
- Automatic prerequisite validation
- Permission mapping and preservation
- Metadata preservation (CreationDate, ModifiedDate, CreatedBy, ModifiedBy)
Looking for our Orchestrator Solution?
Discover all features, pricing, and use cases for the Microsoft 365 Tenant to Tenant Orchestrator.
View Solution PageWhat's Migrated
The Cross-Tenant OneDrive Migration uses Microsoft's native migration engine. This is a OneDrive move operation - everything is migrated without loss.
Limitations
- Version history not migrated (only latest version)
- Deleted items not included
- Max 2 TB or 1 million items per OneDrive
- Cross-tenant links must be re-established manually
- OneDrive with Hold policy must have hold removed first
Prerequisites
Before starting your cross-tenant OneDrive migration, ensure you have the following:
Microsoft Cross-Tenant User Data Migration License
Required for each user to be migrated. One-time fee per migration.
Cloudiway License
Required to run the orchestrator service.
Microsoft Enterprise License
This solution is reserved for Microsoft Enterprise customers.
Cross-Tenant Wizard Completed
The Cross-Tenant Migration Wizard must be completed to establish organization relationships.
Migration Workflow
The Cross-Tenant OneDrive Migration follows a structured workflow. Here are the steps you need to complete in order:
Get User List
Run a discovery task to populate the list of OneDrive accounts to migrate from the source tenant.
Get Mapping
Map source users to their corresponding target users in the destination tenant.
Add to Migration Group
Add users to a migration group to organize and manage the migration batches.
Provision Users
Create OneDrive accounts for users in the target tenant if they don't already exist.
Create Batch
Create a migration batch to group users for migration execution.
Assign License
Assign Microsoft Cross-Tenant User Data Migration licenses to users before migration.
Start Migration
Launch the migration and monitor progress until completion.
Step 1: Get User List
There are three ways to retrieve or upload your user list:
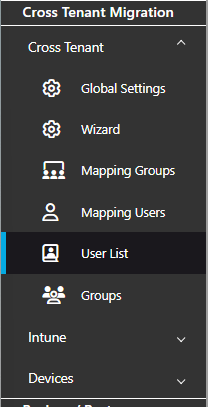
GetList (Discovery)
Click on GetList to automatically discover all OneDrive accounts from the source tenant.
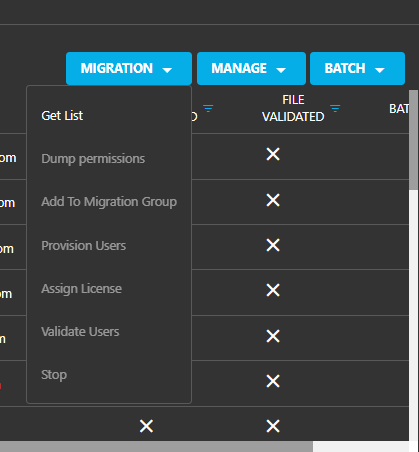
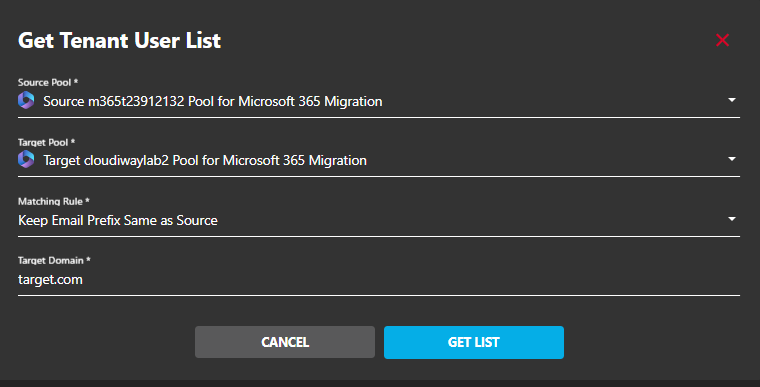
The discovery task retrieves the list of all users in your tenant for all domains defined in the Source connector. Specify the following parameters:
Select Connectors
In the popup window, select your Source and Target connectors.
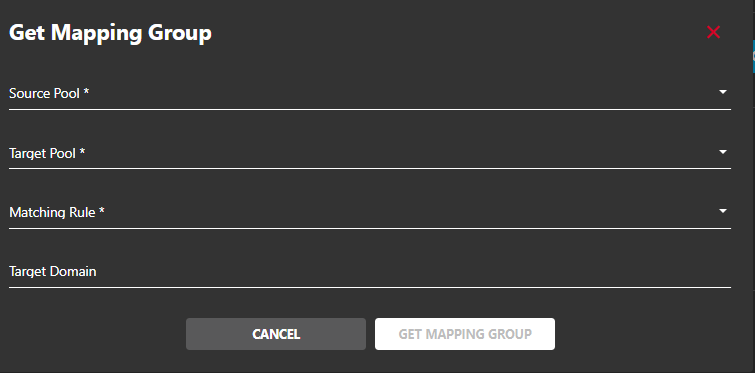
Matching Rule
Choose how source emails should be mapped to target emails:
- Mail Exact Match: source email = target email ([email protected] → [email protected])
- Keep Email Prefix Same as Source: only the domain changes ([email protected] → [email protected])
- FirstName.LastName: (e.g., [email protected])
- F.LastName: (e.g., [email protected])
- FLastName: (e.g., [email protected])
- LastNameF: (e.g., [email protected])
Target Domain
Specify the target domain for the migrated users.
Run Discovery
Click on GET LIST to start the discovery process.
CSV Import
Click on Import to upload a CSV file containing the users to migrate.
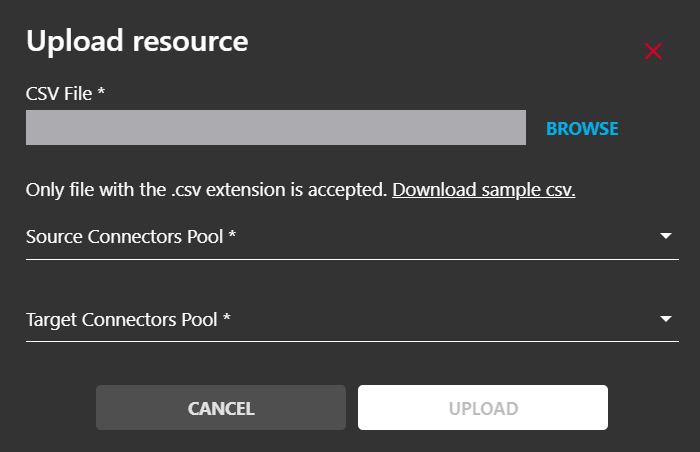
Prepare your CSV file
Create a CSV file with the source and target email addresses. For more details on the syntax of the CSV file, read our guide: How to Fill the Users/Groups CSV File
Click on Browse
Click on the BROWSE button to open the file selector.
Select your CSV file
Locate your CSV file on your computer and select it.
Select Connectors
Select the appropriate connectors in the Source and Target fields.
Create Single User
Click on Create to manually add individual users to the migration list.
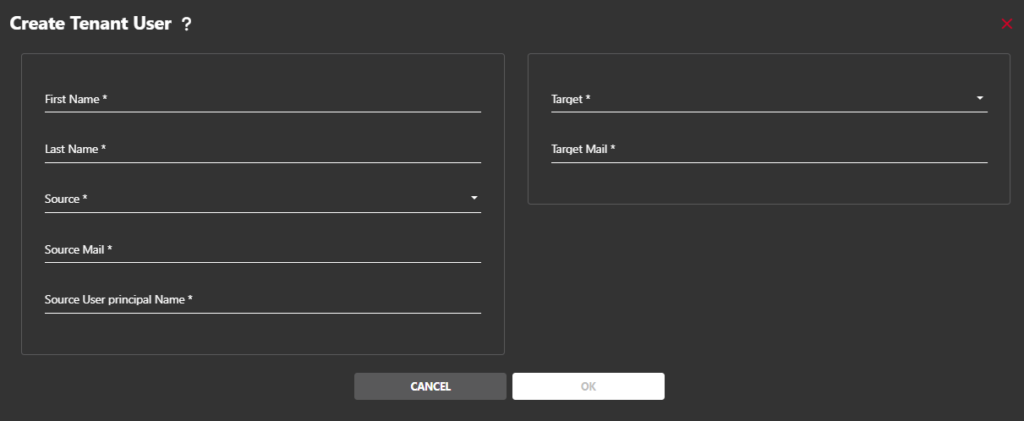
Enter Source Email
Enter the source user's email address (the OneDrive account to migrate from).
Enter Target Email
Enter the target user's email address (the OneDrive account to migrate to).
Select Connectors
Select the appropriate Source and Target connectors.
Click Create
Click the CREATE button to add the user to the migration list.
Step 2: Get Mapping
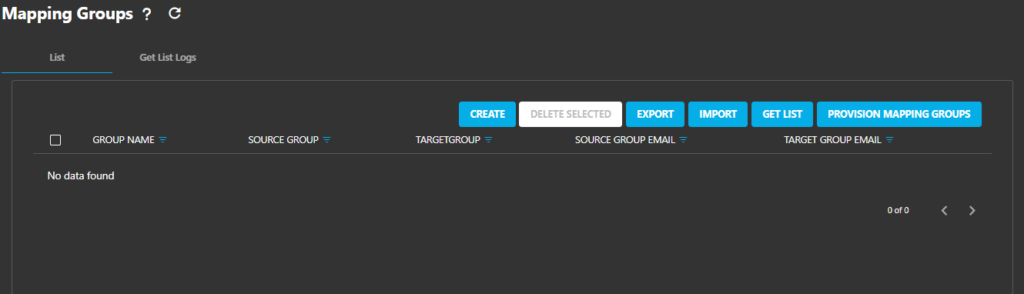
The Get Mapping feature retrieves permission mappings for users and groups. This is essential to preserve access rights during migration.

User Mapping
Retrieve user mappings to ensure permissions are correctly transferred:

Group Mapping
Retrieve group mappings for shared permissions:
Step 3: Add to Migration Group
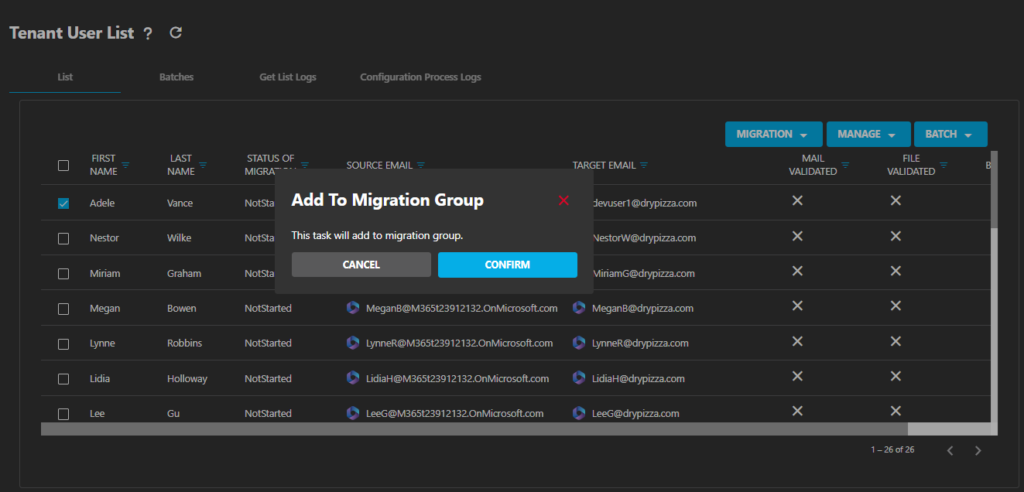
The Microsoft Cross-Tenant migration engine migrates only OneDrive accounts that are members of the selected Security Group. You need to add users to this security group before migration.
Procedure
- Select the users you want to migrate
- Click on Migration in the toolbar
- Select Add to Migration Group
Step 4: Provision Users
This task provisions the users in order to allow them to be migrated using the Microsoft Cross-Tenant Migration engine. Attribute prerequisites are automatically set.

Procedure
- Select the users that you wish to migrate
- Click on Migration in the toolbar
- Select Provision Users
- Select if you want to provision for Mail Migration and/or OneDrive Migration
- Click OK to start provisioning
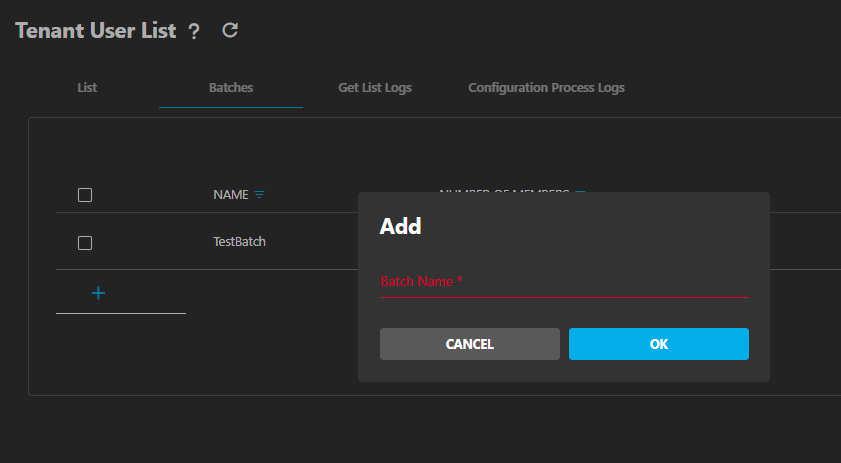
Step 5: Create Batch
Organize your migration by creating batches of users. This allows you to run validation tasks and migrate users in groups.
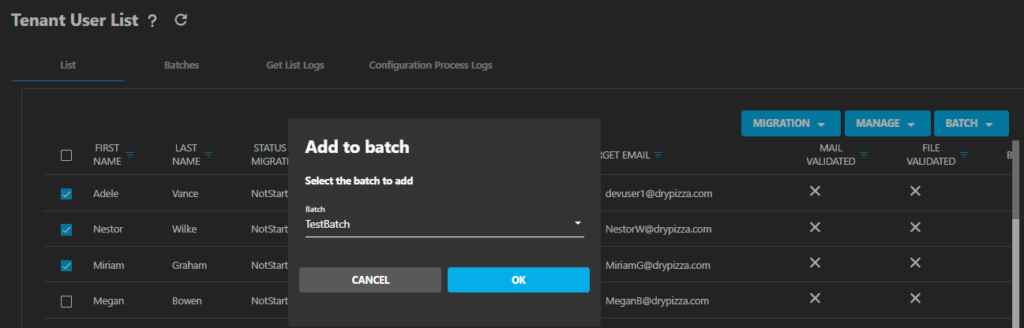
Add Users to Batch
After creating a batch, add users to it:
Step 6: Assign License
Cloudiway facilitates the management of licenses by automatically assigning and transferring the requisite Microsoft Cross-Tenant User Data Migration licenses during the migration period.
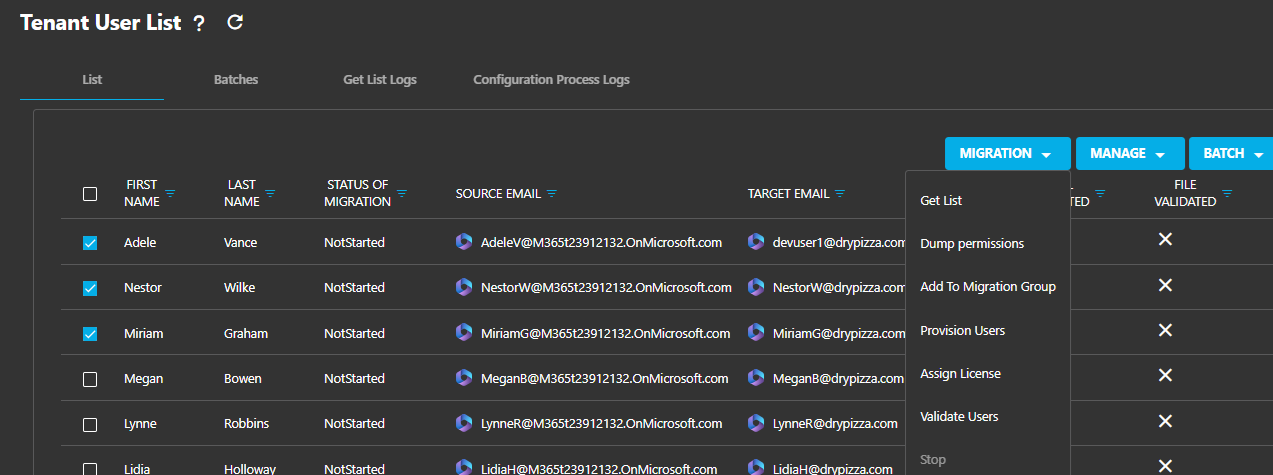
Procedure
- Select the users to assign licenses to
- Click on Migration in the toolbar
- Select Assign License
Step 7: Start Migration
The migration task starts the Microsoft Migration engine (New-MigrationBatch). Once all prerequisites are validated, you can start the migration.
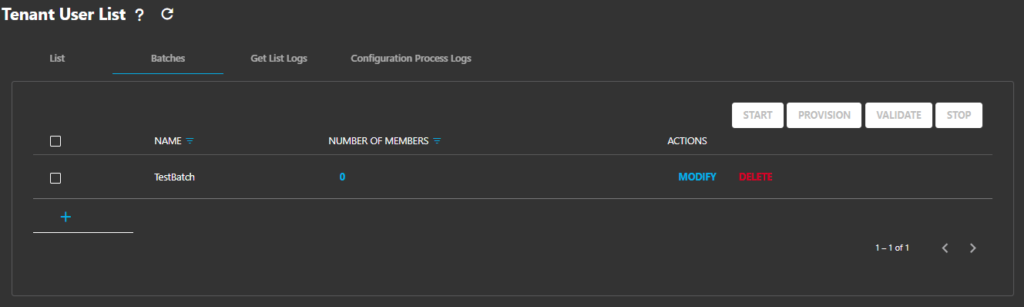
Procedure
- Go to the Batches tab
- Select the batch you want to migrate
- Click on Migration
- Click Start to begin the migration
Delta Migration
Delta migration is a Cloudiway functionality that allows you to migrate incrementally. Changes are migrated during delta passes. Note that deletions are not propagated.
Troubleshooting
Common issues and solutions when using the Cross-Tenant OneDrive Migration Orchestrator:
OneDrive account exceeds size limits
Each OneDrive account has a cap of either 2 TB of content or 1 million items. If a user's OneDrive exceeds these limits, you'll need to reduce the content before migration or use an alternative migration method.
OneDrive has Hold policy applied
OneDrive accounts with a Hold policy applied are blocked from migration. To migrate these accounts, remove the hold policy, perform the migration, then reapply the hold as needed on the target tenant.
Permissions not preserved after migration
Ensure all users and groups are included in the identity mapping file. Only mapped users and groups will retain their permissions in the target tenant. Re-run the Get Mapping task if needed.
Cross-tenant sharing links not working
Cross-tenant links and shares need to be re-established manually after migration. The migration moves content but cannot preserve links that point across tenant boundaries.
Migration performance issues
The solution leverages the Microsoft Cross-Tenant OneDrive migration engine. Any performance-related issues should be reported to Microsoft Support, as Cloudiway does not control the migration speed.
Get a free migration quote in minutes — entirely self-service.