
OneDrive to OneDrive Migration Guide
Complete admin guide for migrating OneDrive content between Microsoft 365 tenants using the Cloudiway File Migration Tool.
Overview
The Cloudiway OneDrive to OneDrive migration tool enables you to migrate OneDrive content between Microsoft 365 tenants. This is ideal for mergers, acquisitions, divestitures, or tenant consolidation projects.
Cloudiway uses Microsoft Graph API to migrate OneDrive content including files, folders, permissions, and metadata. All network operations are performed over TLS 1.2 ensuring enterprise-grade security.
Looking for our OneDrive Migration Solution?
Discover all features, pricing, and use cases for OneDrive to OneDrive migration.
View Solution PagePrerequisites
To perform the OneDrive to OneDrive Migration, you need to configure both source and target Microsoft 365 environments with the appropriate permissions.
Source Tenant Requirements
Cloudiway uses an Entra ID Application with Application Permissions to access the source Microsoft 365 tenant:
App Registration
Create an application in Microsoft Entra ID
API Permissions
SharePoint: Sites.FullControl.All and Microsoft Graph: Files.Read.All
Admin Consent
Granted by a Global Administrator
Certificate Authentication
OAuth 2.0 client credentials flow with certificate
Target Tenant Requirements
Same configuration is required on the target Microsoft 365 tenant:
App Registration
Create an application in Microsoft Entra ID
API Permissions
SharePoint: Sites.FullControl.All and Microsoft Graph: Files.ReadWrite.All
Admin Consent
Granted by a Global Administrator
Certificate Authentication
OAuth 2.0 client credentials flow with certificate
What is Migrated
The following items are migrated during a OneDrive to OneDrive migration:
Automatic Link Rewriting in Documents
Cloudiway now automatically rewrites internal links within your documents during migration. When migrating from OneDrive to OneDrive, links pointing to source OneDrive files are automatically updated to point to their new target OneDrive locations.
- Links to source OneDrive files are converted to target OneDrive links
- Internal document references are preserved and updated
- Links are updated based on your migration mapping table
Limitations
The following limitations apply to OneDrive to OneDrive migration:
- File size limit: Files larger than 250 GB cannot be migrated (Microsoft API limitation)
- Path length: File paths exceeding 400 characters are truncated
- Invalid characters: Files containing invalid characters are automatically renamed
- OneNote notebooks: OneNote notebooks require special handling and may need to be migrated separately
- Shortcuts: OneDrive shortcuts are not migrated (they point to original locations)
Migration Process
The OneDrive to OneDrive migration follows these main steps:
Step 1: Create Connectors
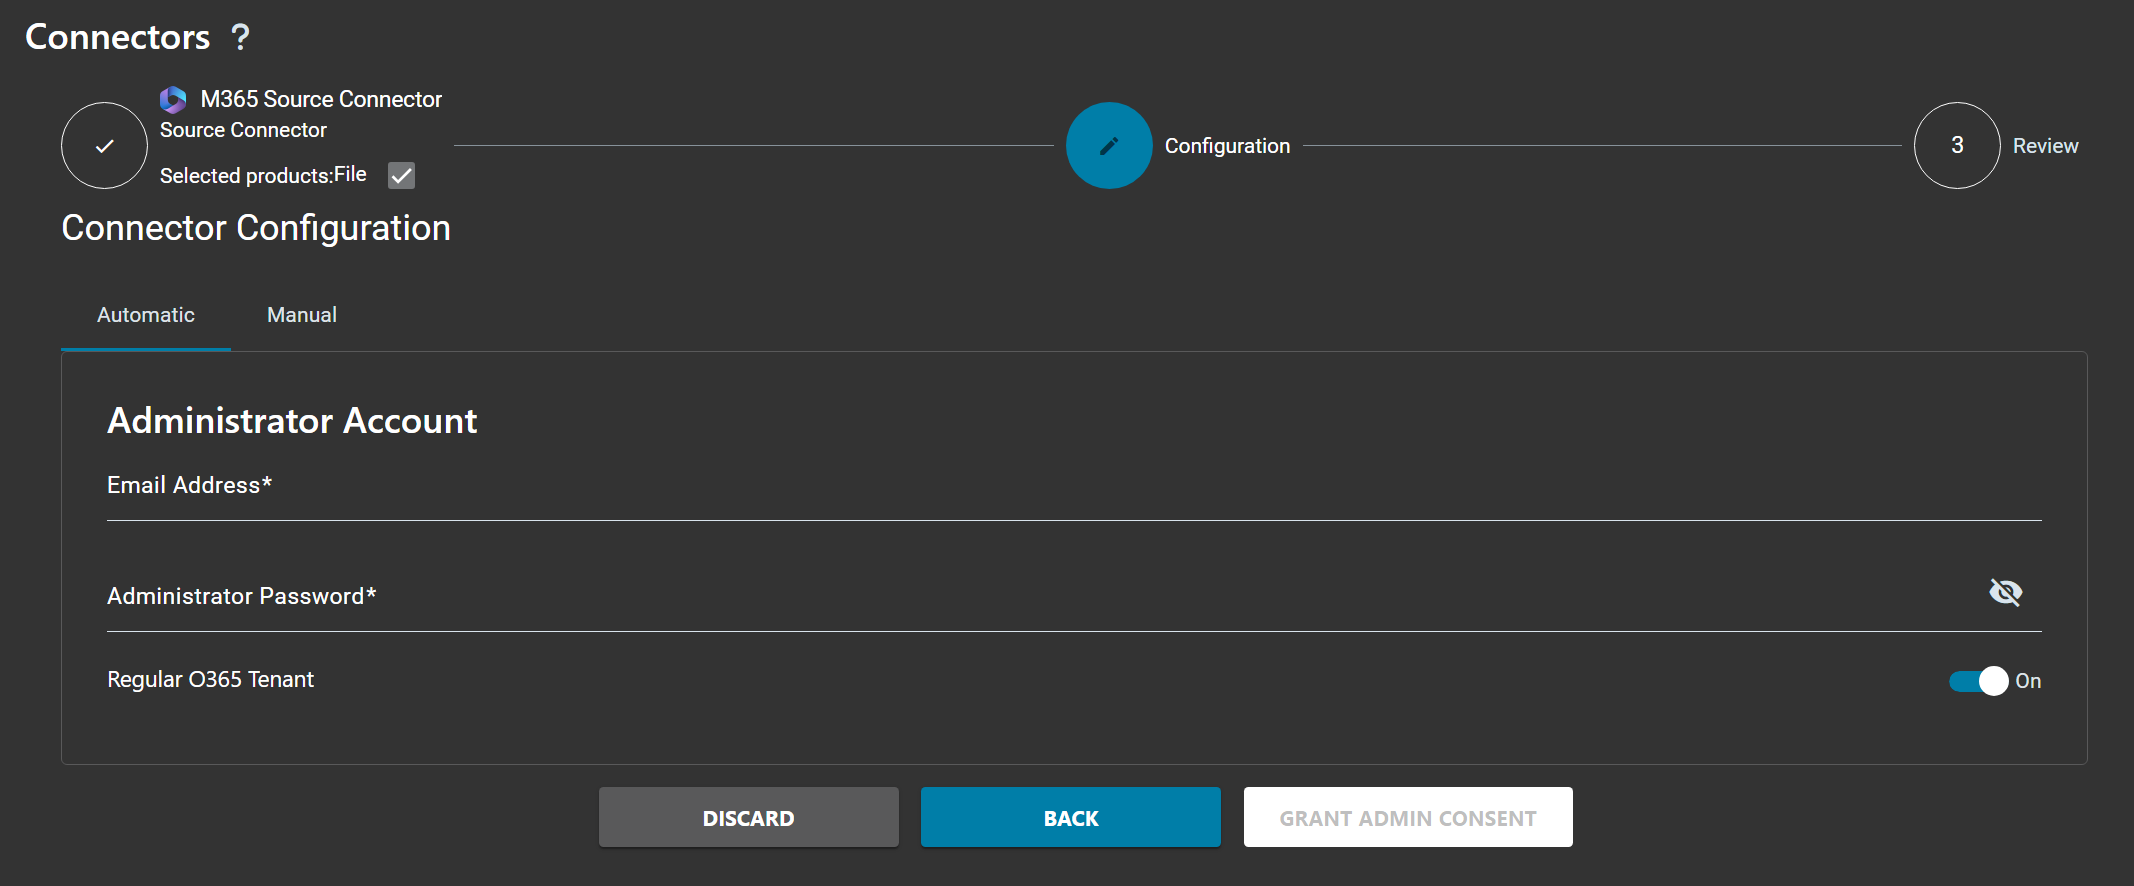
For Cloudiway to migrate your OneDrive content, it needs to communicate with both your source and target Microsoft 365 tenants. To do this, Cloudiway uses connectors.
You will need to set up a connector for each source tenant you wish to migrate and each target tenant that content should be migrated to.
Navigate to Connectors
Click on Connectors > New in the Cloudiway platform.
Select Connector Type
Select Connector Type: Microsoft 365 and set a Connector Name with File selected.
Authorize the Connection
Click the Authorize button and sign in with a Global Administrator account.
Automatic Configuration
The platform automatically retrieves the Tenant Name, the Default Domain Name, and automatically creates an Entra ID application with the required permissions.
Step 2: Configure Global Settings
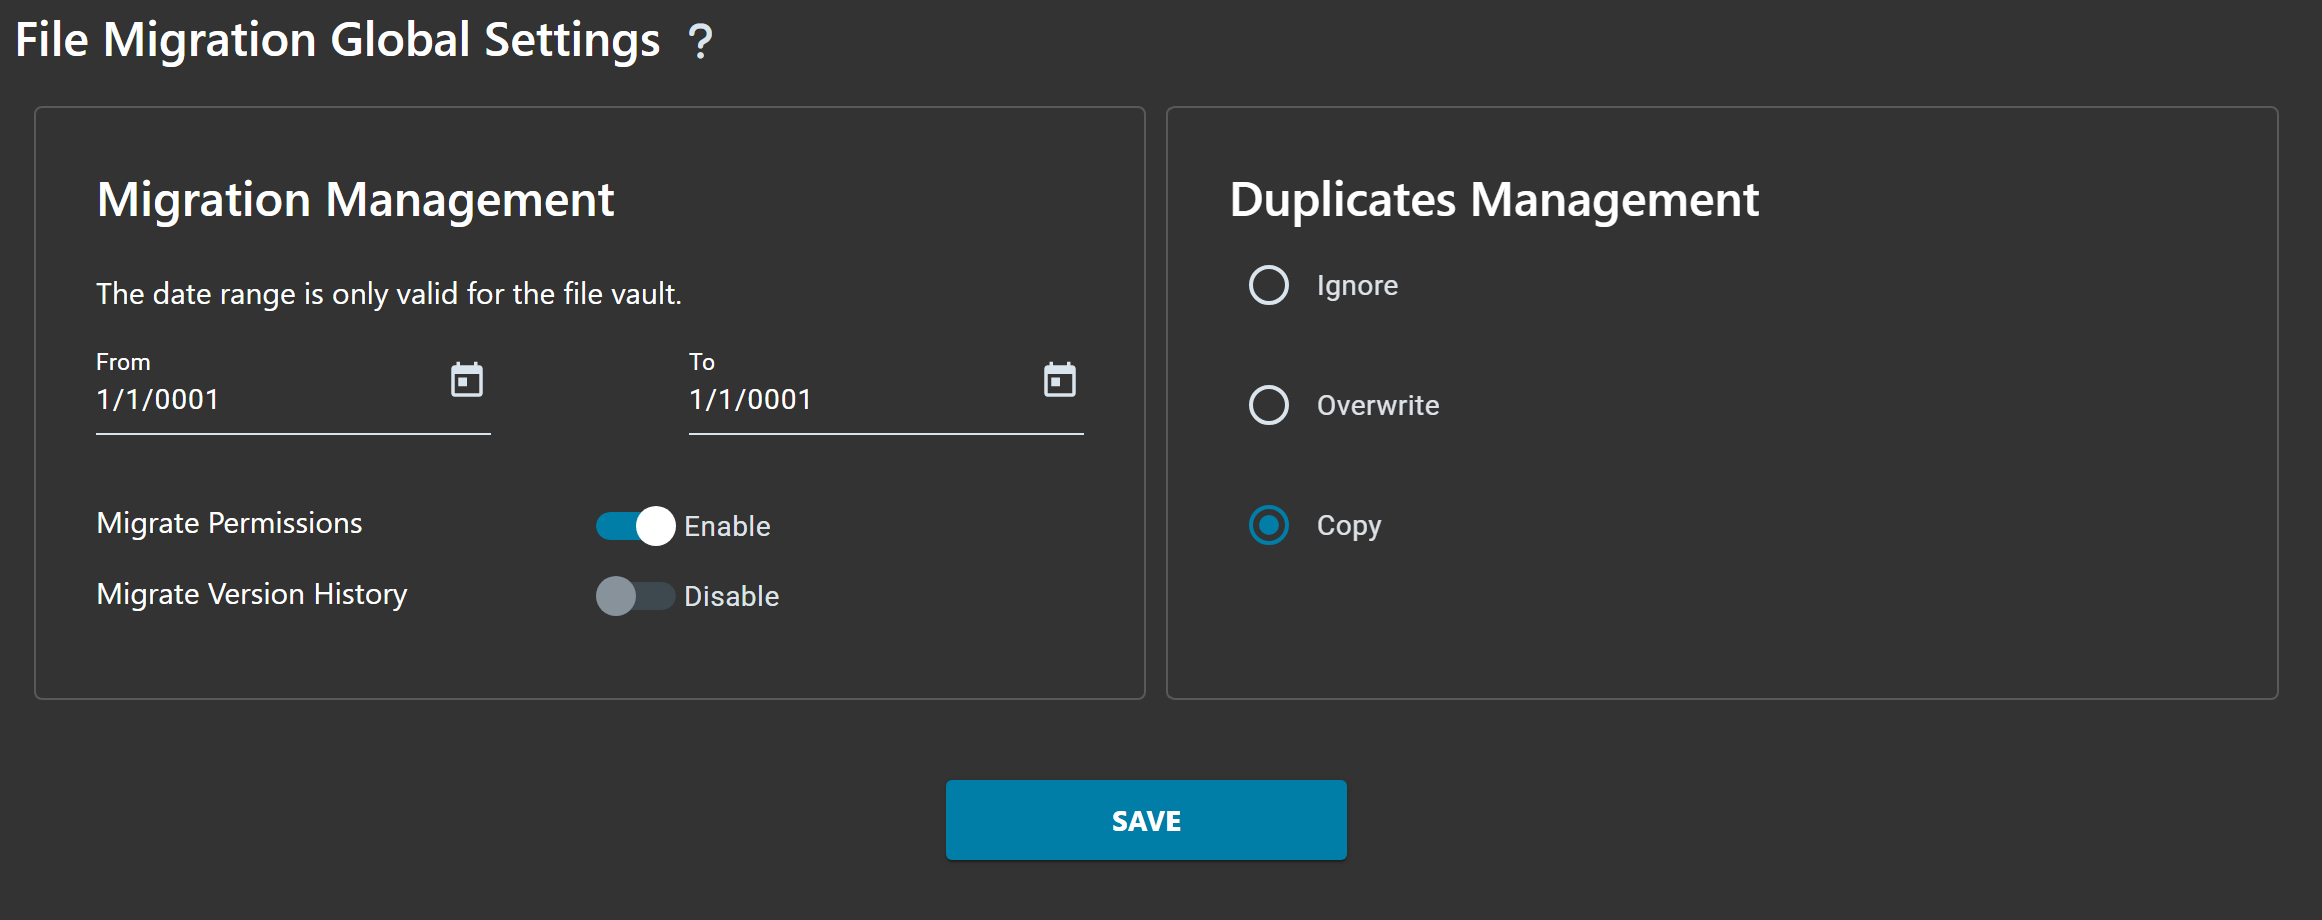
Configure the global settings for your OneDrive migration. Navigate to Products > File > Global Settings.
Key Settings
Permissions Migration
Enable or disable the migration of sharing permissions. When enabled, Cloudiway recreates all sharing permissions on the target.
External Sharing
Choose whether to migrate external sharing settings. External users will receive new sharing invitations on the target tenant.
Link Rewriting
Enable automatic link rewriting to update internal document links to point to the new target locations.
Click on the Save button at the bottom of the screen to update your global settings.
Step 3: Fill User List
The User List contains all OneDrive accounts to be migrated. There are three ways to populate it:
Option 1: Discovery (Get List)
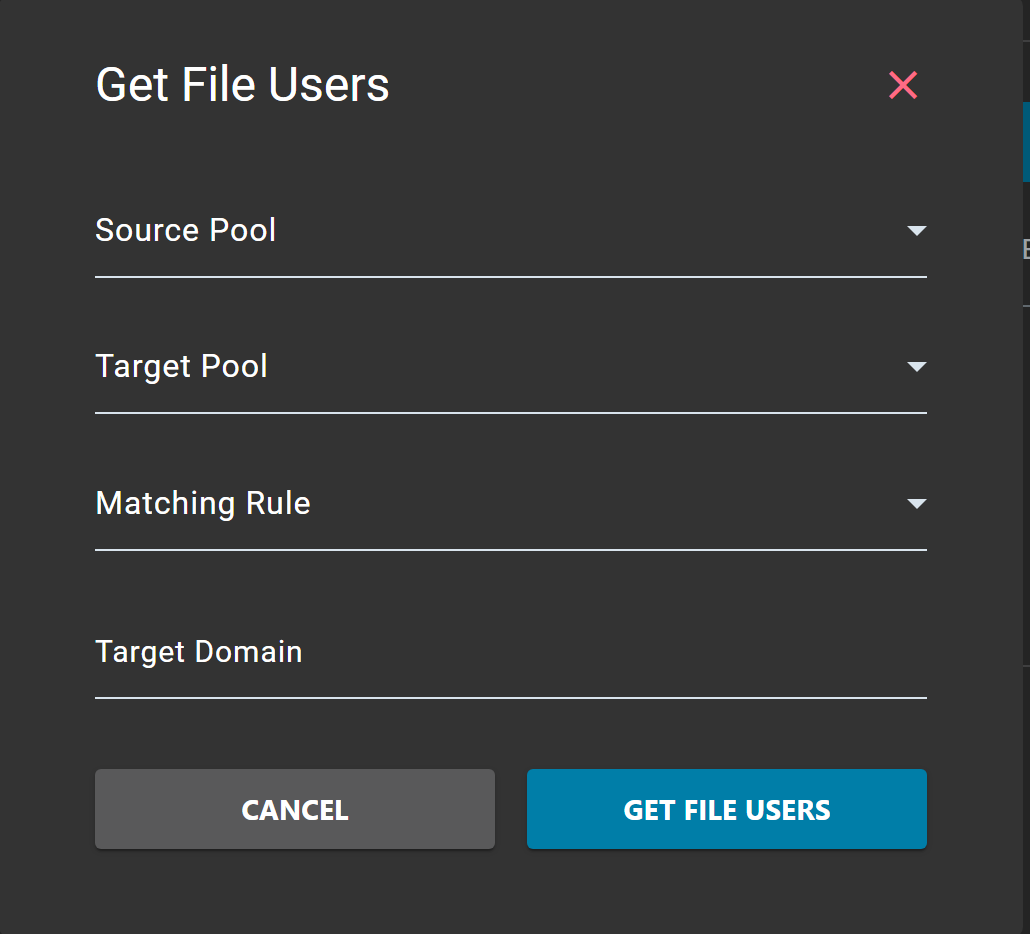
Click on User List > Get List to automatically discover all OneDrive accounts from the source tenant.
Select Connectors
Select your source and target Microsoft 365 connectors.
Matching Rule
Choose how source emails should be mapped to target emails:
- Mail Exact Match: source email = target email
- Keep Email Prefix Same as Source: only the domain changes
- FirstName.LastName: (e.g., [email protected])
Target Domain
Specify the target domain for the migrated users.
Option 2: Import User List
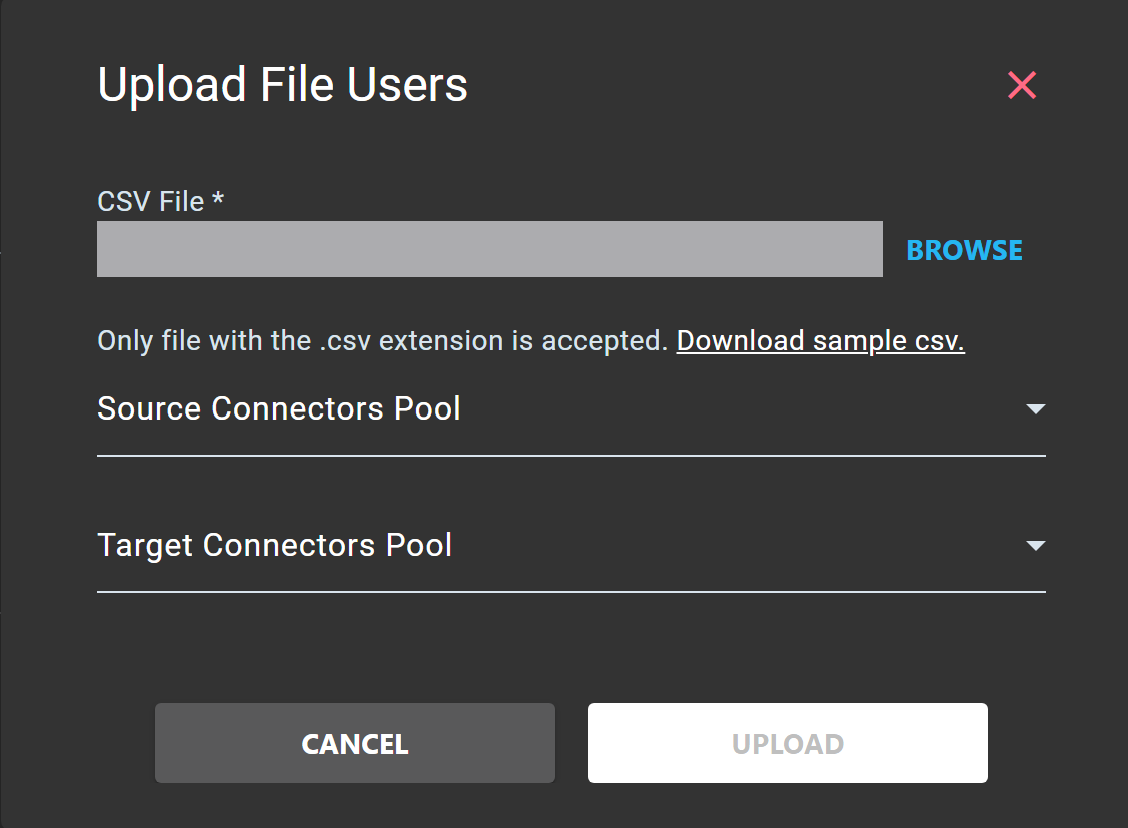
Click on User List > Import to upload a CSV file containing the users to migrate.
Prepare your CSV file
Create a CSV file with the source and target email addresses. For more details on the syntax of the CSV file, read our guide: How to Fill the Users/Groups CSV File
Click on Browse
Click on the BROWSE button to open the file selector.
Select your CSV file
Locate your CSV file on your computer and select it.
Select Connectors
Select the appropriate connectors in the Source and Target fields.
Option 3: Create Manual Entry
Click on User List > Create to manually add individual users. Enter the source OneDrive email address and the target OneDrive email address for each user.
Step 4: Verify Mapping Table
Cloudiway automatically populates this mapping table when source OneDrive accounts are discovered by Get List functionality. However, make sure that the mapping table was populated correctly and that you are not missing any email addresses.
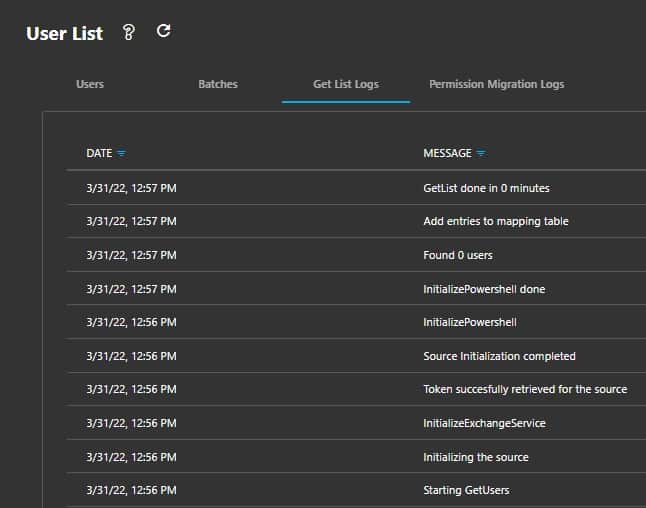
If you make an error in your mapping table, you will have to erase everything and restart the migration with new licenses.
It's important that all users exist in the mapping table before migration begins. Ensure that source Microsoft 365 email addresses are correctly mapped to their corresponding target Microsoft 365 email addresses.
Step 5: Run Migration
Now that you have performed all the pre-migration steps, you're ready to migrate.
- Ensure all target users have OneDrive licenses assigned
- Verify all users exist in the mapping table
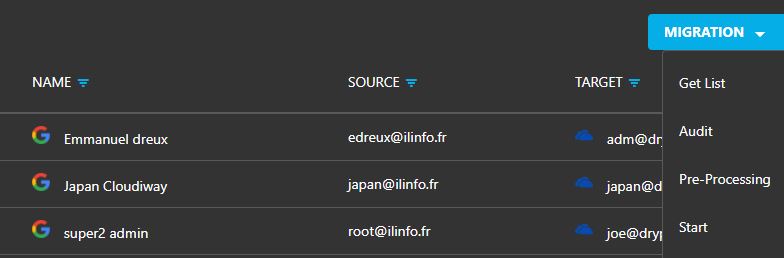
- Run the Audit task first to identify potential issues
Start Migration
- Select the users you want to migrate from the User List
- Click on Actions > Migrate
- Monitor the progress in the migration logs
Delta Pass
Delta pass allows you to synchronize changes made to the source OneDrive after the initial migration. This is particularly useful for minimizing the cutover window.
How Delta Pass Works
- Cloudiway tracks the last migration timestamp for each user
- When you run a delta pass, only files modified after the last migration are transferred
- Deleted files on the source are also removed from the target (optional)
- Permissions changes are synchronized
Best Practice: Pre-Stage Migration
For large migrations, we recommend a pre-stage approach:
- Initial Migration: Run the full migration 1-2 weeks before cutover
- Delta Pass: Run delta passes daily or as needed leading up to cutover
- Final Delta: Run a final delta pass just before cutover to minimize data loss
Frequently Asked Questions
Does Cloudiway migrate OneDrive permissions?
Yes, Cloudiway migrates all sharing permissions including internal users, external users, and sharing links. Permissions are recreated on the target OneDrive with the mapped users.
What happens to files that exceed OneDrive limits?
Files that exceed OneDrive limitations (such as file size limits or path length limits) are skipped and reported in the migration logs. Cloudiway automatically handles character encoding and path truncation where possible.
Can I run delta migrations?
Yes, Cloudiway supports delta migrations. After the initial full migration, subsequent migrations only transfer new or modified files, significantly reducing migration time and minimizing impact on users.
How long does the migration take?
Migration speed depends on several factors including data volume, file sizes, and API throttling. On average, Cloudiway can migrate 50-100 GB per user per day. The platform automatically handles API throttling and retries.
Get a free migration quote in minutes — entirely self-service.